2
Jack-It
Aftermarket Manual
www.lippertcomponents.com (574) 537-8900 Rev: 06.16 - Jack-It Aftermarket Manual
Preparation
Tools required
9/16” Socket Wrench
3/4” Socket Wrench
Installation Instructions
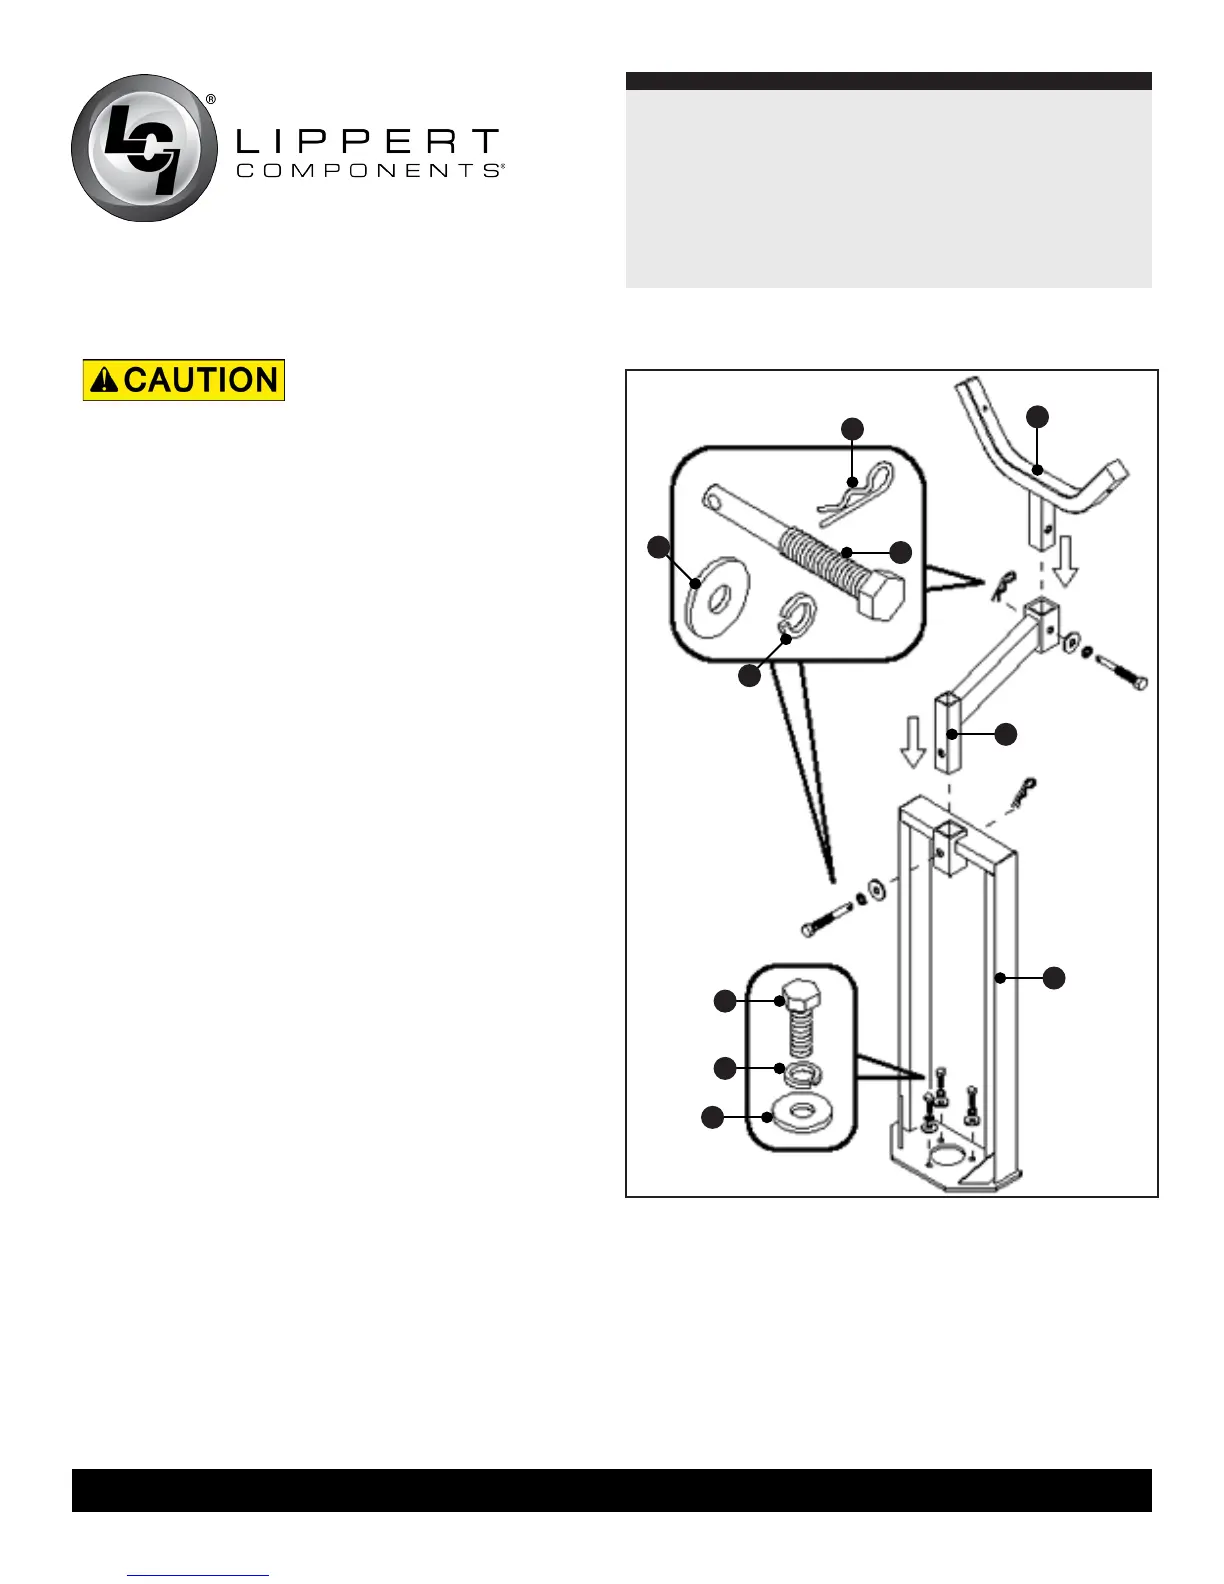
1. Remove the tongue jack from the coupler. Position the
PowerTower ™ (Fig. 1G) on the coupler. Place the jack on
the PowerTower™ (Fig. 1G) and secure both to the coupler
using 3 nuts, bolts and washers each (Fig. 1H, 1I, 1J).
Note: If there is no tongue jack, attach the PowerTower™ (Fig.
1G) to the coupler on the front of the trailer using 3 nuts,
bolts and washers each (Fig. 1H, 1I, 1J).
2. Attach the stinger (Fig. 1F) to the PowerTower™ (Fig. 1G)
using NoMotion™ pin and washers (Fig. 1C, 1D, 1A). For
safety, insert cotter pin (Fig. 1B) through the hole at the end
of the NoMotion™ pin (Fig. 1C) after tightening securely.
3. Attach base (Fig. 1E) to stinger (Fig. 1F) using NoMotion™
pin and washers (Fig. 1C, 1D, 1A). For safety, insert cotter
pin (Fig.1B) through the hole at the end of the NoMotion™
pin (Fig. 1C) after tightening securely.
A
B
C
D
E
F
G
H
I
J
Fig.1
The use of this product
while bicycles are loaded
may affect the turning
radius on some vehicles.
Check the turning radius
before travel.