Do you have a question about the Lippert Components SOLERA AWNING and is the answer not in the manual?
Steps for safely removing the pitch arm and gas strut assembly from the awning.
Instructions for correctly installing the new gas strut and securing it with pins and push nuts.
Steps to reassemble the pitch arm to the awning mount and outer arms using pins and push nuts.
Guidance on reinserting the black spacers between the arm components after strut replacement.
This document outlines the procedure for replacing the gas strut assembly on a Solera® awning. The process is designed to be performed by 1-2 people, depending on the specific task, and requires a basic set of tools including pliers, a flat head screwdriver, a 7/16" deep well socket, tin snips, and a hammer. Optional tools like a C-clamp and rubber or felt pads can be used to prevent marring during the process.
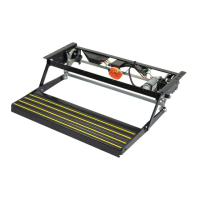
The Solera® awning gas strut is a critical component that assists in the extension and retraction of the awning, providing support and stability to the roll tube and arm assembly. It works in conjunction with the pitch arm, outer arm, inner arm, and mount arm to ensure smooth and controlled operation of the awning. The gas strut provides the necessary force to manage the awning's movement, preventing it from collapsing or extending too rapidly. Proper functioning of the gas strut is essential for the safe and effective use of the awning, contributing to its overall stability and longevity.
The replacement process begins by extending the awning to its fully-open position, which provides access to the various components of the pitch arm and gas strut assembly. Users are cautioned to adequately support the roll tube throughout the process to prevent personal injury or property damage. This emphasizes the importance of safety during maintenance.
The removal of the gas strut involves carefully detaching black spacers located between the pitch arm and the outer arm, the pitch arm and the mount arm, and the inner arm and the top of the gas strut. These spacers are crucial for maintaining proper alignment and spacing within the arm assembly. Users are instructed to keep all removed spacers for reinstallation.
A key step in the removal process is detaching the push nuts that secure the pins connecting the various arm components and the gas strut. Push nuts are one-time use parts and must be replaced with new ones during reinstallation. Tin snips are used for their removal, and a hammer can be used to gently tap the pin if a push nut is difficult to remove. This highlights a specific maintenance feature related to component replacement.
Safety warnings are prominently featured, advising users to be careful when removing push nuts to prevent pins from falling out, as pins must remain in place until all push nuts are removed. Another critical caution emphasizes that the roll tube must be securely held until the new gas strut is installed and all pins are replaced, to prevent the roll tube from falling. Furthermore, users are warned that as pins are removed, pressure from the gas strut can cause the outer arm to push open or the pitch arm to push out, potentially leading to personal injury or product damage. This underscores the importance of a firm hold on the roll tube and pitch arm during pin removal.
The document details the specific sequence for removing pins: first, the pin where the pitch arm meets the outer arm, then the pin holding the pitch arm to the mount arm, followed by the pin holding the bottom of the gas strut to the pitch arm, and finally, the pin holding the top of the gas strut to the inner arm. During this process, the person holding the roll tube may need to raise or lower it to release pressure on the gas strut. The pitch arm can then be set aside.
When installing the new gas strut, users are instructed to always use new push nuts, which are designed for one-time use. New push nuts can only be installed in one direction, with their points facing outward. A 7/16" deep well socket is recommended for pushing the new push nuts onto each pin, ensuring a secure fit.
Proper alignment is crucial during installation. The person holding the roll tube may need to raise or lower the outer arm or the roll tube to align the holes for the pins. The eyelets of the gas strut must line up with the hole locations on the arms for the pin and new push nut to be reattached correctly. A specific warning notes that if the gas strut eyelets are not installed correctly, they will break when trying to operate the awning.
The new gas strut must be aligned in the same orientation as the old one, with the cylinder above the shaft. The installation sequence for pins is the reverse of removal: first, the pin connecting the top of the new gas strut to the inner arm, then the pin connecting the bottom of the new gas strut to the pitch arm. After each pin is inserted, a new push nut is installed.
Reattaching the pitch arm involves inserting the pin that holds the pitch arm to the mount arm, followed by the pin that holds the pitch arm to the outer arm. Again, the person holding the roll tube may need to adjust its height to align the holes for the pins. After each pin is inserted, a new push nut is installed.
The final step in the maintenance process is reinserting the black spacers. These are pushed onto each pin, with the gap side facing inward. Spacers are placed between the pitch arm and the outer arm, the pitch arm and the mount arm, and the inner arm and the top of the gas strut. This ensures that all components are correctly spaced and aligned for optimal awning performance.
The document concludes with contact information for customer service, emphasizing safety, education, and customer satisfaction as primary concerns. It also directs users to self-help tips, technical documents, product videos, and training class schedules available online or through a mobile application, providing comprehensive support for device maintenance.
| Category | Automobile Accessories |
|---|---|
| Brand | Lippert Components |
| Model | SOLERA AWNING |
| Mounting Type | RV Sidewall |
| UV Protection | Yes |
| Water Resistant | Yes |
| Weather Resistant | Yes |
| Operation | Electric or Manual |
| Material | Acrylic Fabric |
| Width | Varies by model (e.g., 12 ft, 18 ft) |
| Length | Varies by model (e.g., 6 ft, 8 ft, etc.) |
| Type | RV Awning |