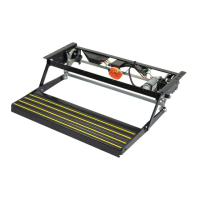
The SureShade™ Power Bimini is a marine accessory designed to provide shade and shelter on boats, specifically pontoon boats, and features a powered mechanism for deployment and retraction. This manual outlines the procedure for a manual override, which is necessary if the power bimini top fails to respond to a "close" command, ensuring the top can be safely stored, towed, or operated.
Function Description:
The primary function of the SureShade™ Power Bimini is to offer a convenient and automated solution for deploying and retracting a boat canopy. It utilizes a powered system to extend and retract the bimini top, enhancing the user experience by eliminating the need for manual setup and takedown under normal operating conditions. The manual override procedure detailed in this document serves as a crucial backup, allowing users to manually close the top in the event of a power failure or system malfunction. This ensures that the boat can still be safely stored, towed, or operated without the bimini top extended, preventing potential damage to the top or the boat.
Important Technical Specifications:
While specific technical specifications like motor type, power consumption, or material composition are not explicitly detailed in this manual, several operational and maintenance-related specifications are highlighted:
- Maximum Speed Limit (Full Down Position with Boot Installed): 65 MPH. This indicates the maximum safe speed for the boat when the bimini top is fully retracted and covered with its protective boot.
- Maximum Speed Limit (Full Down Position Without Boot Installed): 5 MPH. This significantly lower speed limit emphasizes the importance of using the protective boot when the top is retracted, especially at higher speeds, to prevent damage to the canvas or frame.
- Hex Wrench Size: 5/32". This specific tool is required for the manual override procedure, particularly for removing hex cap screws and is provided with models manufactured from May 2020 onwards.
- Tool Storage: The 5/32" hex wrench is designed to be stored inside the actuator assembly, ensuring it is readily available when needed for maintenance or manual override procedures.
Usage Features:
The SureShade™ Power Bimini is designed for ease of use, with its primary feature being the powered operation for deploying and retracting the canopy. However, the manual override procedure introduces several usage considerations:
- Two-Person Operation: The manual override procedure often requires two people. One person is needed to push forward on the rear frame to relieve pressure on the canvas while it's being unzipped, and to hold up the rear and middle frames. This highlights the physical effort and coordination required for manual operation.
- Canvas Management: The procedure involves unzipping the front pocket of the bimini canvas and later zipping the front canvas pockets over the loose front frame to help hold it in place. This indicates a modular design for the canvas, allowing for partial removal or manipulation during maintenance.
- Frame Manipulation: Users must lower the rear frame assembly and canvas fully down, and later lift the front frame off the actuator gear handles. The front frame assembly is then placed on top of the rear frame for storage. This demonstrates the multi-segment design of the bimini frame.
- Secure Storage: After the manual override, the front frame must be secured in place using zip ties, hook-and-loop strips, or rope. This emphasizes the need for proper securing of the retracted top to prevent movement and damage during boat operation or towing.
- Protective Boot: The manual recommends installing a protective boot over the frames and canvas once the top is fully retracted. This boot is crucial for protecting the bimini top during travel, especially at higher speeds, and is directly linked to the maximum speed limits.
Maintenance Features:
The manual override procedure itself can be considered a maintenance-related feature, providing a method to address a system malfunction. Key maintenance aspects include:
- Onboard Tool Storage: The 5/32" hex wrench is stored inside the actuator assembly. This thoughtful design ensures that the necessary tool for manual override or minor adjustments is always on hand, eliminating the need to search for external tools.
- Accessible Components: The procedure involves removing an end cap from the motor-end of the actuator to access the stored hex wrench and the internal mechanism. This indicates that critical components are designed to be accessible for maintenance or manual intervention.
- Clear Instructions for Disassembly/Reassembly: The manual provides step-by-step instructions for disengaging parts of the frame (e.g., removing hex cap screws from the front frame on both actuators) and later re-attaching the end cap and storing the hex wrench. This facilitates proper execution of the manual override and ensures the system can be returned to a functional state or prepared for professional repair.
- Preventive Measures: The warning against opening the bimini top in excessively high winds and the caution regarding moving parts (pinching, cutting, crushing) serve as important maintenance advisories, guiding users on safe operation to prevent damage to the product and personal injury.
- Reference for Future Service: The manual serves as a critical resource for troubleshooting and temporary fixes, potentially reducing the immediate need for professional service by allowing users to secure the top themselves.
In summary, the SureShade™ Power Bimini offers a blend of automated convenience and a robust manual override system, ensuring functionality and safety even in the event of power system failures. Its design incorporates practical features for user accessibility, tool storage, and clear instructions for maintenance and emergency procedures.