Rev: 01.24.19 Page 2 CCD-0002165
SOLERA SMART ARM™ LED LIGHTING
INSTALLATION GUIDE
TI-302
AWNINGS
Installing LED Lights
Fabled (Fabric LED)
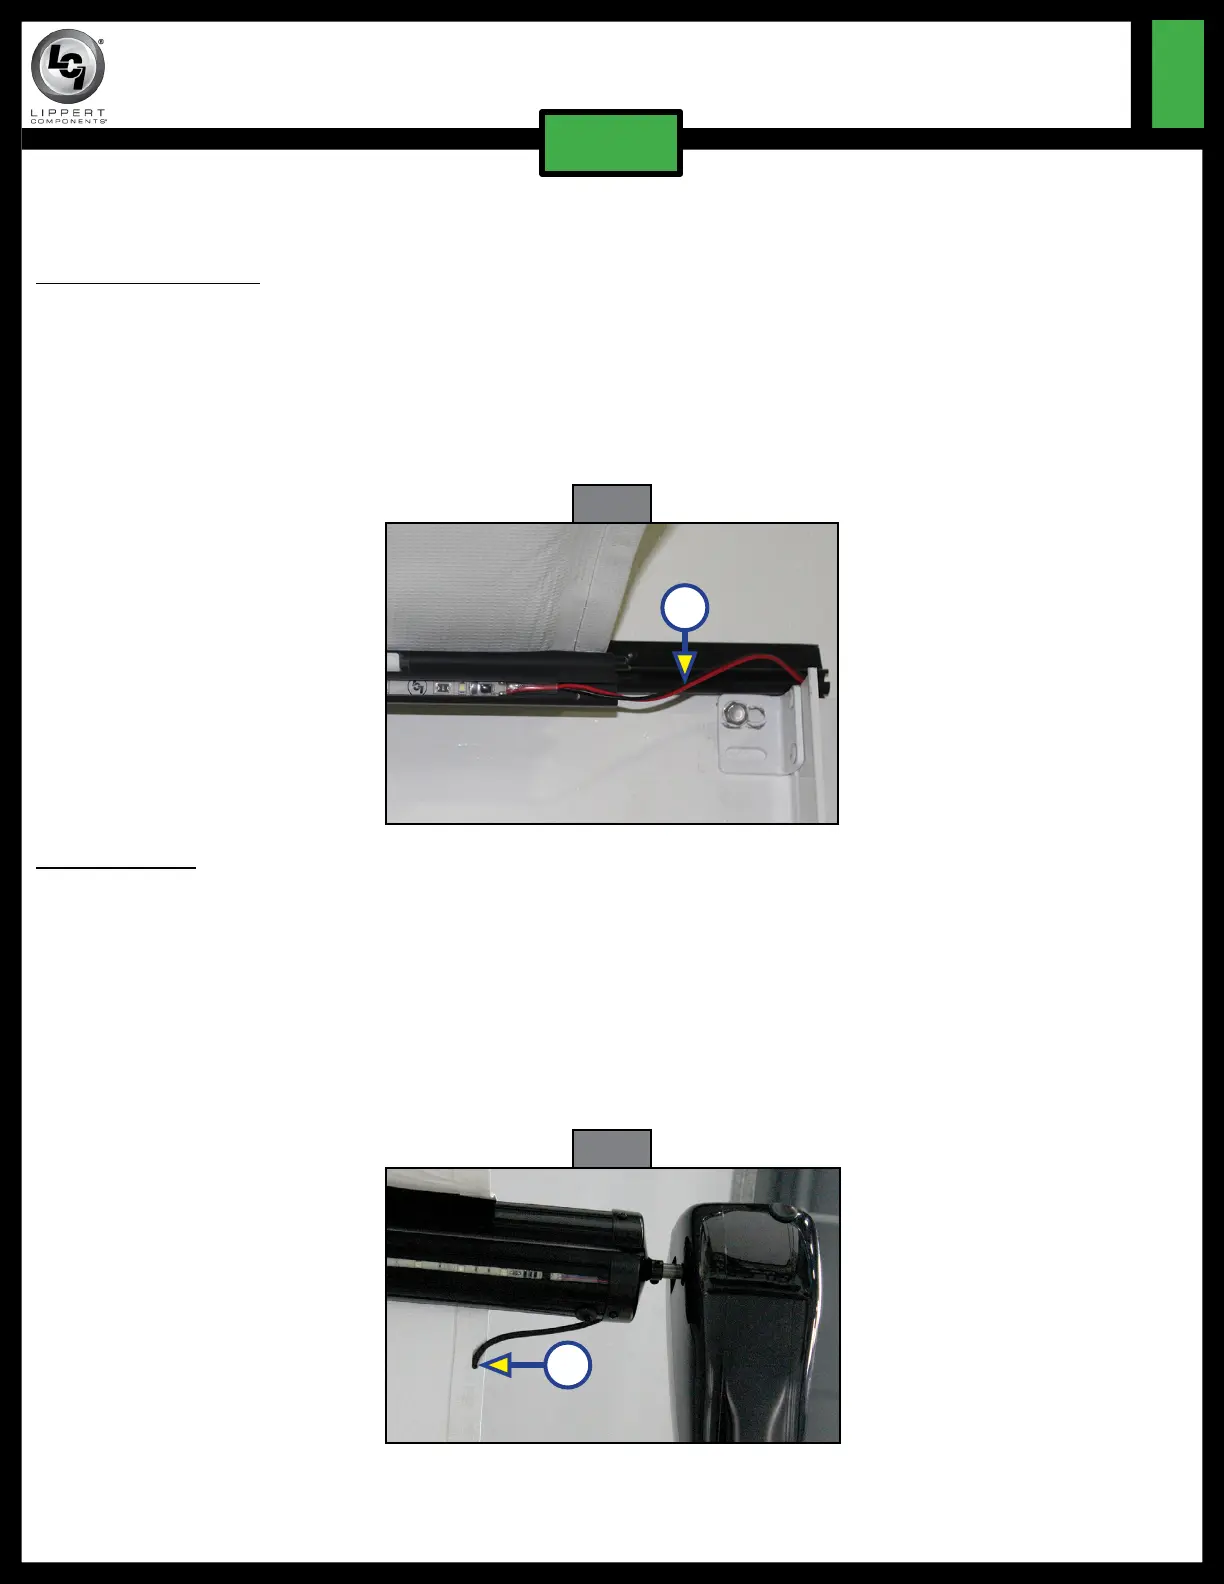
1. Depending on top wire or bottom wire installation, remove the wire covers in the drive mount arm.
2. If bottom installation, take the LED power wire (Fig. 2A) from the light track and run it down the drive
arm. Make sure to run the wires over the center pin of the drive mount arm.
3. Connect the red power wire from the LED to the red (LIGHT) wire in the smart arm and the black
ground wire from the LED to the white (LIGHT) wire in the smart arm.
4. Reinstall the wire covers in the drive mount arm.
LED Roll Tube
The awning fabric has a power wire (Fig. 3A) sewn into the hem. The power wire is connected to the LED
light in the roll tube prior to the end cap being installed on the roll tube by LCI.
1. Depending on top wire or bottom wire installation, remove the wire covers in the drive mount arm.
2. If bottom installation, take the LED power wire (Fig. 2A) sewn into the hem of the fabric and run it
down the drive arm. Make sure to run the wires over the center pin of the drive mount arm.
3. Connect the red power wire from the LED to the red (LIGHT) wire in the smart arm and the black
ground wire from the LED to the white (LIGHT) wire in the smart arm.
4. Reinstall the wire covers in the drive mount arm.
Fig. 2
A
Fig. 3
A