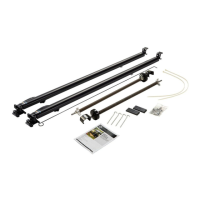
The Solera Classic Awning is a recreational vehicle accessory designed to provide shade and shelter, enhancing the outdoor living experience for RV owners. It is available in various sizes to accommodate a wide range of RV units, from smaller models to the largest ones. The awning's design focuses on ease of use and durability, offering a practical solution for extending the usable space of an RV.
Function Description
The primary function of the Solera Classic Awning is to extend outward from the side of an RV, creating a shaded area. This area can be used for relaxation, dining, or other outdoor activities, protecting users from direct sunlight and light rain. The awning is manually operated, requiring the user to physically extend and retract it. It also features an optional car port mode, which allows the outer arm to be detached from the RV and staked to the ground, providing a more open and versatile covered space. The awning's design incorporates travel locks to secure it during transit, preventing accidental deployment or damage. Cam locks are also integrated to hold the awning in its extended or retracted position, ensuring stability and safety. The system includes support arms that provide structural integrity when the awning is deployed, and these arms are adjustable to achieve the desired height and tension for the fabric.
Usage Features
Operating the Solera Classic Awning involves a series of steps for both extension and retraction, designed to be straightforward for the user.
Extending the Awning:
- Release Travel Locks: Before extending, the travel locks must be released. There are two styles of travel locks:
- Original Travel Locks: These are released by squeezing the sides of the travel lock inward from behind the support arm bracket, which frees the outer arm.
- Current Travel Locks: These require pressing slightly upward on a tab on the travel lock base latch to release the travel lock body. The body arm is then swung from behind the support bracket to release the outer arm.
- Cam Lock Position: It is crucial that the cam lock is in the "roll out" position before raising a pop-top trailer, if applicable, to prevent damage.
- Loosen Locking Knobs: The black locking knobs on the support arms need to be loosened.
- Flip Cam Lock: The cam lock is flipped down to the "roll out" position.
- Extend Awning: Using a pull rod, the awning is pulled outward until it reaches full extension.
- Secure Support Arms: The bottom of the support arms are slid all the way to the top of the outer arm and locked into place.
- Tension Fabric: The outer arms are pulled to ensure the fabric is taut, and the black locking knob is tightened to secure the outer arm.
- Adjust Height: The outer arms can be raised to the desired height by releasing the support arm assembly handle, allowing the upper channel of the outer arm to slide along the lower channel. Releasing the handle locks the arm in position.
- Secure Pull Strap: The pull strap is slid to one end and wrapped around the arm to keep it out of the way.
Extending Optional Car Port:
- After completing the standard awning extension steps, the outer arm is removed from the side of the unit by releasing a lever on the lower mounting bracket.
- The awning is walked out until the outer arm is straight up and down and rests on the ground.
- The foot of the outer arm is secured to the ground using provided stakes.
Retracting the Awning:
- Remove Stakes (Car Port Mode): If in car port mode, stakes are removed, and the outer arm is walked back to the unit and secured into the lower mounting bracket by pushing the lever and inserting the outer arm pin. This procedure is repeated for both ends.
- Unwrap Pull Strap: The awning pull strap is unwrapped and returned to the center of the awning roll tube.
- Lower Outer Arms: The outer arms are lowered by releasing the support arm assembly handle, allowing the upper channel to slide down to the acorn nut. This is done for both ends.
- Loosen Locking Knobs and Unlock Support Arm: The black locking knob is loosened, and the support arm is unlocked by releasing the spring clip at the top of the outer arm head assembly. The support arm is allowed to slide down toward the bottom of the outer arm. This is repeated for both ends.
- Release Spring Tension: A firm hold is taken on the awning strap, and tension on the springs is released by flipping the cam lock up to the "roll in" position.
- Walk Awning In: The awning is walked in toward the unit. The pull rod is hooked into the pull strap before it gets too high, and the awning is walked to the fully-closed position. The hook is then removed and stored.
- Secure Travel Locks: The travel locks are secured for travel mode.
- Original Travel Locks: The outer arm and support arm are compressed together until the outer arm clicks into the travel locks on the support arm.
- Current Travel Locks: The outer arm and support arm are compressed together. The travel lock body is swung down onto the travel lock base, pressing and latching close. The travel lock body's arm wraps behind the arms for secure travel.
- Tighten Locking Knob: The black locking knob is tightened.
Troubleshooting:
The manual provides a comprehensive troubleshooting guide for common issues such as the awning not extending or retracting, fabric being loose, locking knobs not tightening, or the awning not rolling up straight. Solutions often involve checking the position of cam locks, ensuring travel locks are released, loosening or tightening locking knobs, checking for debris, or verifying proper alignment and tension of the fabric and arms. For instance, if the awning won't extend, the user is advised to check the cam lock position (roll out), ensure travel locks are released, and verify that the locking knob for the rafters has been loosened. If the awning won't roll up straight, the user should check if the fabric is centered on the roll tube and between the arms, and ensure anchoring screws are present and the arms are square and straight.
Maintenance Features
Regular maintenance is crucial for the longevity and proper functioning of the Solera Classic Awning. The manual outlines simple yet effective steps for cleaning the awning fabric.
Resources Required:
- 5-gallon bucket
- Clean water
- 1/4 cup dish soap
- Bristle brush with sufficient reach
Fabric Care:
- Drying After Wet Use: If the awning is retracted while wet, it should be extended and allowed to dry as soon as conditions permit. This prevents mildew formation and extends the life of the awning. It's noted that mildew forms on accumulated dust, dirt, and grime, not on the fabric itself.
- Cleaning Procedure:
- A mixture of 1/4 cup of dish soap and five gallons of warm water is prepared.
- This mixture is liberally applied to the top of the fabric.
- The awning is then retracted for five minutes, allowing the mixture to apply to the bottom of the fabric as well.
- The awning is extended, and the fabric is hosed off with fresh water.
- This cleaning process can be repeated if necessary.
- The awning must be allowed to dry completely before being retracted.
Safety Precautions:
The manual emphasizes safety with "CAUTION" symbols. Users are warned about the risk of personal injury and product/property damage if instructions are not followed. Specific warnings include:
- Cam Lock Position: Failure to have the cam lock in the open/roll out position before raising a pop-top trailer can result in damage.
- Moving Parts: Moving parts can pinch, crush, or cut, so users should keep clear and use caution.
- Cleaning Solution: Over-spray of cleaning solution can cause eye and sensitive skin irritation. Users are advised to flush affected areas with clean water, seek medical attention if necessary, and wear eye protection and appropriate protective clothing.
Overall, the Solera Classic Awning is designed as a user-friendly and maintainable accessory that significantly enhances the utility and comfort of an RV by providing a reliable outdoor shaded area.