M & MA Series Meters
37
Get the latest PDF manual:
https://www.lcmeter.com/resources/technical/manuals
Mobile/online version of this manual:
https://www.lcmeter.com/manuals
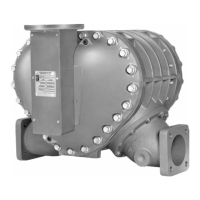
2. Insert the non-tapered ends of the three rotors into the housing and onto its respective
bore of the installed bearing plate.
NOTE: For MA-4®, M-5®, and MA-5® old style models, M-60® and M-80® current
models, make sure that the teeth of the driving reduction gear mesh with the teeth of the
driven reduction gear.
3. Place the remaining bearing plate over the three tapered rotor ends and fasten it to the
housing with the bearing plate screws.
4. The rotors should have a small amount of end-play and be easy to turn. Test each rotor,
one at a time. Turn the rotors to make sure that they revolve freely. Jog the rotors from
end to end to check for end-play. If they do not move easily in both tests, remove the
rotors and check for burrs and corrosion deposits. Clean them thoroughly and repeat
steps 2, 3 and 4.
5. Each rotor has a notch, or “keyway”, to hold a rotor key. The rotor key is a small wedge
of metal. Press a rotor key into the keyway of each rotor with your thumb and forefinger.