page 3
INSTALLATION INSTRUCTIONS
For Conduit Mounting see Figure E
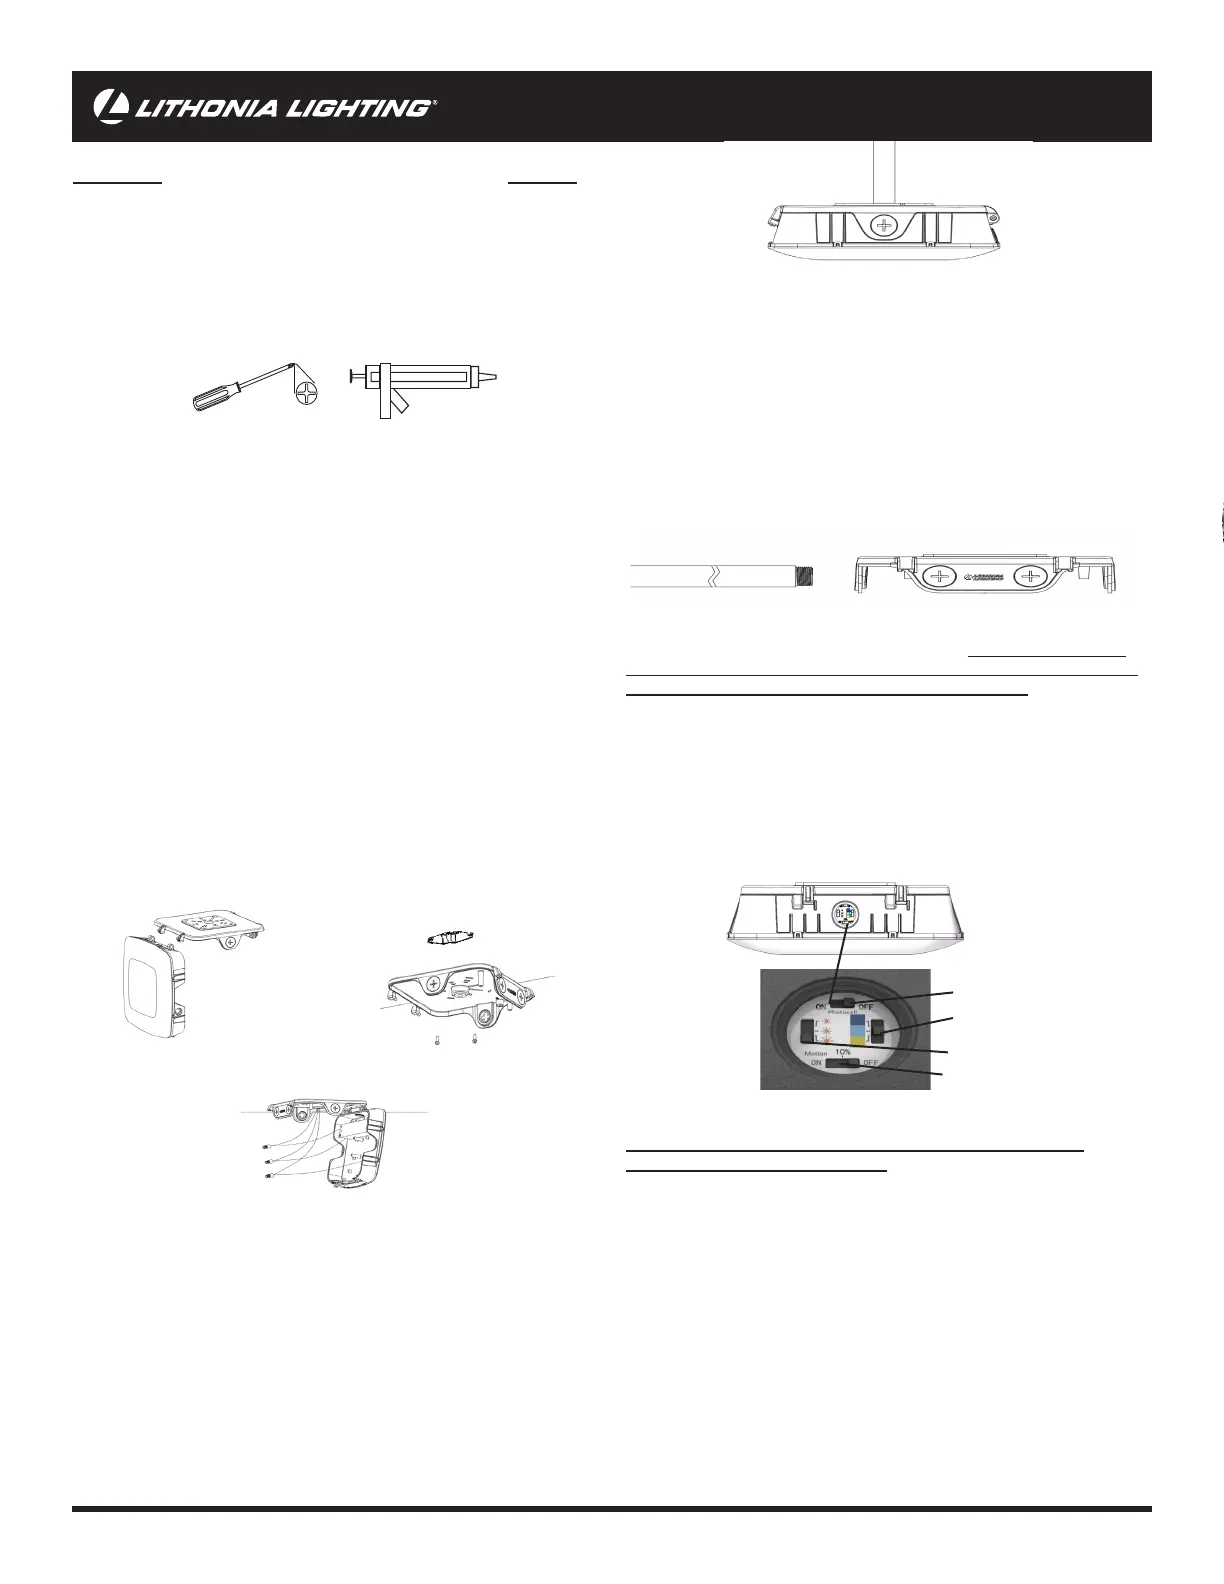
1. Loosen the screws on the front of housing and slide the housing with
lens to the left to detach from top housing. See Figure A
2. Fix the back housing to the ceiling using provided mounting screws.
See Figure B
3. Remove conduit plug. Feed input leads through 3/4” conduit pipe and
screw pipe into xture threading. Note: Seal thread using Teon tape or
silicone sealant.
4. Make wiring connections using provided wire nuts. See Figure C.
Re-attach the lens housing to the mounting backplate by sliding the pins
back in. Close the housing and screw down, max torque: 1.5ft-lbs (2Nm)
CAUTION: WIRING AND FIXTURE OPERATION
Make sure power is turned o.
Connect xture to supply wires rated for at least 75°C (167°F)
To Ground xture use Wire Nut to connect the (copper) house supply
ground wire & the (green) xture ground wire. Note: If house wiring
does not include a ground wire, consult your local electrical code for
approved grounding methods.
For proper connection, place wire nut over
wires and twist clockwise until tight.
To connect supply wires use Wire Nuts to connect the black xture wire
to the black power supply wire and the white xture wire to the white
(neutral) supply wire.
Turn on electricity at fuse or circuit breaker and verify success of installation.
Remove xture components and parts pack. Check to ensure all
parts are included. Note: Account for small parts and destroy packing
material, as these may be hazardous to children.
Turn OFF Power at fuse or circuit breaker box!
CAUTION: Do not rely on wall switch alone to turn o power.
Not suitable for use with motion sensors or other remote devices.
This xture is intended for ceiling, wall or stem mount
(conduit and stem not included)
For j-box mounting
1. Loosen the screws on the front of housing and slide the housing with
lens to the left to detach from top housing. See Figure A
2. Pull power wires all the way through the center hole on the mounting
backplate. Fix the back housing to the ceiling using provided mounting
screws. See Figure B
3. Make wiring connections using provided wire nuts. See Figure C.
Re-attach the lens housing to the mounting backplate by sliding the pins
back in. Close the housing and screw down, max torque: 1.5ft-lbs (2Nm)
Figure B
FIXTURE PACKING LIST
Description Quantity
1) Fixture Housing ..............................................................................1
2) 1/2” 8-32 & 10-24 J-Box Mounting screws* 1/2” 8-32 & 10-24 J-Box Mounting screws* .................................4
3) Wire Nuts* Wire Nuts* ......................................................................................3
4) Wire Plug* Wire Plug* ......................................................................................1
*Contained in parts packs
Mounting Hardware andMounting Hardware and
Silicone Sealant Required - Purchase Separately
REQUIRED TOOLS:
1) Fixture Housing
Figure C
CHOOSE SETTINGS (OPTIONAL) - CAUTION: SWITCH
CAN ONLY OPERATE WHEN POWER TO FIXTURE IS OFF. WAIT 60
SECONDS BEFORE POWERING AFTER SWITCHING
• To change settings, using a philps head screwdriver, remove the switch cover
on the side of the xture See Figure C. Choose your settings and replace switch
cover. Tighten to min. 1.5ft-lbs (2Nm) to max. 1.8ft-lbs (2.5Nm).
• For lumens, factory set to brightest sun (10,000lm). If dierent brightness
is desired select middle sun (7500lm) and for lowest lumens dimmest sun
(5000lm).
• For color, factory set to Light Blue (4000K) if dierent color is desired select
Blue (5000K) for the whitest color and Yellow (3000K) for the least white.
For Pendant Mounting
1. Loosen the screws on the front of housing and slide the housing
with lens to the left to detach from top housing. See Figure A
2. Remove rubber wire plug from the top of xture to expose the NPS
threads.
3. Feed input leads through a 3/4” threaded conduit pipe and screw
conduit pipe into xture threading. Note: Seal thread using Teon tape
or silicone sealant.
4. Make wiring connections using provided wire nuts. See Figure C.
Re-attach the lens housing to the mounting backplate by sliding the pins
back in. Close the housing and screw down, max torque: 1.5ft-lbs (2Nm)
Figure A
Figure D
Figure E
Photocell
CCT
Lumens
Motion
Figure F
 Loading...