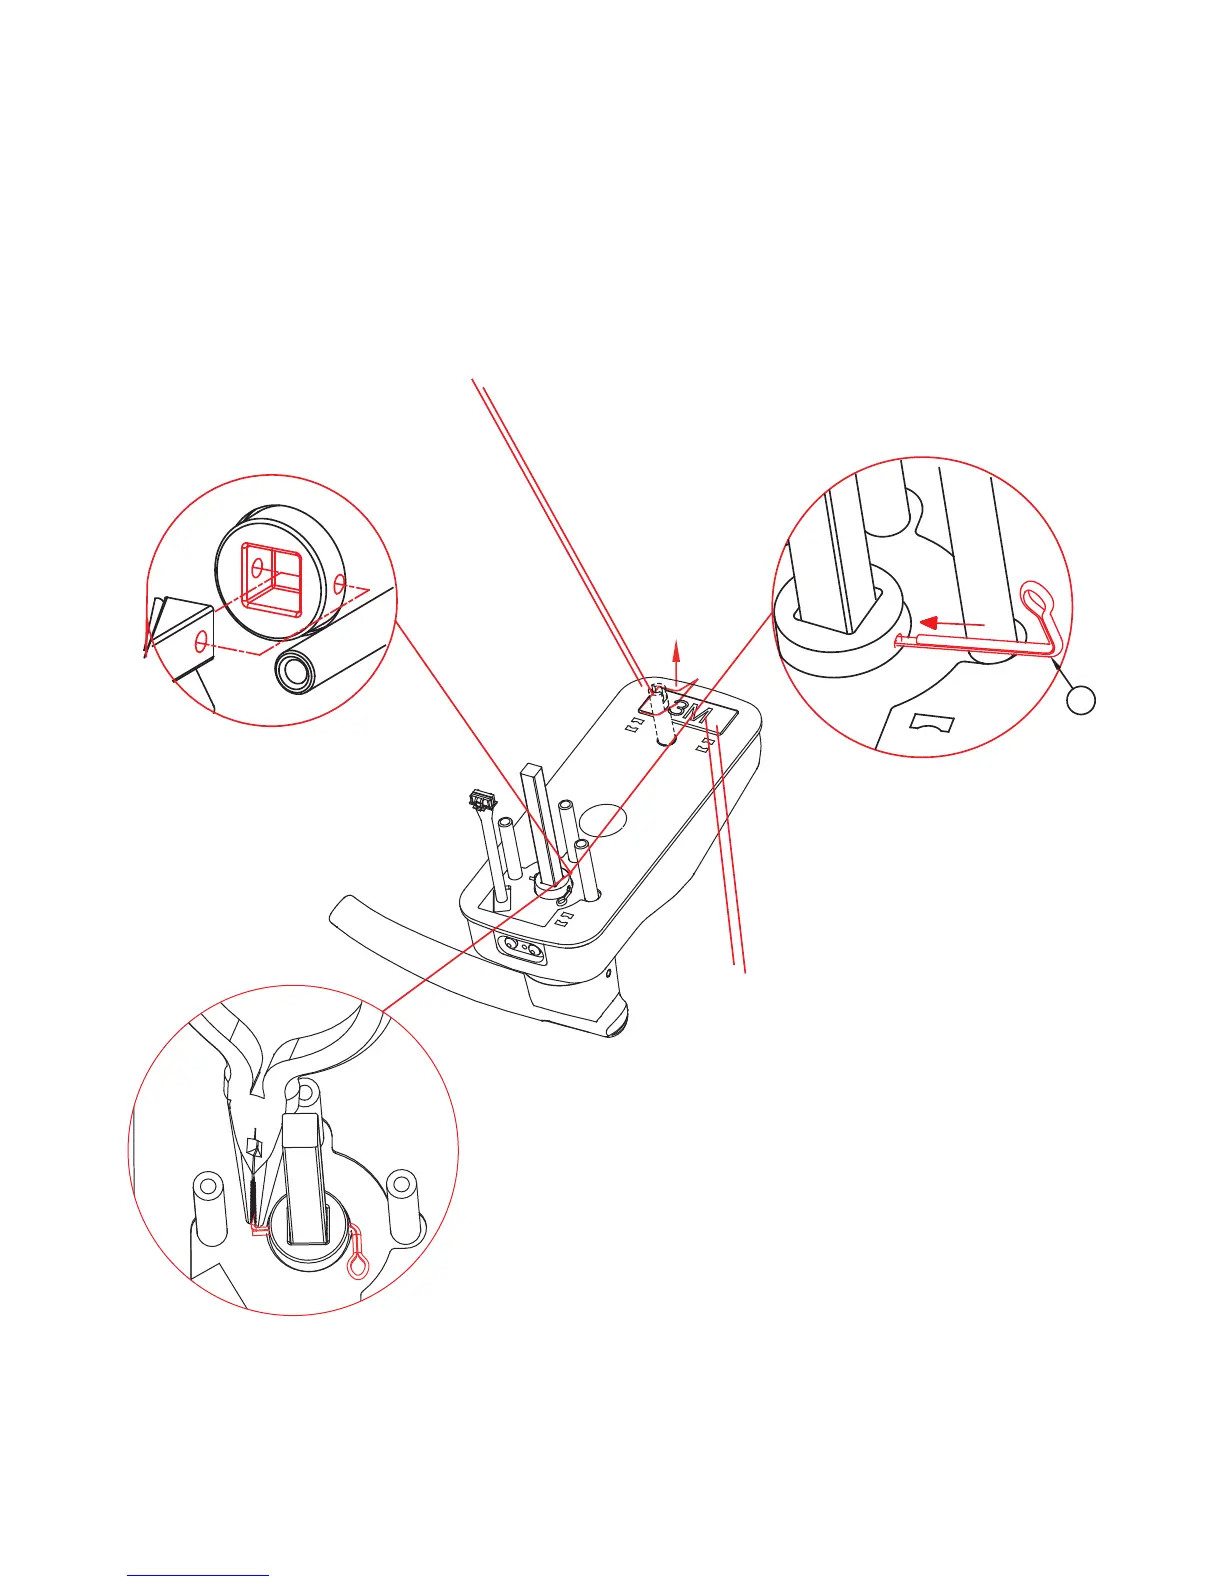
EasyManuals Logo

Lockly SECURE Installation Manual

Lockly SECURE
19 pages
To Next Page IconTo Next Page
To Previous Page IconTo Previous Page
Page #11 background imageLoading...
Page #11 background image
4.1
4.3
4.4
Peel paper layer OFF the 3M
tape and prepare for installation.
4.2
Install Part C with the holes
side into the base of the lock
and align the holes locate in
the 3 o’clock and 9 o’clock
position.
Insert locking pin Part D in
to the hole as shown above.
Lightly bend Part D so it’s locked into place
from moving as shown. We recommend using
pliers.
After you finshed bending the locking pin, turn
the handle to make sure it turns freely and
nothing is obstructed.
D
STEP 4: PREPARING LOCK FOR INSTALLATION
If you drilled a hole in Step 1, use pole (
Part U
) and securely tighten with a flat head screw-
driver by turning it clockwise onto the lock. If you did not drill a hole in step 1, you can leave
this pole removed.

Other manuals for Lockly SECURE

Questions and Answers:

Question and Answer IconNeed help?

Do you have a question about the Lockly SECURE and is the answer not in the manual?

Lockly SECURE Specifications

General IconGeneral
Power SourceBattery
CompatibilityStandard doors
Operating Temperature-4°F to 140°F (-20°C to 60°C)
Keyless EntryYes
Access MethodsFingerprint, Keypad, Physical Key, Mobile App
Fingerprint Capacity99 fingerprints
ConnectivityBluetooth, Wi-Fi
Battery LifeUp to 1 year (depending on usage)
KeypadYes
Voice ControlYes (Amazon Alexa, Google Assistant)
Door Thickness1.375 to 2 inches
Battery Type4 AA batteries
Mobile AppLockly App
Auto-LockYes
Weather ResistanceYes
InstallationDIY
Lock TypeSmart Deadbolt
MaterialZinc Alloy

Related product manuals