Kabel anschließen
d
Raccordement du câble
f
Kabel aansluiten
l
Collegamento dei cavi
i
Connecting the cables
g
Conexión de cables
e
l
Bescherm de gevoelige oppervlakken tegen krassen.
Leg de speaker met gemonteerde voet op een
zachte ondergrond om de kabel aan te sluiten zoals
getoond in de tekening
Schuif de luidsprekerkabel in de met pijl X
aangeduide boring, tot hij zichtbaar wordt in de
aansluitzone Z
Aansluitzone Z op de speaker
Een nauwkeurige beschrijving voor het aansluiten
vindt u op pagina 9
g
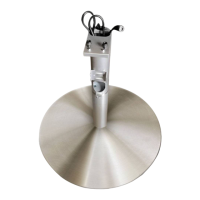
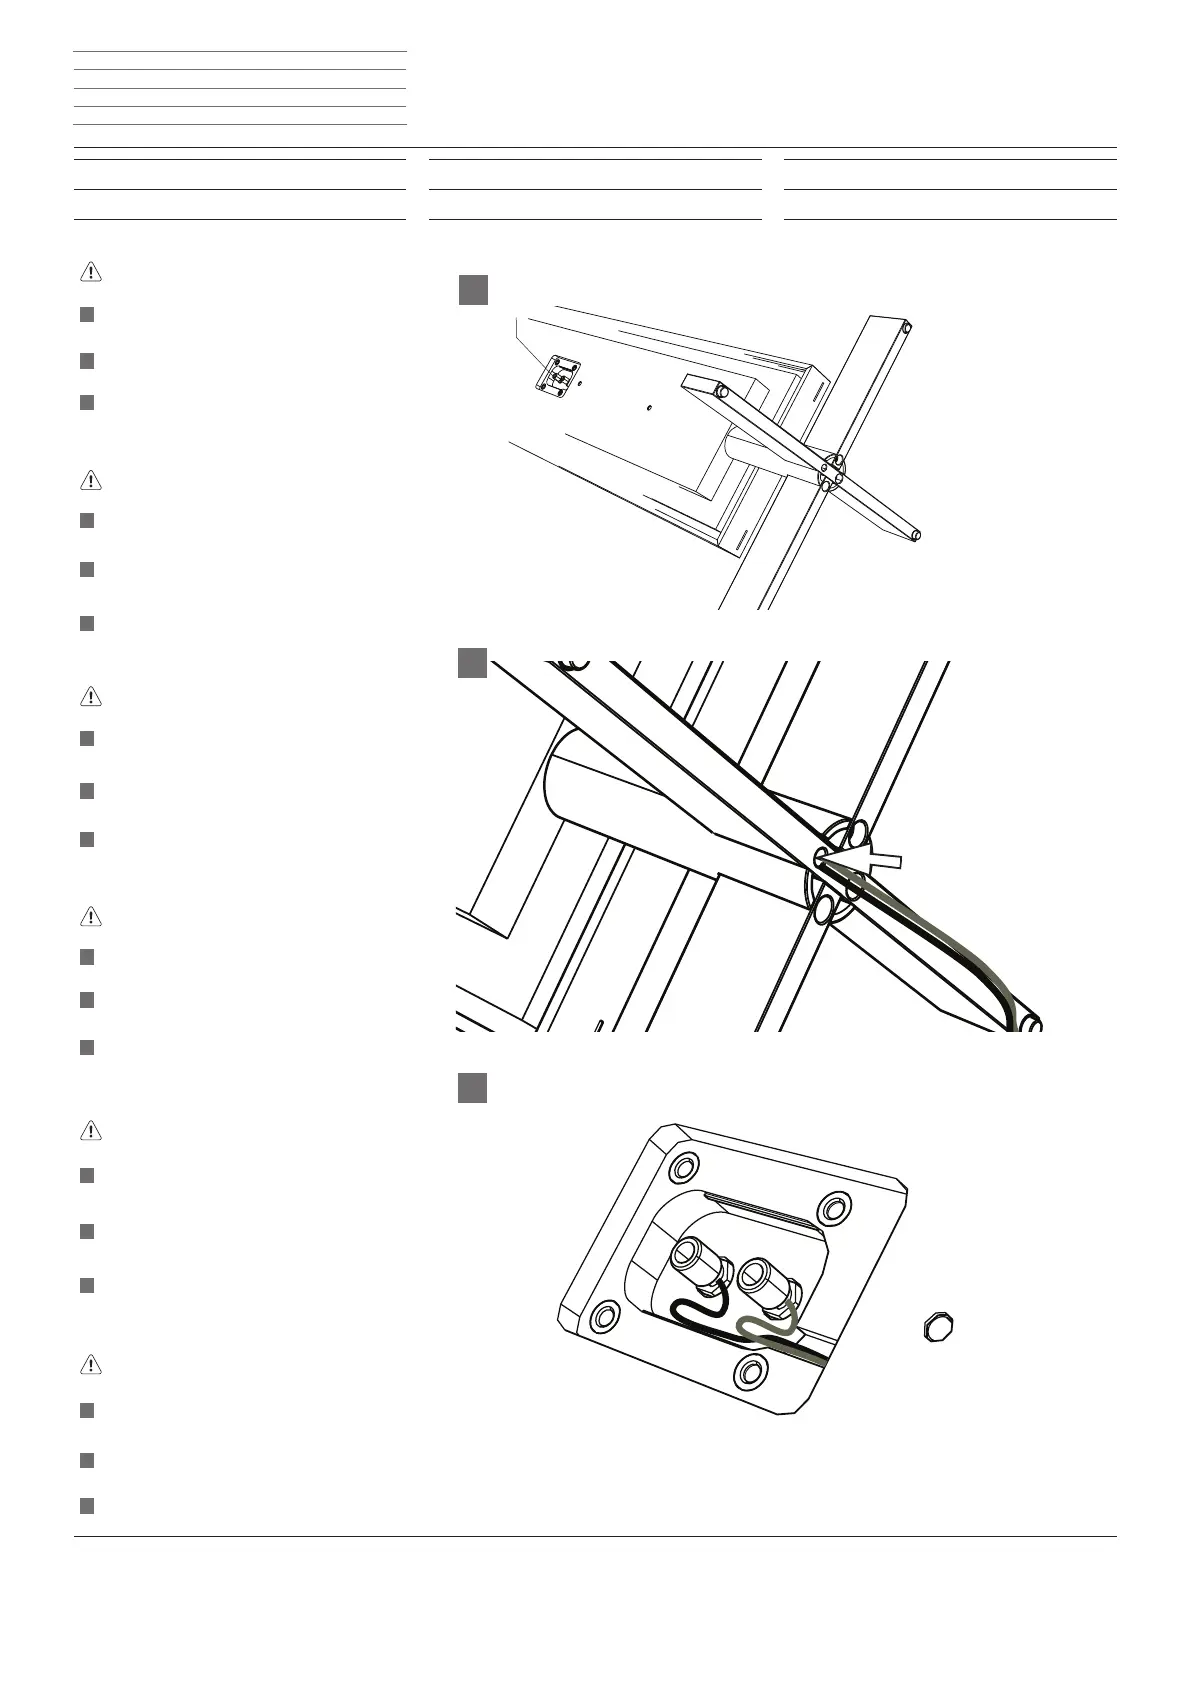
Protect the sensitive surfaces against scratches.
When connecting the cable, place the speaker
on a soft underlay as shown with the fl oor stand
installed
Insert the speaker cable into the hole marked with
the arrow X until it can be seen in the connecting
area Z
Connection area Z on the speaker
See page 9 for a more detailed description of how
to connect the cables
f
Protégez les surfaces sensibles contre les rayures.
Posez le Speaker avec le pied monté sur une surface
douce pour raccorder le câble, tel que représenté.
Faites glisser le câble des haut-parleurs dans l'orifi ce
indiqué par une fl èche X jusqu'à ce qu'il soit visible
dans la zone de raccordement Z.
Zone de raccordement Z sur le Speaker.
Description détaillée des raccordements à la page 9.
i
Proteggere le superfi ci sensibili da possibili graffi -
ature.
Mettere l'altoparlante in posizione sdraiata su una
superfi cie morbida, con il piede di appoggio per il
collegamento dei cavi come illustrato
Far scorrere il cavo dell'altoparlante nel foro indica-
to con la freccia X, fi no a rendere visibile la zona di
collegamento Z.
Zona di collegamento Z sull'altoparlante
Per una descrizione dettagliata in merito al collega-
mento, vedere a pagina 9
e
Proteja las superfi cies delicadas frente a posibles
arañazos.
Coloque el altavoz con el pie montado en una
superfi cie blanca para conectar el cable de la forma
mostrada
Introduzca el cable del altavoz en el orifi cio indica-
do con la fl echa X hasta que se vea en el área de
conexión Z
Área de conexión Z en el altavoz
Descripción detallada de la conexión en la página 9
d
Die empfi ndlichen Oberfl ächen vor Verkratzen
schützen.
Legen Sie den Speaker mit montiertem Standfuß
zum Anschließen der Kabel, wie dargestellt auf eine
weiche Unterlage
Schieben Sie das Lautsprecherkabel in die mit Pfeil X
bezeichnete Bohrung ein, bis es im Anschlußbereich
Z zu sehen ist
Anschlußbereich Z am Speaker
Genaue Beschreibung zum Anschließen, auf Seite 9
Z
X
+
-
Floor Stand R ID - 15 -
Montageanleitung Instructions de montage
Montage-instructies Istruzioni di montaggio
Installation instructions Instrucciones de montaje