Logitech Reviewer’s Guide: QuickCam Pro 9000 and QuickCam Pro for Notebooks –
Page 11
Example 1 – Using RightLight 2 Technology with Backlighting
To better illustrate how RightLight 2 Technology works, the next two examples guide you
through disabling RightLight 2, so that you can see how much the image improves when
you allow the wizard to re-enable it.
• Position yourself so that there is a light source behind you.
• Click the QuickCapture icon to activate your camera.
• Click the Change Settings icon on the QuickCam Control Panel.
• Click the RightLight 2 icon to access the RightLight 2 settings.
• Uncheck Use RightLight 2 Settings to disable RightLight 2.
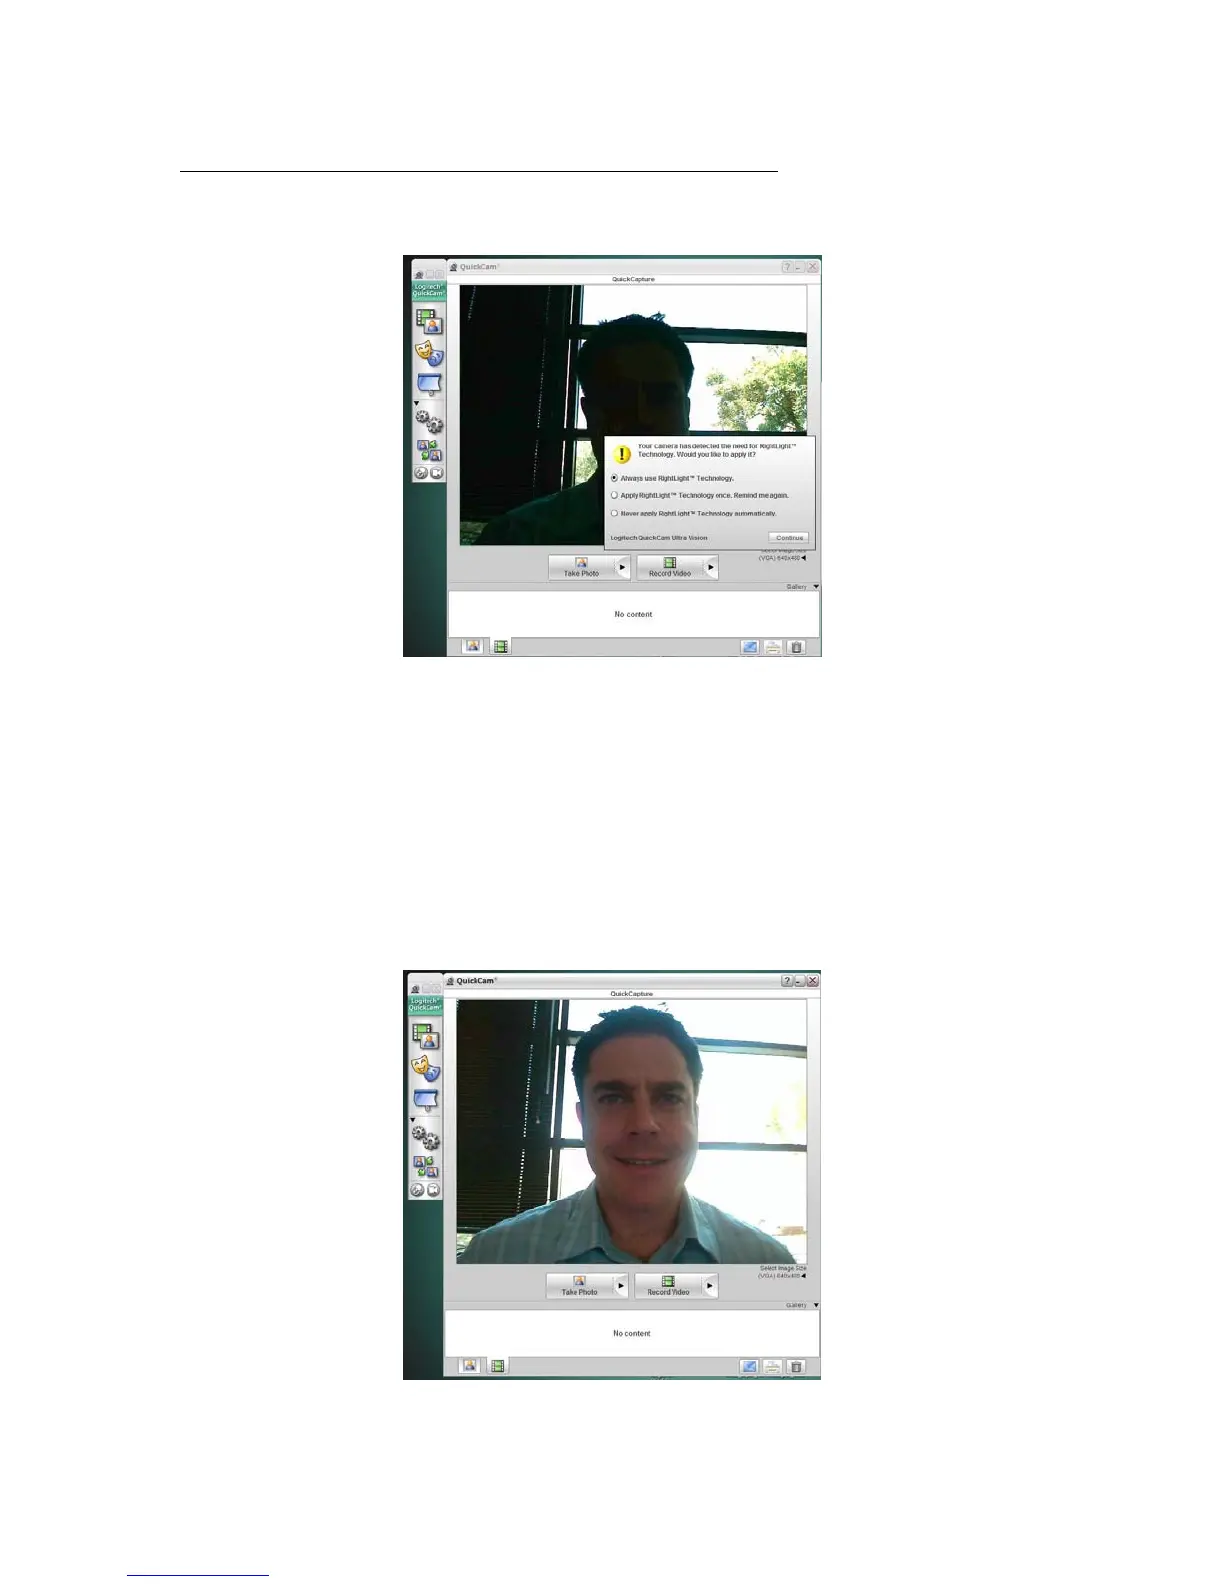
• Click Return to Default Settings. You’ll see your face in shadows. The camera
detects that you can benefit from RightLight 2 Technology and prompts you to
enable it.
• Accept the default and click Continue.
The result will look something like this: