SETUP &
USE
Please inspect your RANGER system before use to ensure that all
components listed on page 1 are present. Prior to first use, you
should fully charge the system.
Inspection
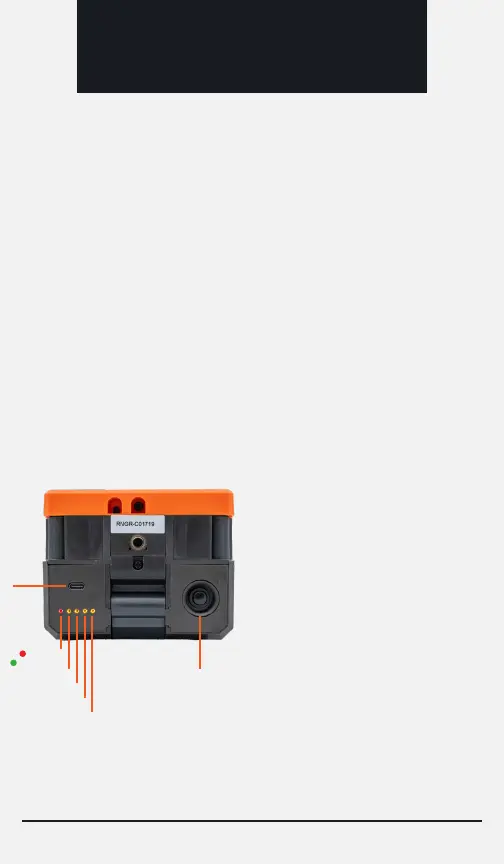
On the bottom of the camera
system, there are 5 LEDs; 1 LED
indicates the charging status (red
while charging and green when
fully charged) and 4 LEDs that
indicate the battery's charge level.
Each LED represents 25% of the
battery life. When the battery level
becomes too low for the system to
operate, the LEDs will flash and
the system will turn off.
BATTERY LEVEL INDICATOR
To charge the system, use the included USB-C cable and plug it
into the USB-C port at the bottom of the unit. This port is only
used for charging and cannot transmit data. The system is
intelligent and will stop charging once the battery is fully charged
and the red charging indicator LED will turn green. Your Longshot
system should be turned off while charging. While charging, all of
the battery level lights will remain illuminated as well as the red
charging indicator LED. Please allow up to 7 hours for the camera
to fully charge.
CHARGING
You may also notice a slight delay from the time you flip the
power switch until the time the lights come on, this is a result of
the circuitry within the battery level indicator board and
is standard operation.
Page 3
100%
POWER
CHARGING
FULL CHARGE
CHARGE
PORT
75%
50%
25%