Do you have a question about the Lorex C581CB Series and is the answer not in the manual?
Advice before starting camera installation, including cable routing.
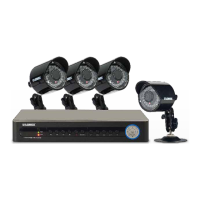
Information on single or multi-camera power adapters provided with the product.
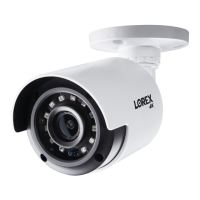
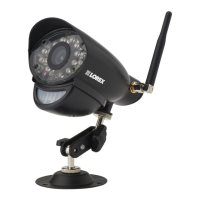
This document describes the Lorex 5MP HD Bullet Security Camera, a device designed for surveillance and security applications.
The Lorex 5MP HD Bullet Security Camera is a high-definition security camera capable of capturing 5-megapixel video. It is designed for both indoor and outdoor use, with a recommendation for installation in a sheltered location when used outdoors. The camera features an Auto Mechanical IR Cut Filter, which allows it to automatically switch between Day and Night viewing modes. This filter produces an audible clicking noise during mode transitions, which is a normal indication of its operation. The camera is part of a larger security system and requires connection to a compatible Lorex HD DVR for recording and viewing footage. It is powered by a regulated UL/CSA approved power supply, which is crucial for its proper function and to avoid voiding the warranty. The camera can be extended with various cable types to accommodate different installation distances, with specific guidelines for cable length and power supply connection for longer runs.
The camera comes with a mounting kit, BNC/power extension cable, and a power adapter. Installation involves selecting a mounting location, drilling holes, feeding the cable through the mounting surface or a cable notch, and securing the camera stand with screws. Drywall anchors are provided for mounting on drywall. The camera's position can be adjusted by rotating the arm up to 360°, bending the arm up to 90°, and leveling the camera until it is aligned with the desired viewing area. An adjustment screw allows for precise positioning, which should be tightened once the desired angle is achieved. After installation, a vinyl film must be removed from the camera lens.
For optimal performance, it is recommended to point the camera where there are minimal obstructions, such as tree branches. The camera should be installed in a location that is difficult for vandals to reach, and cabling should be secured to prevent exposure or cutting. The camera is rated for outdoor use, but a sheltered location is recommended to prolong its lifespan.
The camera connects to a DVR via a BNC connector for video input and to a power adapter for power. Depending on the product configuration, either individual or multi-camera power adapters may be supplied. Cable extension options are available, with different cable types supporting varying maximum distances. For cable runs exceeding 200ft (61m), the power adapter must be connected directly to the camera, not at the end of the extension cable. Indicators such as permanently black and white video, unclear, soft, or distorted video can suggest that the cable run is too long.
Regular maintenance is important for the camera's longevity and performance. Periodic cleaning of the camera lens may be required, using only a damp cloth. Harsh, chemical-based cleaners should be avoided. It is crucial to use only the supplied regulated power supply, as using a non-regulated or non-conforming power supply can damage the product and void the warranty.
Troubleshooting tips are provided for common issues:
The camera is not intended for submersion in water. It is important to handle the product with care and follow all instructions for safe use. The camera should be operated within the specified temperature, humidity, and voltage levels. Disassembling the camera or pointing it directly at the sun or intense light sources should be avoided. The supplied cable is rated for surface mounting only; in-wall and floor-to-floor cables (CMR type) are sold separately.
| Image Sensor | 1/2.7" CMOS |
|---|---|
| IR Cut Filter | Yes |
| Wireless | Yes |
| Operating Temperature | -22°F ~ 140°F / -30°C ~ 60°C |
| Power Supply | DC 12V |
| Motion Detection | Yes |
| Storage | MicroSD card slot (up to 256GB) |