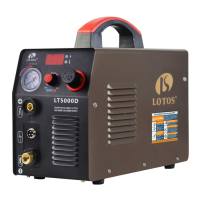
The Lotos Technology Plasma Cutter LT5000D is a powerful, portable, and affordable welding solution designed for efficient metal cutting. This device utilizes state-of-the-art inverter technology, converting 50/60Hz frequency to a high frequency (over 100 KHz) using V-MOSFETs, followed by step-down voltage and rectification current. The integration of Pulse-Width-Modulation (PWM) technology enables the inverter power supply to generate powerful DC welding currents. This advanced technology significantly reduces the dimensions and weight of the main transformer while increasing efficiency by 30%.
Function Description:
The primary function of the LT5000D is plasma cutting, suitable for a variety of metal materials including stainless steel, alloy steel, mild steel, copper, and aluminum. It operates by generating a high-temperature plasma arc that rapidly melts and cuts through conductive materials. The machine is designed for both 110V and 220V AC input, making it versatile for different power environments.
Usage Features:
- Safety First: Before operation, users are instructed to wear a proper helmet (Figure 1.1) to protect eyes from harmful plasma cutting arc radiation and safety gloves to protect hands. The manual emphasizes the importance of isolating oneself from both the earth and the work piece, connecting the machine to a UL-approved outlet only, and ensuring the working area is nonflammable and explosive-free. All operators should be technically certified for welding/cutting.
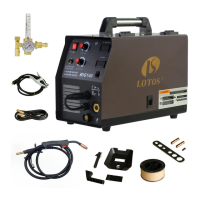
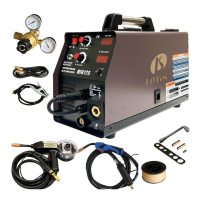
- Air Compressor Connection: The machine requires connection to an air compressor (Figures 1.3 & 1.4) via its gas inlet on the back (Figure 1.2). The air pressure should be set to 65-70 PSI. An air regulator is optional, as some compressors have built-in pressure control.
- Torch and Ground Cable Connection: The plasma cutting torch and ground cable connect to the front panel of the machine (Figure 1.5). The ground clamp must be securely attached to the metal work piece, with any rust or paint removed to ensure good contact and prevent an open circuit.
- Operation Sequence:
- Ensure the machine's on/off switch is in the off position before plugging the power cord into the outlet.
- Connect the air compressor with an air regulator/filter.
- Attach the ground clamp to the work piece, cleaning the contact point thoroughly.
- Turn on the power switch; the cooling fan should start, and the LED should illuminate. The front panel will display the electrical current volume, which can be adjusted with the knob.
- Adjust the air pressure on the compressor to 60-65 PSI.
- Bring the torch tip into direct contact with the work piece edge or over a pre-drilled pilot hole for thicker materials.
- Press the button on the torch to initiate cutting, ensuring the cutting current is appropriate for the material thickness.
- Consumable Assembly: The torch head features a consumable assembly (Figure 3.1) consisting of a double-sided electrode, copper tip, ceramic ring, and ceramic cup, all housed within the torch body.
- Cutting Environment: The machine is designed to perform in various conditions, withstanding temperatures between 14 and 104 degrees Fahrenheit and up to 80% humidity. It is recommended to keep the machine dry. The working area must be adequately ventilated to avoid inhaling harmful smoke, gases, and vapors.
- Power Plug Wiring: The manual provides detailed instructions for power plug wiring, identifying the green wire with a yellow strip as the ground wire and the other two as hot wires for both 110V and 220V configurations. It warns against improper wiring, which can damage the machine and void the warranty.
Maintenance Features:
- Consumable Replacement: Consumables such as the tip, electrode, and cup should be changed when worn out. The correct consumable type is LCON, and the metal protector on the tip is also replaceable. These can be purchased from www.uwelding.com or authorized resellers.
- Dust Removal: Dust created by compressed air should be removed regularly. In environments with smoke and dust, daily maintenance is required.
- Air Pressure Check: Ensure adequate air pressure exists to protect internal components.
- Connection Integrity: All connectors should be checked to ensure firm connections.
- Protection from Elements: The machine should be protected from water or dampness.
- Storage: When not in use for extended periods, the machine should be properly packed and stored in a dry environment.
- Torch Maintenance: To protect the copper tip, avoid direct contact with the work piece during cutting; the torch should be inclined, maintaining a 1 mm distance from the inter-hole of the copper tip to the work piece. If pilot arcing functions improperly, oxidization of the electrode on the torch can be removed with sandpaper.
- Troubleshooting: The manual includes a comprehensive troubleshooting guide for common issues such as power pilot light being off, fan not working, no cutting voltage output, unstable output current, or improper metal cutting. It emphasizes that only qualified technicians should undertake repairs and advises turning off electrical power and air supply before any inspection or reconnection.
The LT5000D is characterized by its stabilization, reliability, portability, power efficiency, low noise output, high cutting speed, and smooth cuts, making it a robust tool for various cutting applications.