I412 GB I 11 19 31100198
2
INTRODUCTION
The DMG6... multimeters have been designed to combine the maximum possible easiness of operation
together with a wide choice of advanced functions. The flush-mount 96x96mm housing joins the modern
design of the front panel with the tool-less mounting of the device body and the expansion capability of
the rear panel, where it is possible to mount plug-in one module of EXP... series. The front panel is
equipped with an infrared optical interface that allows programming through USB or WiFi dongles. The
backlighted LCD display offers a user-friendly interface. Model DMG6... is also provided with a isolated
RS-485 interface with Modbus protocol to consent remote supervision.
FRONT KEYBOARD
MENU key – Used to enter or exit from visualization and setting menus.
L
and
M
keys – Used to scroll display pages, to select among possible choices and to modify settings
(increment-decrement).
key – Used to rotate through sub-pages, to confirm a choice, to switch between visualization modes.
EXPANDABILITY
– Thanks to expansion bus, the DMG6... can be expanded with one EXP... series module.
– The supported EXP modules can be grouped in the following categories:
• communication modules
• digital I/O modules
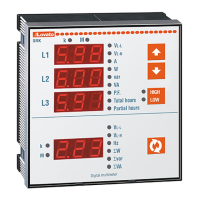
– To insert an expansion module:
• remove the power supply to DMG6....
• remove the protecting cover of the expansion slot.
• insert the upper hook of the module into the fixing hole on the top of the expansion slot.
• rotate down the module body, inserting the connector on the bus.
• push until the bottom clip snaps into its housing.
INTRODUZIONE
I multimetri trifase DMG6... sono stati progettati per unire la massima semplicità di utilizzo con una
ampia scelta di funzioni avanzate. In esecuzione per montaggio a pannello con dimensioni standard
96x96mm, uniscono il moderno design del frontale alla praticità di montaggio e alla possibilità di
espansione sul retro, dove è possibile alloggiare un modulo della serie EXP.... Il frontale è dotato della
interfaccia ottica a infrarossi che consente la programmazione tramite USB o WiFi.
Il display retroilluminato LCD consente una interfaccia utente chiara ed intuitiva. DMG6... è inoltre dotato
di una interfaccia di comunicazione RS-485 isolata con protocollo Modbus per consentirne la
supervisione.
FUNZIONE DEI TASTI FRONTALI
Tasto MENU – Serve per entrare o uscire dai vari menu sia di visualizzazione che di impostazione.
Tasti
L
e
M
– Servono per lo scorrimento fra le pagine video, per la selezione fra le possibili scelte
presentate a display e per la modifica di impostazioni (incremento/decremento).
Tasto – Serve per lo scorrimento delle sotto-pagine, per confermare una scelta effettuata e per
passare da una modalità all’ altra di visualizzazione.
ESPANDIBILITÀ
– Grazie al suo bus di espansione, il DMG6... può essere espanso con un modulo aggiuntivo della serie
EXP….
– I moduli EXP... supportati dal DMG6... si dividono nelle seguenti categorie:
• moduli di comunicazione
• moduli di I/O digitale
– Per inserire un modulo di espansione:
• togliere l’alimentazione al DMG6....
• rimuovere il coperchio protettivo dello slot di espansione.
• inserire il gancio superiore del modulo nella apposita feritoia in alto nello slot .
• ruotare il modulo verso il basso inserendo il connettore sul bus.
• premere fino a che l’apposita clip sul lato inferiore del modulo si aggancia a scatto.
– When the DMG6... is powered on, it automatically recognises the EXP module that have been
mounted.
– The expansion modules provide additional resources that can be used through the dedicated setup
menus.
– The setup menus related to the expansions are always accessible, even if the expansion modules are
not physically fitted.
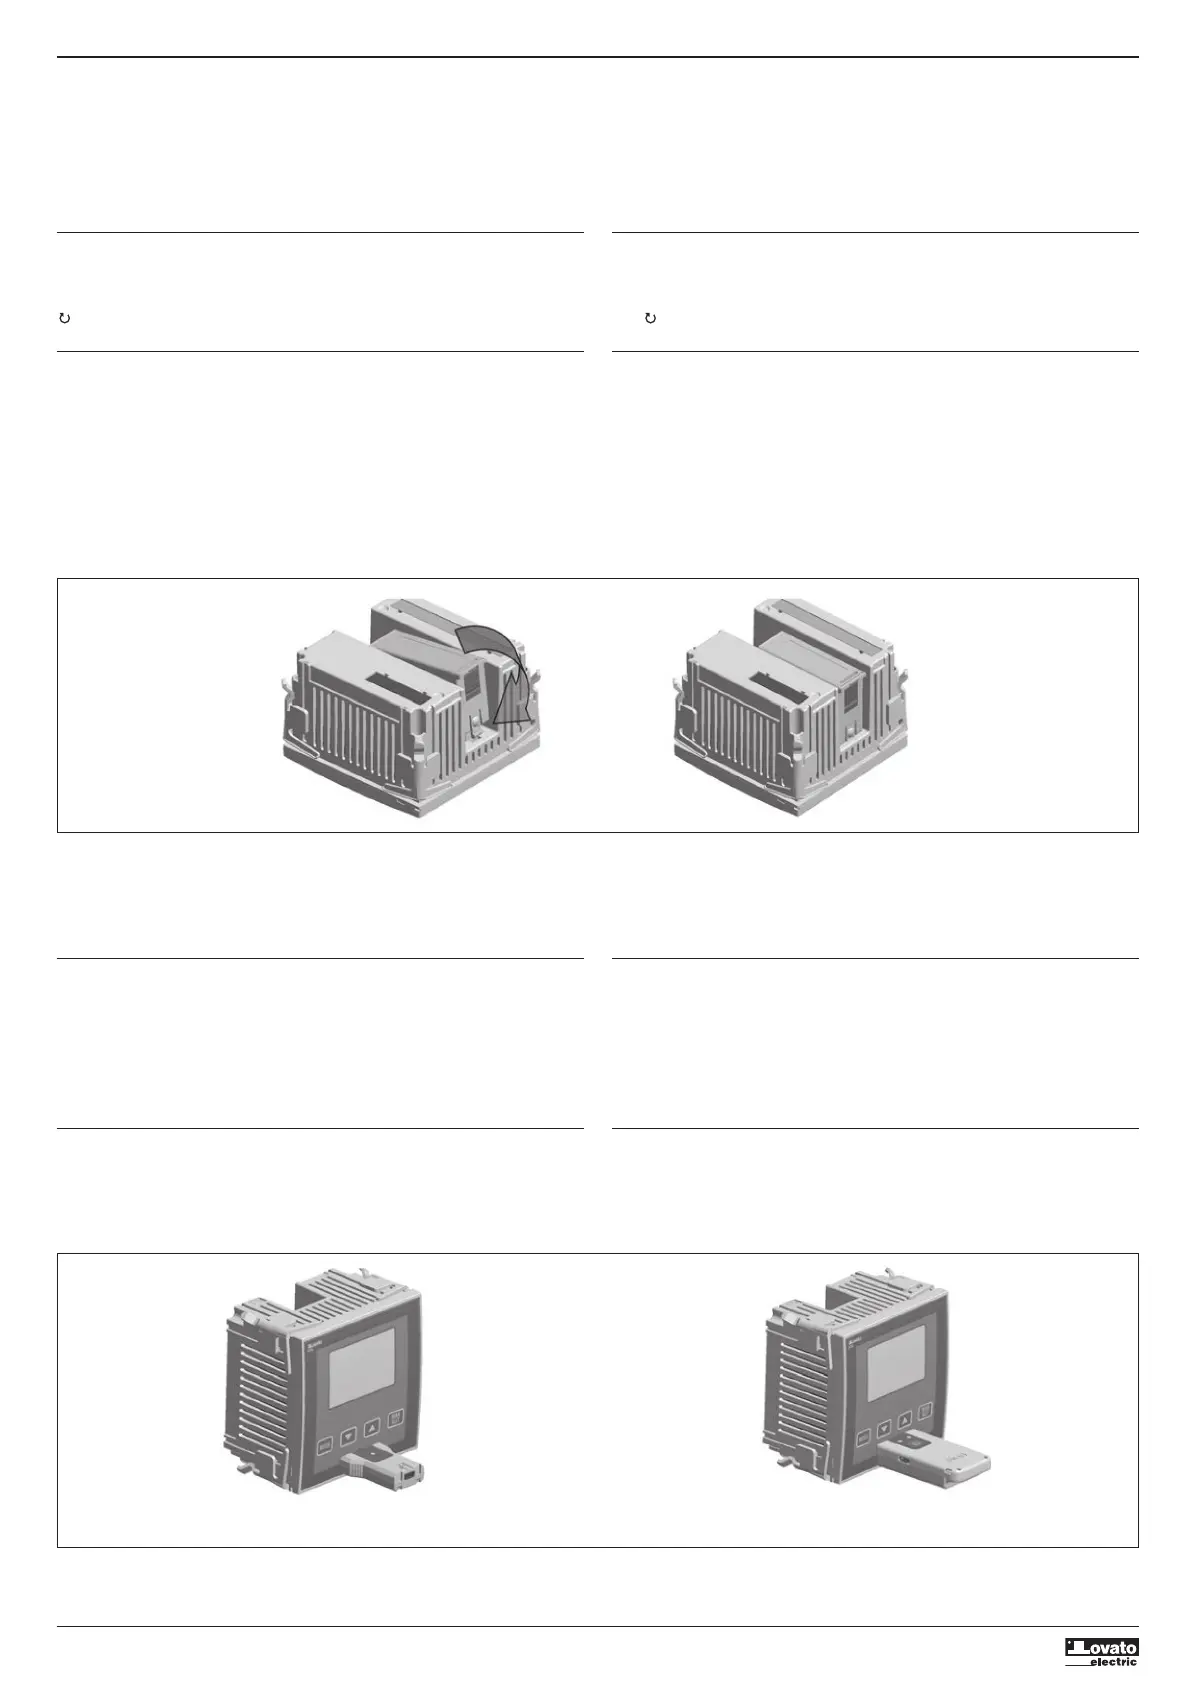
IR PROGRAMMING PORT
– The parameters of the DMG6... can be configured through the front optical port, using the IR-USB
code CX01 programming dongle, or with the IR-WiFi code CX02 dongle.
– This programming port allows to configure and service the DMG6... without the need to access to the
rear of the device thus having to open the electrical panel.
– Simply hold the CX... dongle up to the front panel, connecting the plugs to the relevant connectors,
and the device will be acknowledged as shown by the LINK LED on the programming dongle flashing
green.
PARAMETER SETTING WITH PC, TABLET OR SMARTPHONE
– PC: You can use the DMK-DMG Remote control software to transfer (previously programmed) setup
parameters from the DMG6... to the hard drive of the PC and vice versa.
– Tablet/Smartphone: Using the dedicated application Lovato Electric Sam1, available for Android and
iOS operative systems together with the CX02 dongle it is possible to program the parameters in a
very easy and innovative way.
– Quando un DMG6... viene alimentato, riconosce automaticamente il modulo EXP ad esso collegato.
– I moduli di espansione forniscono delle risorse aggiuntive che possono essere sfruttate tramite gli
opportuni menu di impostazione.
– I menu di impostazione che riguardano le espansioni sono disponibili anche se i moduli non sono
fisicamente presenti.
PORTA DI PROGRAMMAZIONE IR
– La configurazione dei parametri del DMG6... si può effettuare tramite la porta ottica frontale,
attraverso la chiavetta di programmazione IR-USB codice CX01 oppure la chiavetta IR-WiFi codice
CX02.
– Questa porta di programmazione consente di effettuare la configurazione e la manutenzione del
DMG6... senza la necessità di accedere al retro dell’apparecchio e quindi di aprire il quadro elettrico.
– Semplicemente avvicinando una chiavetta CX... alla porta frontale ed inserendo le spine negli appositi
fori, si otterrà il vicendevole riconoscimento dei dispositivi evidenziato dal colore verde del LED LINK
sulla chiavetta di programmazione.
IMPOSTAZIONE PARAMETRI DA PC, TABLET O SMARTPHONE
– PC: Mediante il software DMK-DMG Remote control è possibile effettuare il trasferimento dei
parametri di setup (precedentemente impostati) da DMG6... al disco del PC e viceversa.
– Tablet/Smartphone: Utilizzando l’apposita App Lovato Electric Sam1, disponibile per sistemi operativi
Android ed iOS in abbinamento ai dongle WiFi CX02 è possibile effettuare la programmazione dei
parametri in modo molto semplice ed innovativo.
click
USB programming dongle code CX01
Adattatore di programmazione USB cod. CX01
WiFi programming dongle code CX02
Adattatore di programmazione WiFi cod. CX02
 Loading...