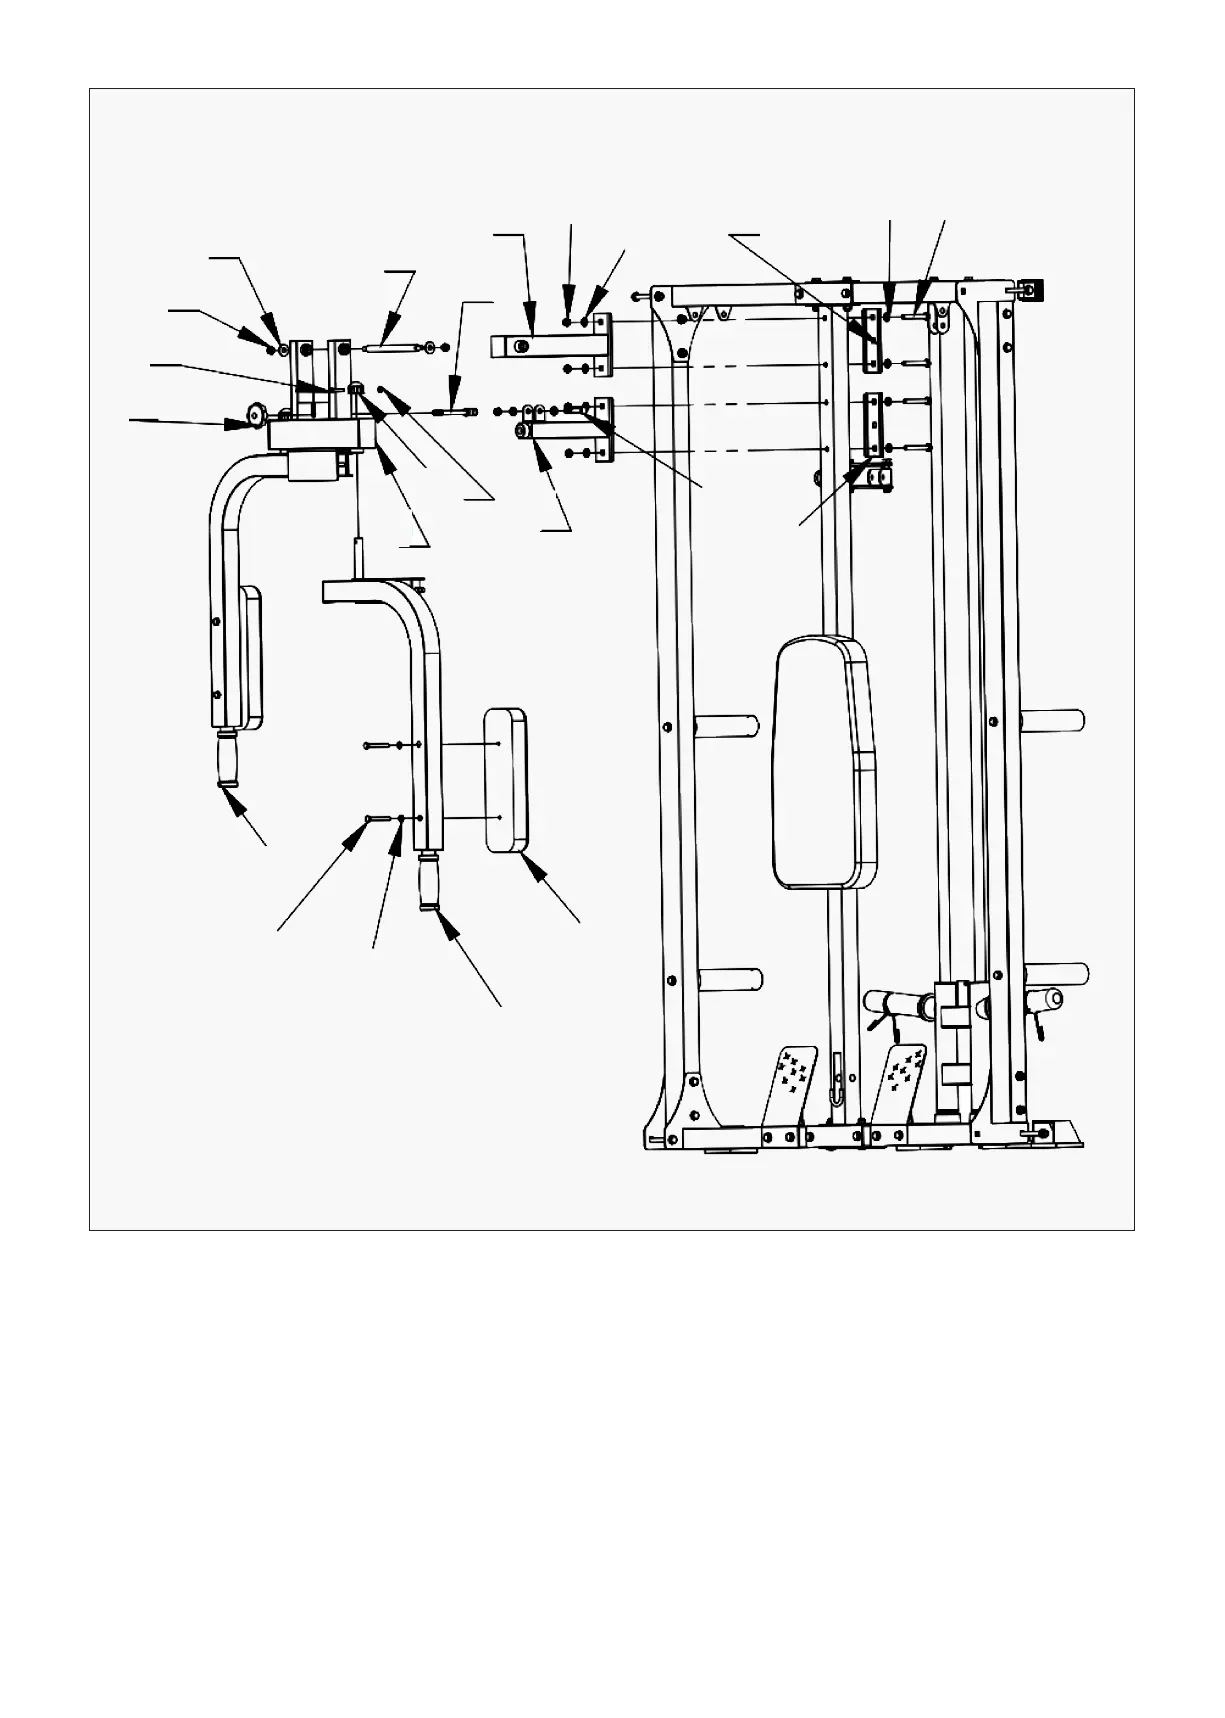
15ASSEMBLY INSTRUCTIONS |
STEP 8
1. Place (#28) and (#29) in the front of (#10) and (#61) (at the back of #10) and secure with bolts (#93),
flat pads (#99), nuts (#100).
2. Place (#30) on both sides of (#28) as shown and feed through (#72) into the hole, then tighten with
flat spacer (#101) and nut (#100).
3. Place (#60) to the inside of (#29) as shown and tighten through (#72) with bolts (#97), flat spacers
(#99) and nuts (#100). Then screw on (#74).
4. Insert (#31) into (#30) as shown in the figure, cover (#73) and fasten with bolts (#106) and nuts (#107).
5. Then use bolts (#98) and flat washers (#102) to secure (#67) on (#31).
6. Repeat on the other side.
101
100
106
74
72
60
28
100
99
61
99 93
97
61
29
107
73
30
32
98
102
31
67