Installation Instructions
3 | Page
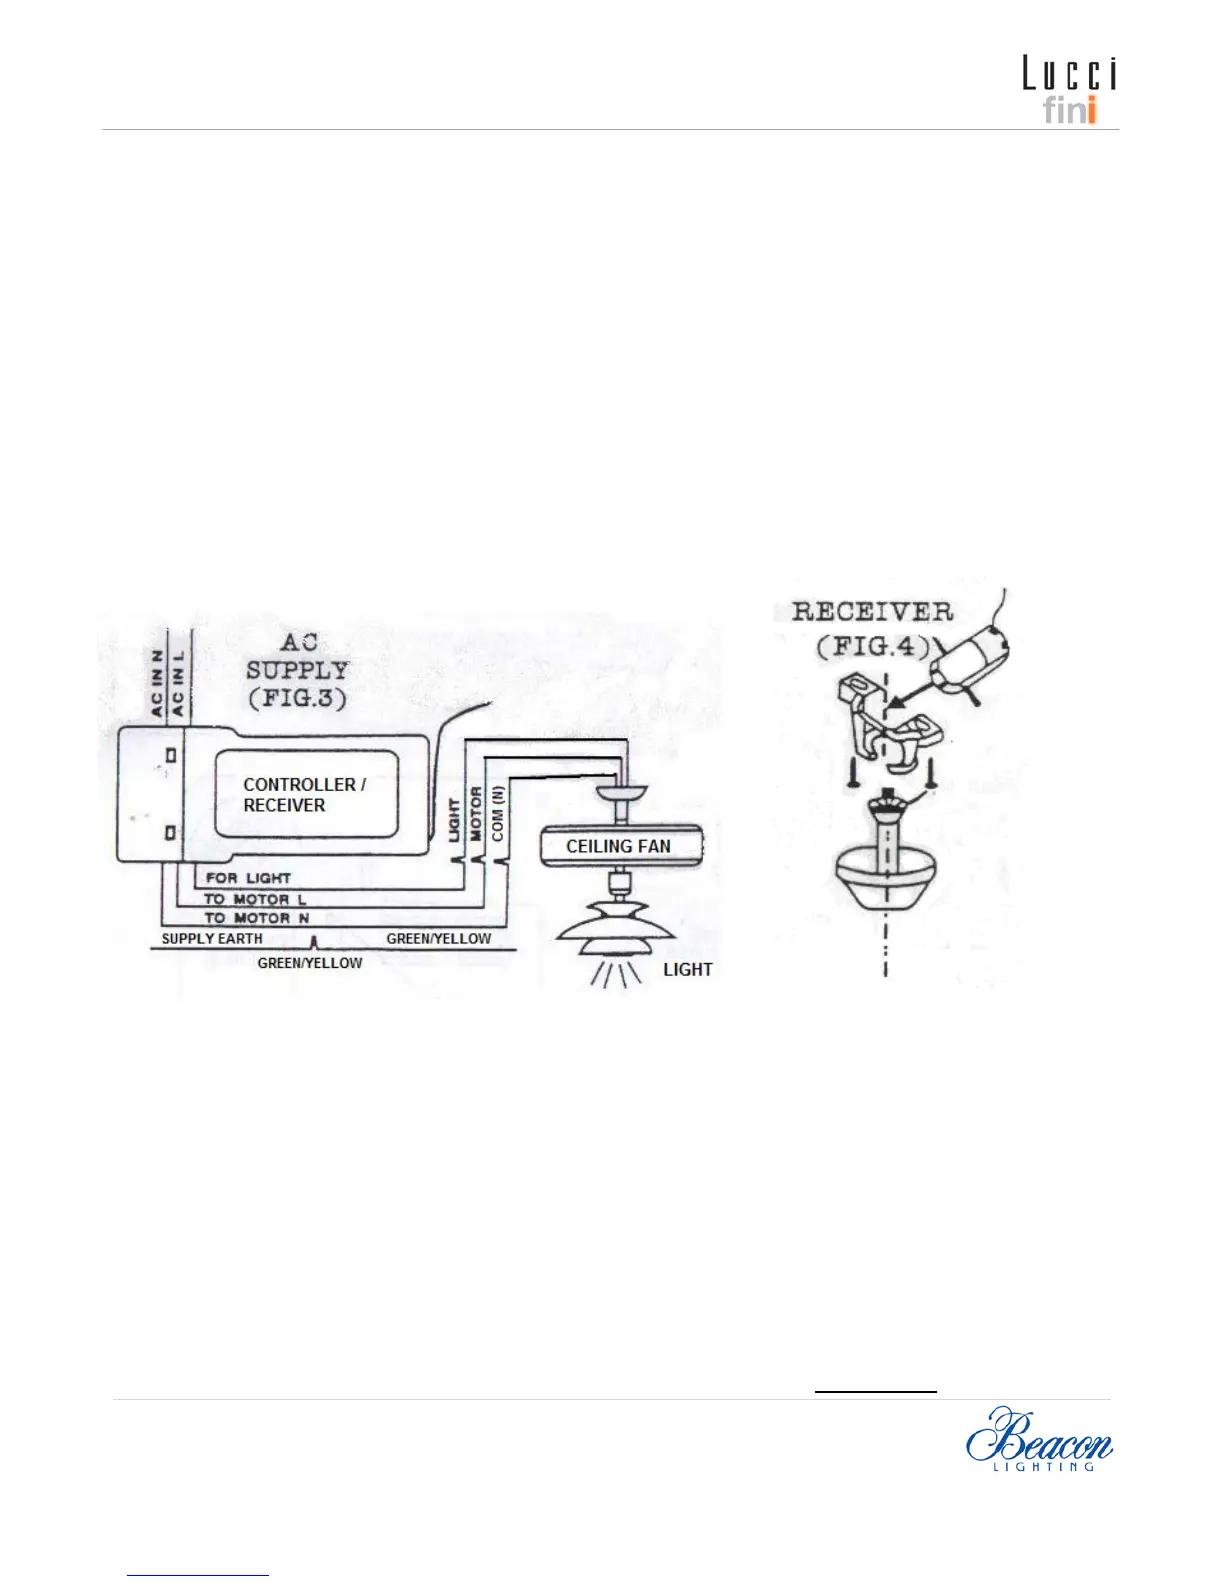
1. Remove/ disconnect electrical power from the working circuit.
2. Remove the ceiling fan CANOPY cover from the mounting bracket.
Disconnect existing wiring from the supply at ceiling.
3. Connect the earth (GREEN/YELLOW) wire to the supply EARTH wire, and ensure continuity for the whole
electrical earth wiring.
4. Connect AC IN L of control unit to AC L supply wire.
5. Connect AC IN N of control unit to AC N supply wire.
6. Connect TO MOTOR N of control unit wire to the MOTOR (N) fan wire.
7. Connect TO MOTOR L of control unit wire to the MOTOR (L) fan wire.
8. Connect FOR LIGHT of control unit wire to the LIGHT fan wire.
9. Push the connected wires up into the junction box.
10. Lay the control unit wire on top of the control unit.
11. Lay the control unit in the CANOPY. (See Fig. 4).
12. Reinstall the canopy on the mounting bracket.
13. Restore electrical power to the circuit.
Fig.3 Fig. 4
NOTE: Fan installation must be complete including assembly of blades before operating the remote controller.
NOTE: This remote/controller is only suitable where the controller/receiver can be inserted inside the canopy
cover safely and securely. Ceiling fan with mount bracket type shown in Fig. 4 would be suitable.
NOTE: The controller wiring circuit must NOT be shared with any electrical equipment that is sensitive to
voltage fluctuation, such as flooding with infrared sensor.
DO NOT use the wiring of the controller, other than for the purpose supplying power into the controller, and
connections to the equipment that is under control. Any outside wiring connections which is not part of the
controller/controlled circuit may affect the operation of the controller, and will void warranty.
 Loading...