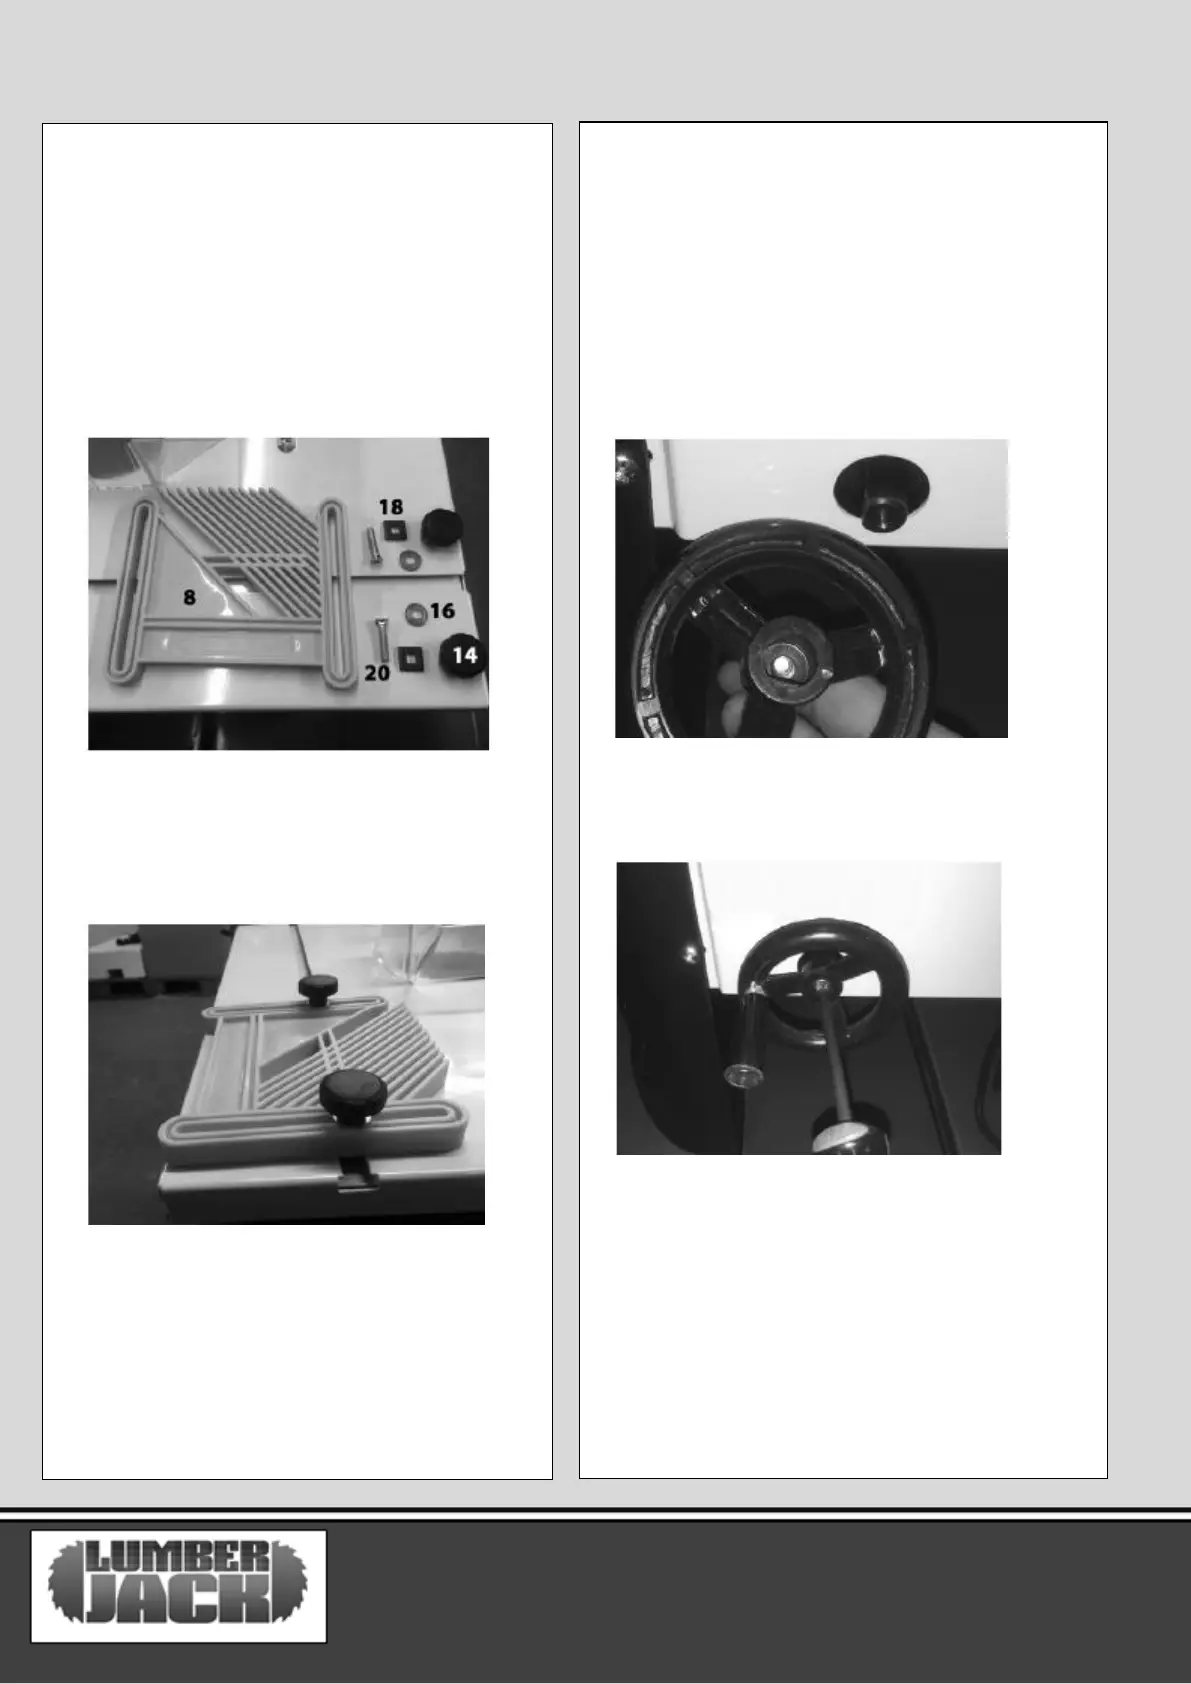
Front Feather‐board (8) Assembly
– Attach the front feather‐board (8) using 2 x
square washers (18), 2 x Flat feather‐board
screws (20), 2 x large washers (16) and 2 x
knob nuts (14). To do this thread the flat
feather‐board screw (20) with a square washer
(18), then thread this through the feather‐
board (8). Next thread on a large washer (16),
and finally loosely thread on knob nut (14).
– Complete this for both sides of the feather‐
board (8). This will then thread neatly through
the trench in the table top giving the following
result, and a free flowing feather‐board (8).
Router Rise and Fall Handle (6)
Assembly
– Unscrew the screw for the handle aperture
– Align the Handle (6) with the aperture
Be aware this has a semi‐circular design and
will only fit on in one way. As such please do not
try to force on the handle 6 as it may damage
the tool.
– Once pushed on using screwdriver to tighten
the screw back up.
Stationary or Flexible Mounting
To ensure safe handling, the machine
must be mounted on a level and stable
surface (e. g., workbench) prior to using.