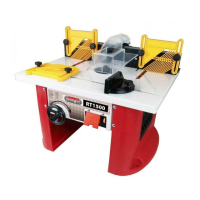
The Lumberjack RT1500 is a benchtop router table with an integrated router, designed for stationary use in cutting wood or wood-based materials when fitted with a suitable cutter. It is not intended for continuous production or production line use.
Technical Specifications:
- Mains Voltage: 230V/50Hz
- Power Consumption: 1500W
- Min Speed: 8000rpm
- Max Speed: 26000rpm
- Max Cutting Depth: 38mm
- Max Cutter Raise: 40mm
- Table Size: 597x457mm
- Table Height: 355mm
- Gross Weight: 23.0kg
- Nett Weight: 19.6kg
Package Contents:
The RT1500 comes with the router table itself, a mitre gauge, a guide fence, three feather boards, a tool wrench, two collets (1/2" and 1/4"), and two leg storage boxes.
Product Features:
The router table includes several key features for operation and safety:
- Extractor Hood: For dust and chip collection.
- Back Guide Fence: Helps guide the workpiece for accurate cuts.
- Mitre Gauge: For angled cuts.
- Variable Speed Control: Allows adjustment of the router speed from 8000rpm to 26000rpm.
- On/Off Switch: For powering the unit.
- Height Adjustment Handle: To control the router bit height.
- Collets (x2): For securing different sized router bits.
- Feather-board: Provides pressure against the workpiece for stability and safety.
- Fence Base: The foundation for the guide fence.
- Hood Screw: Fastens the extractor hood.
- Hood Nut: Secures the extractor hood.
- Support Blocks: Provide additional support for the fence.
- Block Screw: Attaches support blocks.
- Knob Nut: Used for various adjustments and securing components.
- Feather-board Screw: Attaches feather boards.
- Large Washer: Used with screws and nuts.
- Small Washer: Used with screws and nuts.
- Square Washer: Used with feather-board screws.
- Back Guide Fence Screw: Attaches the back guide fence.
- Flat Feather-board Screw: Used for front feather-board assembly.
- Spindle Lock: Engages the mechanism for collet installation/removal.
- Tool Wrench: For tightening and untightening collets.
Assembly:
Before assembly, ensure the power plug is disconnected from the mains supply. All parts should be carefully removed from packaging and checked against the parts list. Any damaged parts must be replaced by an authorized service center.
- Back Guide Fence Assembly: The extractor hood (1) aligns with the center square hole of the fence base (9) and is secured with two hood screws (10), two small washers (17), and two hood nuts (11). Support blocks (12) are attached to each side of the hood using two block screws (13), two large washers (16), and two knob nuts (14). The bevelled edge of each block should be next to the hood. The block screws fit through slotted holes in the support block and circular holes in the fence base, with knob nuts at the back of the fence base. The built-in back fence guide (2) attaches to the table top with two back guide fence screws (19), two large washers (16), and two knob nuts (14). The screws must be inserted from underneath through the slotted hole on the table.
- Feather-board Assembly: Feather-boards (8) are attached to each side using two feather-board screws (15), two knob nuts (14), and two large washers (16). These attach to the back guide fence (2) through slotted holes in the fence base (9) and circular holes in the back support (12), with knob nuts (14) at the front of the feather-boards.
- Front Feather-board Assembly: The front feather-board (8) is attached using two square washers (18), two flat feather-board screws (20), two large washers (16), and two knob nuts (14). The flat feather-board screw (20) threads through a square washer (18), then through the feather-board (8), followed by a large washer (16), and finally a loosely threaded knob nut (14). This process is repeated for both sides, allowing the feather-board to thread through the table top trench.
- Router Rise and Fall Handle Assembly: Unscrew the handle aperture screw. Align the handle (6) with the aperture, noting its semi-circular design for correct fitment. Do not force the handle. Once pushed on, tighten the screw.
Stationary or Flexible Mounting:
For safe handling, the machine must be mounted on a level and stable surface (e.g., workbench) prior to use. The power tool can be fastened with suitable screw fasteners through its mounting holes or clamped by its feet with commercially available screw clamps.
Connect a suitable extractor (internal diameter 70mm) to the extractor hood (1). The extractor must be appropriate for the material being worked. For dry, health-detrimental, or carcinogenic dust, a special dust extractor is required.
Operation:
Always ensure the On/off switch (5) is in the off position and the tool is unplugged before making any adjustments.
- Installing and Removing the Collet (7): Turn the router rise and fall handle (6) to set the collet to its maximum height. Pull the spindle lock (21) to engage the mechanism. Use the tool wrench (22) to untighten the collet (7) in an anti-clockwise direction. This typically requires two hands: one to engage the spindle lock and one to untighten the collet. Place the new collet (7) onto the spindle and finger-tighten it with the router bit inserted. Engage the spindle lock (21) and tighten the collet (7) with the tool wrench (22) in a clockwise direction.
- Adjusting the Router Speed: Adjust the variable speed control dial (4). Setting 1 is the slowest (approx. 8000rpm no-load speed), and setting 6 is the highest (26000rpm no-load speed). Do not adjust the speed while the router is in use or turned on; turn it off and allow it to stop completely first. Using the correct speed for each job increases router bit life and affects the surface finish. A trial cut on a scrap piece is recommended to determine the correct speed.
- Operating the Router Table: To turn on, lift the safety cover and press the green button. To turn off, lift the safety cover and press the red button. After inserting and securing the desired collet (7) and router bit, make all necessary adjustments to the router table, feather-boards (8), and back guide fence (2). Ensure the on/off switch (5) is off, then plug the machine into an outlet. Push the on switch. Feed the workpiece gradually from right to left against the rotation of the cutter, maintaining a constant feed rate. Feeding too slowly can cause burning, while feeding too quickly can slow the motor and result in an uneven cut. Harder wood may require multiple passes. Once finished, push the off switch, allow the machine to stop, and unplug it.
Safety Warnings:
- Read all safety warnings and instructions to avoid electric shock, fire, or serious injury.
- Keep the work area clean, well-lit, and free of flammable materials.
- Keep children and bystanders away.
- Ensure power tool plugs match outlets and avoid body contact with grounded surfaces.
- Do not expose power tools to rain or wet conditions.
- Use an RCD protected supply in damp locations.
- Do not abuse the power cord.
- Stay alert, use common sense, and do not operate while tired or under the influence.
- Always wear eye protection, dust mask, non-skid safety shoes, hard hat, or hearing protection.
- Prevent unintentional starting by ensuring the switch is off before connecting to power.
- Remove adjusting keys or wrenches before turning on the power tool.
- Maintain proper footing and balance.
- Dress properly; avoid loose clothing, jewelry, and long hair near moving parts.
- Use dust extraction facilities.
- Do not force the power tool.
- Do not use if the switch does not turn it on and off.
- Disconnect power before making adjustments, changing accessories, or storing.
- Store idle power tools out of reach of children and untrained users.
- Check for misalignment, binding, breakage, or other conditions affecting operation.
- Keep cutting tools sharp and clean.
- Use the power tool, accessories, and tool bits according to instructions and working conditions.
- Have the power tool serviced by a qualified repair person using identical replacement parts.
- If the supply cord needs replacement, it must be done by the manufacturer or agent.
- Dust from materials like lead-containing coatings, certain wood types, minerals, and metals can be harmful. Observe local regulations.
- Prevent dust accumulation to avoid ignition.
- Fully assemble and tighten all fasteners before use.
- Use correct table rings for the cutter block size.
- Ensure the router is unplugged when installing, removing, or adjusting bits.
- Plug the router motor power cord into the router table switch, not a standard wall outlet.
- Ensure the unit is placed on a solid, flat, level surface and will not tip. Use auxiliary in-feed and out-feed supports for long or wide workpieces.
- Securely clamp the router motor in the router base.
- Do not use the router table without the overhead guard or auxiliary bit guard. Adjust guard height to clear the bit and workpiece.
- Never place fingers near a spinning bit or under the guard when plugged in.
- Never hold the workpiece on the out-feed side of the bit.
- Guide the workpiece by the fence; do not place material between the router bit and fence while routing the edge.
- Routers are for wood, wood-like products, plastic, or laminates, not metals.
- Do not use bits with a cutting diameter exceeding the clearance hole in the table top insert.
- Install bits securely in the collet chuck.
- Never use dull or damaged bits.
- Cut flat, straight, and squared materials. If slightly curved, cut with the concave side against the table or fence.
- Never start the tool when the bit is engaged in the material.
- Feed the workpiece against the rotation of the bit (anticlockwise from top).
- Use push sticks, feather-boards, and jigs to hold down the workpiece.
- Use piloted bits with the starter pin and auxiliary bit guard when shaping contours.
- Do not use the table as a workbench or scaffolding.
- Avoid using multiple extension leads. Unwind cable reels completely before use.
Maintenance and Service:
- Always ensure the on/off switch (5) is off and the machine is unplugged before any inspection, adjustments, maintenance, or cleaning.
- Before each use: Inspect the machine for loose screws, misalignment or binding of moving parts, cracked or broken parts, damaged electrical wiring, loose router bit, or any other condition affecting safe operation. Correct any abnormal noise or vibration before further use.
- Each day: Remove all sawdust and debris from the router table with a soft brush, cloth, or vacuum, paying particular attention to the extraction hood (1) and the main table. Lubricate all moving parts with premium lightweight machine oil.
- Do not use solvents or caustic agents to clean the router table.