40
Table lock knob
Tab
le support
Washer
Sanding plate
Disc guard
Wor
k table
Sunk head screw M6x16
Wing nut
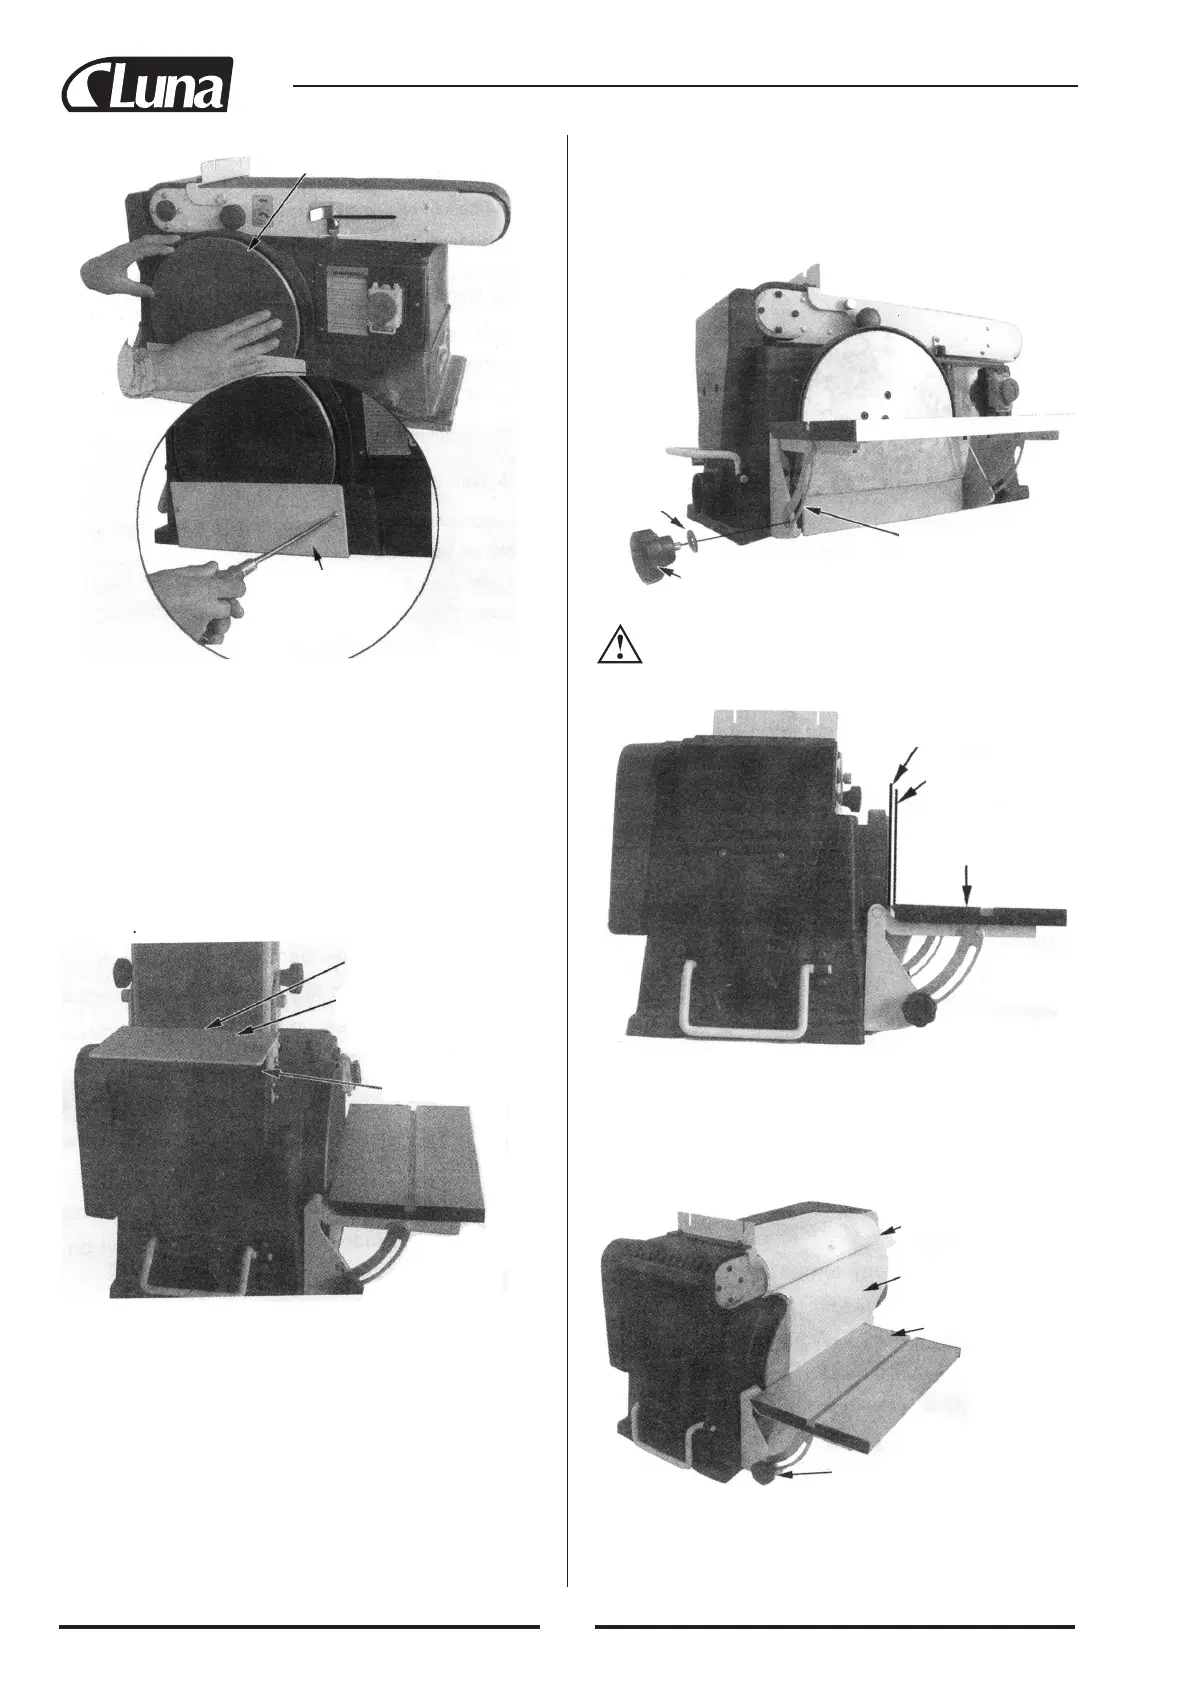
Installing sander disc and guard
1. Locate sanding disc and peel backing from disc. Align perime-
ter of disc with plate and press disc firmly into position all the
way around.
2.
Locate disc guard and two pan head screws M4x40, from loose
parts bag.
3. Position disc guard against lower 1/3 disc aligning holes as
shown.
4. Using Phillips type screwdriver, fasten the pan head screw secu-
rely applying slight pressure to thread the holes.
Installing work table
1. Place the work table for belt on the work support.
2.
Insert 2-sunk head screw through work table and the work sup-
port slot.
3. Put a 6 mm washer and a wing nut on the screw and tighten.
Install table
1. Use 2-M6x16 pan head screw fastening a table support mount
on the front of sander.
2. Place the support table w/scale onto the table support mount.
3. Put a 6 mm flat washer on the table lock knob, and place the
knob into the tilt scale plate and mount. Hand tight it.
4.
Place the table onto support table, align the 4-screw which pre-
assembled under the table with the holes of table support.
5.
Put the external lock washer and hex nut onto the screws, and
tighten them.
6. Adjust the table and retighten the table lock knobs.
W
ARNING! T
o avoid trapping the work or fingers betwe-
en the table and sanding surface, the table edge should be a
maximum of 2 mm from sanding surface.
Tab
le lock knob
Owner’s man
ual
Wor
k table
10 page
Sanding surface
2 mm max.
Ta
b
le
7. Loosen 4-M6 hex nuts under the table.
8.
Use your owner’s manual as a spacer. Place ten pages of
owner’s manual between the disc and the front edge of the
table. Hold the table against the manual and tighten the 4-M6
hex nuts.