Application Note #480
7 Technical Support — 800.523.9466
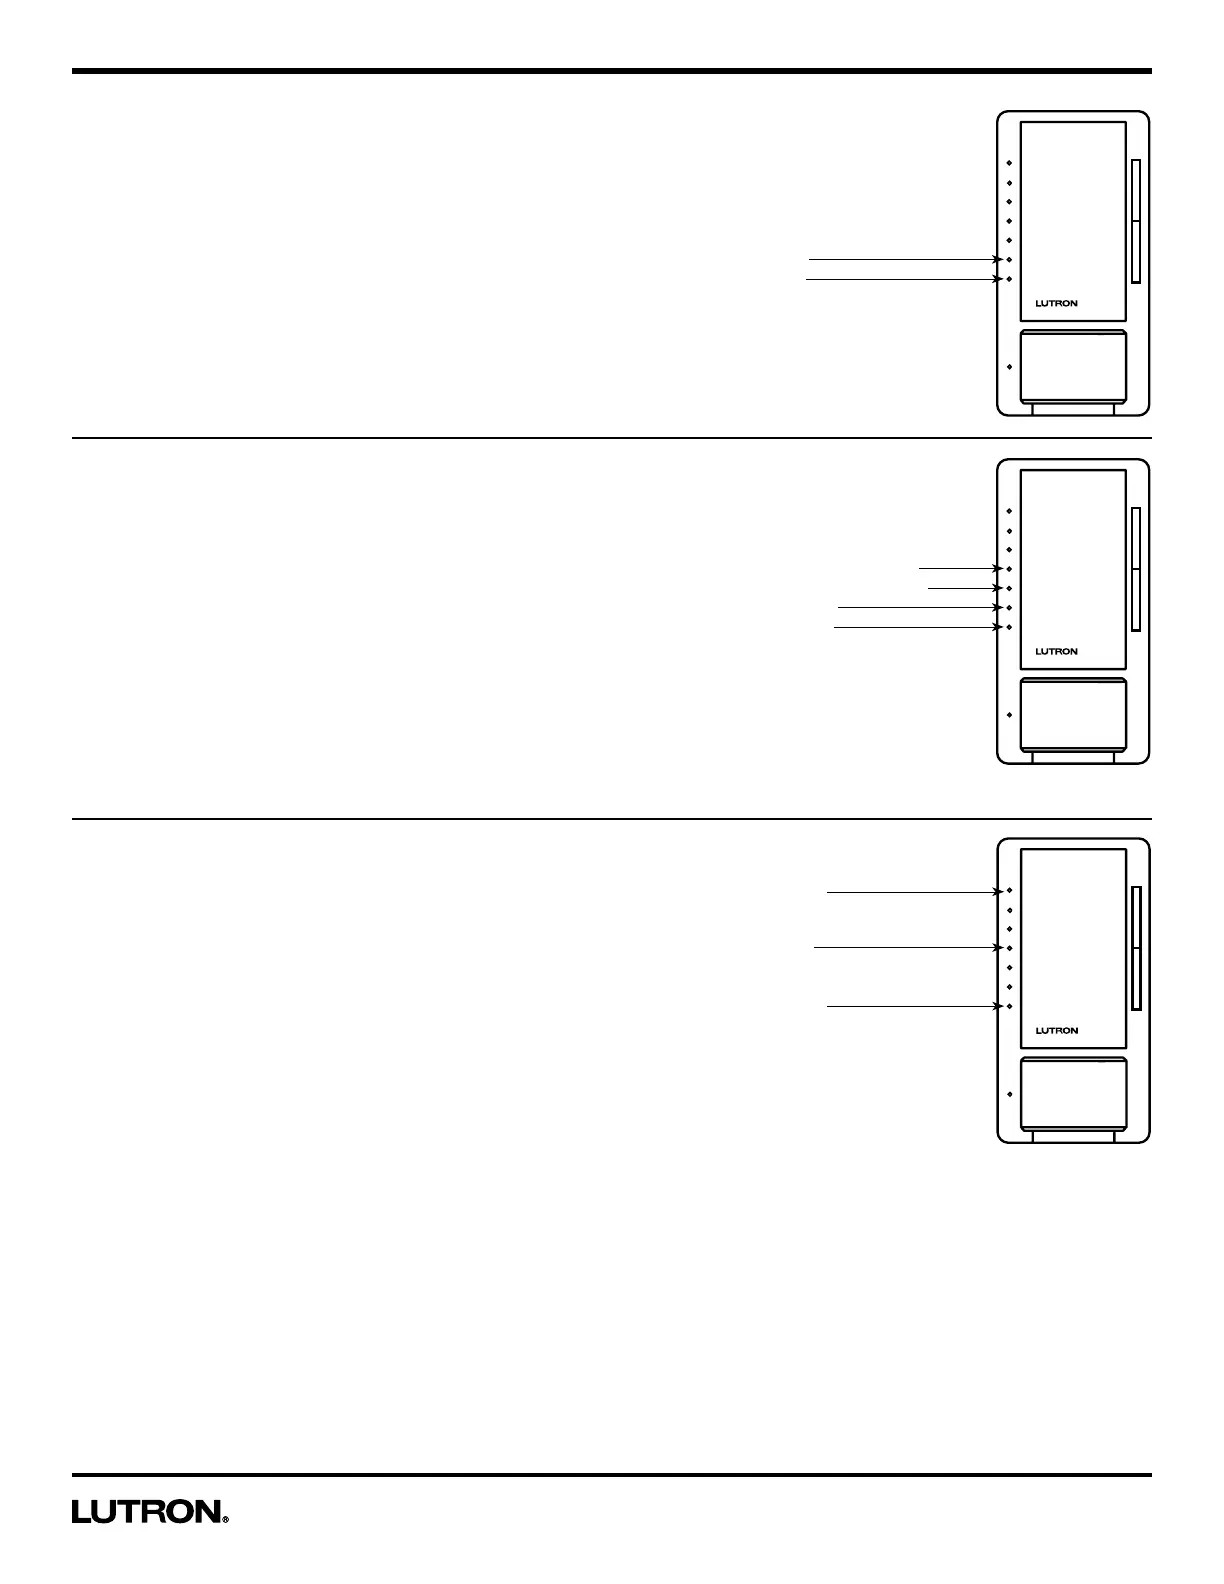
Selecting the Sensitivity
Once you've selected "Sensitivity" from the main sensor
programming menu (page 6), proceed with the following steps.
In the Sensitivity Menu
1. Press the raise/lower rocker to move the blinking LED to
desired sensitivity.
2. Press the Tap button one time to select the sensitivity level
and return to the main sensor menu.
Note: The default setting is High Sensitivity.
To exit programming mode, press and hold the Tap button for
5 seconds. Alternatively wait 1 minute or pull the FASSTM out and
the dimmer will exit from programming mode.
Selecting an Auto-On setting
(Occupancy Version Only)
Once you've selected "Auto-On" from the main sensor
programming menu (page 6), proceed with the following steps.
In the Auto-On Menu
1. Press the raise/lower rocker to move the blinking LED to
desired auto-on setting.
2. Press the Tap button one time to select the auto-on setting
and return to the main sensor menu.
Note: The default setting is Auto-On Enabled.
To exit Programming Mode, press and hold the Tap button for
5 seconds. Alternatively wait 1 minute or pull the FASSTM out and
the dimmer will exit from programming mode.
Selecting an Occupied Level
Once you've selected "Occupied Level" from the main sensor
programming menu (page 6), proceed with the following steps.
In the Occupied Level Menu
1. Press the raise/lower rocker to move the blinking LED to
desired Occupied Level.
2. Press the Tap button one time to set the Occupied Level and
return to the main sensor menu.
Note: The default setting is 100%.
To exit programming mode, press and hold the Tap button for
5 seconds. Alternatively wait 1 minute or pull the FASSTM out and
the dimmer will exit from programming mode.
Sensitivity Menu
LED 2: High
LED 1: Low
Auto-On Menu
LED 4: Off While Occupied
LED 3: Ambient Light Detect
LED 2: Disabled
LED 1: Enabled
Occupied Level
LED 7: 100%
LED 4: 50%
LED 1: Preset