© 2016 Lytx, Inc. – Confidential & Proprietary 15
Attach the Bracket to the Windshield
Make sure the glass is clean and dry and the air temperature is at least 50F
(10C).
Remove the backing from the adhesive side of the bracket.
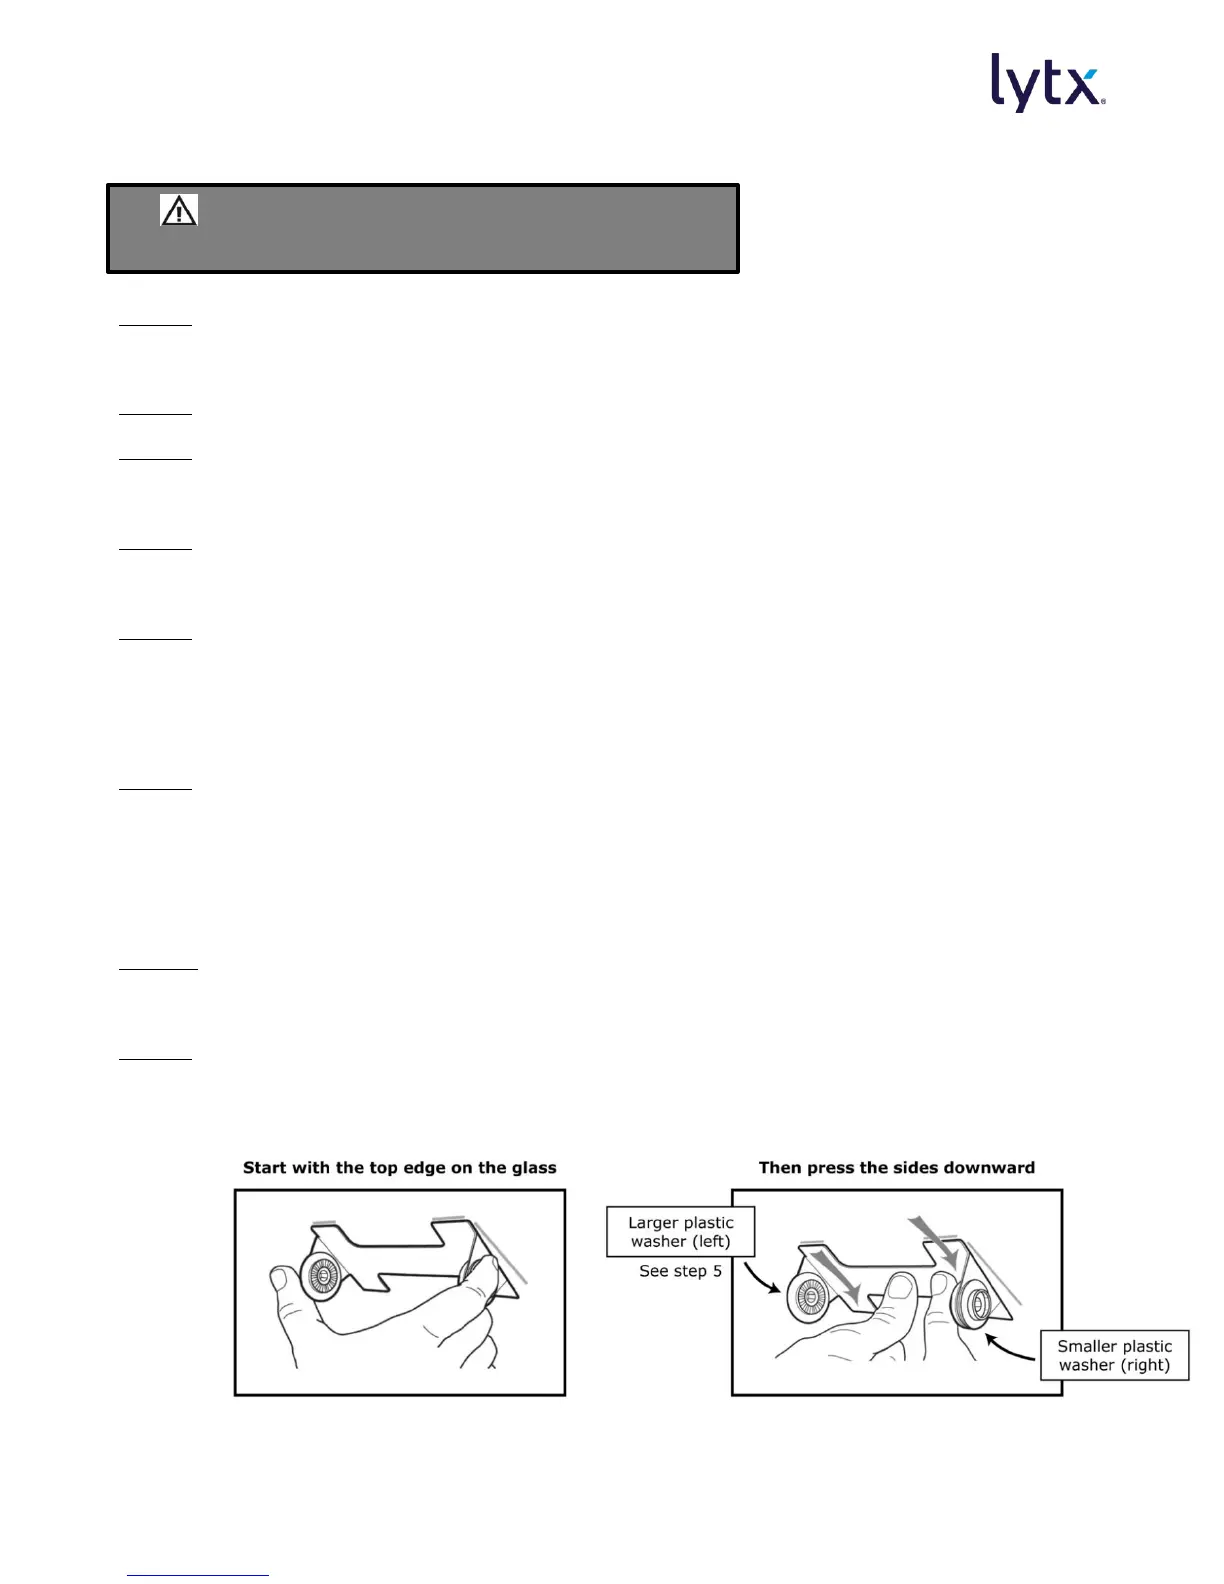
Make sure the large plastic washer is on the left side of the bracket (see image
below or next page).
Start by placing the top edge of the bracket against the windshield, aligned
with the marks, and make sure it is level.
Press the bracket firmly against the windshield starting at the top and pressing
the sides downward.
CAUTION: Do not apply excessive pressure as it may cause the windshield to
break.
Check from outside the vehicle to make sure there are no large air bubbles
under the bracket.
Note: You may need to (carefully) apply additional pressure to the bracket and
remove any large air bubbles. Use a small pin to create an escape path for the
air if the problem is persistent.
After 5 minutes of adherence, the event recorder can be attached to the base
of the bracket.
Secure the event recorder in the bracket using the two Torx screws and Torx
wrench (provided).
Mount the Event Recorder in the Bracket
CAUTION: The adhesive is very sticky. Once
applied to the windshield, it cannot easily be removed.