4
Setup
Driver Installation
IMPORTANT!: Before connecting M-Track Quad to your computer, install the drivers:
1. Go to m-audio.com/drivers and download the latest M-Track Quad driver for your operating system.
2. Open the file you downloaded and double-click the driver installer file.
3. Follow the on-screen instructions to install the drivers. (You may be asked to connect M-Track Quad to
your computer during the installation process.)
Quick Setup / Connection Diagrams
• WARNING: Only put on your headphones or turn on your speakers AFTER turning on the M-Track Quad.
Also, start with all of your volume levels low before increasing them to a comfortable listening level.
• When recording a guitar or bass with an active pickup, set the M-Track Quad's Mic/Line Inst Switch to
Mic/Line. If your instrument uses a passive pickup, set the switch to Inst.
• To reduce electrical hum at high gain settings, keep the M-Track Quad's power supply away from your
guitar cable and the M-Track Quad's channel inputs.
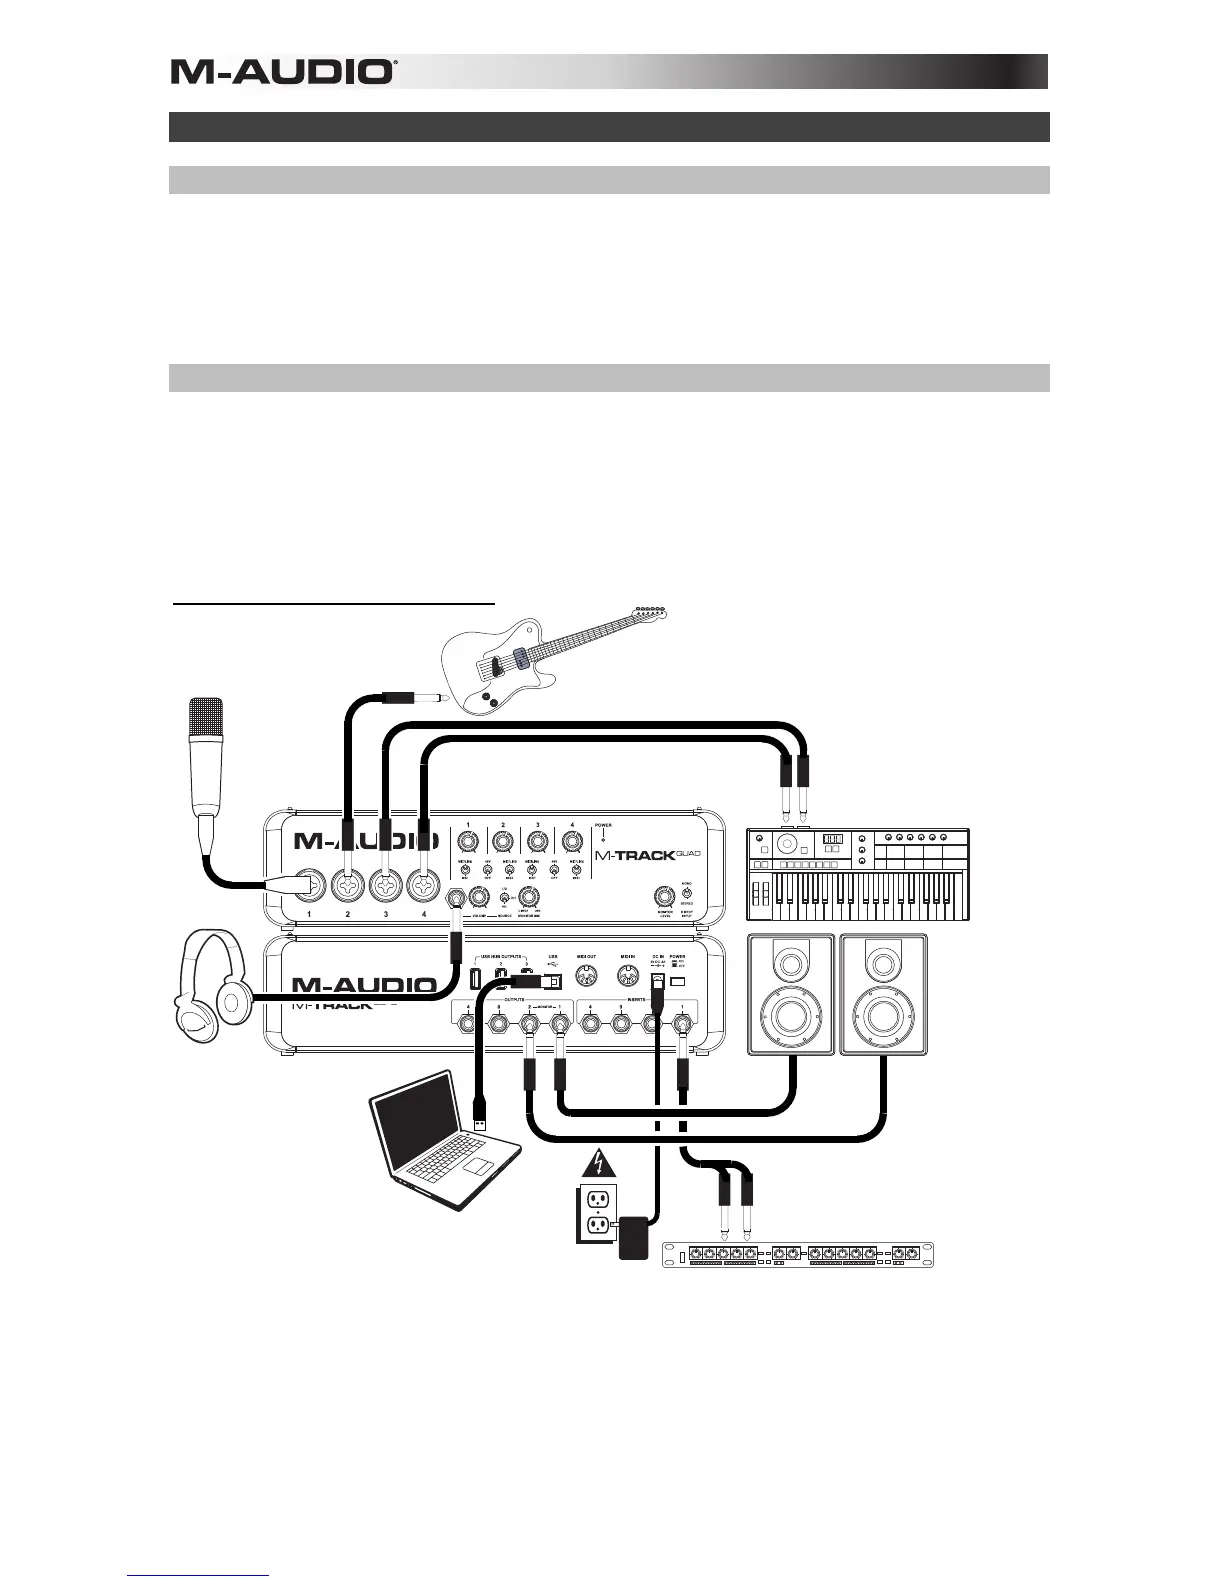
Setup Scenario 1: General usage
Headphones*
Guitar*
(Vocal)
Microphone*
Keyboard
synthesizer*
Monitors*
Powe
Use this setup to record in your home studio. Connect your computer to the rear panel USB port, and remember to select M-
Track Quad as your computer's default device for recording and playback (see the following Audio Setup section for more
information). Connect your microphone to Channel 1 and activate the phantom power switch for Channels 1 and 2. Connect
other instruments to Channels 2-4. (If you are recording any instruments with left and right channels, make sure you use
either Channels 1 and 2 or Channels 3 and 4. For microphones and keyboards, set the channel's Mic/Line/Inst Switch to
Mic/Line. For guitars and basses, set it to Inst. Connect your monitors to the rear panel Audio Outputs 1 and 2 and you
 Loading...