9
ENGLISH
free, the tool will cease to impact and will reduce speed to help
prevent “run-off” of loose hardware.
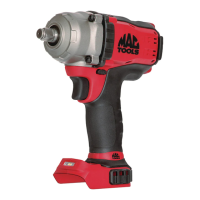
MCF894
Low Mode Low Speed Impacting RPM 0–900
High Mode High Speed Impacting RPM 0–2000
Impact Assist™ Mode Impact Assist™ RPM 0–2000
Anvils (Fig. A, D)
WARNING: Use only impact accessories. Non-impact
accessories may break and cause a hazardous condition.
Inspect accessories prior to use to ensure that it con tains
nocracks.
CAUTION: Inspect anvils, detent pins and hog rings prior
to use. Missing or damaged items should be replaced
beforeuse.
Place the switch in the locked off (centre) position or remove
battery pack before changingaccessories.
Anvil with Hog Ring (Fig. E)
To install an accessory on the hog ring anvil, firmly push
accessory onto the anvil
3
. The hog ring
9
compresses to
allow the accessory to slide on. After accessory is installed, the
hog ring applies pressure to help provide accessoryretention.
To remove an accessory, grasp the accessory and firmly pull
itoff.
OPERATION
Instructions for Use
WARNING: Always observe the safety instructions and
applicableregulations.
WARNING: To reduce the risk of serious personal
injury, turn tool off and disconnect battery pack
before making any adjustments or removing/
installing attachments or accessories. An accidental
start-up can causeinjury.
Proper Hand Position (Fig. F)
WARNING: To reduce the risk of serious personal injury,
ALWAYS use proper hand position asshown.
WARNING: To reduce the risk of serious personal
injury, ALWAYS hold securely in anticipation of a
suddenreaction.
Proper hand position requires one hand on the main handle
4
.
Usage
Your impact tool generates the following maximum torque.
NOTE: Output fastening torque is dependent on the speed
selected, with the highest provided in the Impact Assist™ mode.
Cat # Ft.-Lbs. Nm
Low/High/
Impact Assist™
Low/High/
Impact Assist™
MCF894 0–150/0–330/0–330 200/447/447
CAUTION: Ensure fastener and/or system will withstand
the level of torque generated by the tool. Excessive torque
may cause breakage and possible personalinjury.
1. Place the accessory on the fastener head. Keep the tool
pointed straight at thefastener.
2. Press switch to start operation. Release the switch to stop
operation. Always check torque with a torque wrench, as
the fastening torque is affected by many factors including
the following:
Voltage: Low voltage, due to a nearly discharged battery,
will reduce fasteningtorque.
Accessory size: Failure to use the correct accessory size
will cause a reduction in fasteningtorque.
Bolt Size: Larger bolt diameters generally require higher
fastening torque. Fastening torque will also vary according
to length, grade, and torquecoefficient.
Bolt: Ensure that all threads are free of rust and other
debris to allow proper fasteningtorque.
Material: The type of material and surface finish of the
material will affect fasteningtorque.
Fastening Time: Longer fasten ing time results in
increased fastening torque. Using a longer fastening
time than recom mended could cause the fasteners to be
overstressed, stripped or
damaged.
MAINTENANCE
Your Mac Tools power tool has been designed to operate
over a long period of time with a minimum of maintenance.
Continuous satisfactory operation depends upon proper tool
care and regularcleaning.
WARNING: To reduce the risk of serious personal
injury, turn tool off and disconnect battery pack
before making any adjustments or removing/
installing attachments or accessories. An accidental
start-up can causeinjury.
The charger and battery pack are notserviceable.
Lubrication
Your power tool requires no additionallubrication.
Cleaning
WARNING: Blow dirt and dust out of the main housing
with dry air as often as dirt is seen collecting in and around
the air vents. Wear approved eye protection and approved
dust mask when performing thisprocedure.
WARNING: Never use solvents or other harsh chemicals
for cleaning the non-metallic parts of the tool. These
chemicals may weaken the materials used in these parts.
Use a cloth dampened only with water and mild soap.
Never let any liquid get inside the tool; never immerse any
part of the tool into aliquid.