Do you have a question about the Magnavox MDR533H and is the answer not in the manual?
General warnings and precautions for safe operation of the apparatus.
Precautions regarding the Class 1 laser product and potential radiation exposure.
Instructions to prevent hazards of electrical shock and fire during operation.
Instructions for cleaning, disc handling, and when to seek service.
Overview of the unit's recording, dubbing, and editing capabilities.
Explanation of dubbing functions and automatic title finalizing.
Details on various playback features like surround sound and search.
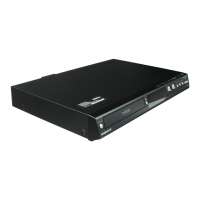
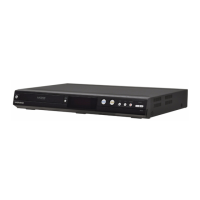
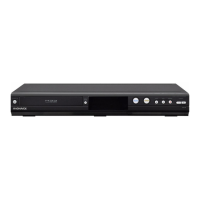
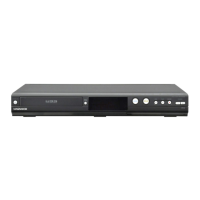
Identification and function of buttons and indicators on the front panel.
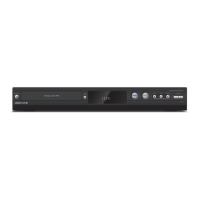
Identification and function of all input/output terminals on the rear panel.
Instructions for installing batteries and using the remote control.
Instructions for connecting to a TV with an HDMI compatible port.
Explanation of HDMI output modes and corresponding video signals.
Instructions for connecting to a cable or satellite box.
Details on Coaxial and HDMI audio connections.
Steps to find the correct TV channel for the unit's input.
Functions for editing disc names, erasing, and making edits compatible.
Functions for managing titles on the HDD.
Options for dubbing content between HDD and DVD.
Step-by-step guide for inserting a disc into the unit.
Steps to display the initial setup menu on your TV.
Procedure to select the type of broadcasting signal for channel setup.
Process of automatic channel scanning and memorization.
Step-by-step guide to program available channels automatically.
Procedure to manually add or delete channels from the lineup.
Procedure for automatically setting the clock via analog broadcast signal.
Procedure to manually set the PBS channel for clock data.
Procedure for automatically setting the clock via digital broadcast signal.
Procedure to manually set the date and time.
How to switch TV audio languages for digital TV.
Procedure to select Stereo or SAP for analog TV audio.
How to change settings for DTV closed captions (DTV CC).
List of compatible disc types for recording (DVD+RW, DVD+R, etc.).
Explanation of different recording modes and their time/quality trade-offs.
Information on using HDD as a temporary storage and backup.
Instructions for recording from external tuner sources.
Simple method to set recording time in 30-minute blocks.
Explanation of the feature that automatically records current channel.
Steps to locate desired point and start autostart recording.
Procedure to program timer recordings up to 36 programs monthly.
Steps to select analog/digital mode, external input, and recording media.
How to view, delete, or change timer recording programs.
List and explanation of error numbers that may appear in timer programming.
Tips for timer recording, including power failure and overlap scenarios.
Procedure to overwrite an existing title from its start.
Procedure to overwrite an existing title from a selected point.
Description of scenarios when overwriting titles.
Explanation of 'High' and 'Auto' recording modes for dubbing.
Instructions for connecting external devices via RCA or S-Video cables.
Detailed steps for connecting using RCA audio/video cables.
Detailed steps for connecting using an S-Video cable.
Instructions for connecting an external device using a DV cable.
Steps to record content from an external device.
Selecting the correct input channel for the external device.
Pressing the RECORD button to start recording.
Starting playback on the external device to initiate recording.
Steps for dubbing content from a DVC to HDD or DVD.
Selecting the correct input for DV connection.
Steps to display and select the DV input source.
How to start and stop the dubbing process.
Procedure to start the DV dubbing process.
Function to select and dub a specific title.
Procedure for dubbing from HDD to DVD.
Procedure for dubbing from DVD to HDD.
How to add titles to the dubbing list.
Selecting a specific title from the list to be dubbed.
Initiating the dubbing process after selecting titles and mode.
Function to start dubbing with a single touch.
Function to select one specific title for dubbing from HDD to DVD.
Selecting a specific title from the list for dubbing.
How to protect a disc from accidental recording or erasing.
Selecting the 'Disc Protect OFF ON' option.
Procedure to finalize a disc for playback on other DVD players.
Selecting the 'Finalize' option.
Function to automatically finalize discs after recordings.
Steps to access and configure auto finalize settings.
Selecting 'Disc Full' or 'End of Timer Rec' for auto finalization.
List of discs and files compatible with the unit for playback.
How to start playback using the PLAY button.
Method for direct playback of titles.
How to play back titles from the HDD or DVD title list.
Selecting a title from the list and starting playback.
Selecting Play, Resume, or Play from Start from the title list.
How to play back audio CDs and discs with JPEG files.
Selecting content from the file or track list.
How to play back recorded content while recording continues.
How to play back one title while recording another.
How to pause, resume, rewind, or fast forward autostart recordings.
How to search for specific titles or chapters.
How to search for specific tracks or files.
How to search for content at a specific time.
Step-by-step guide to access the Edit menu.
Procedure to delete a single title from HDD or DVD.
Steps to access the title list to select a title for deletion.
Procedure to select and delete multiple titles.
Selecting titles to be deleted.
Selecting the option to delete multiple titles.
Marking titles for deletion using the CLEAR button.
How to assign custom names to titles.
Selecting the option to edit the title name.
How to add chapter marks to titles.
Playing title to the desired point and pressing PAUSE.
Selecting the 'Add' option to create a chapter mark.
Procedure to delete individual chapter marks.
Navigating to the chapter to be deleted.
Procedure to delete all chapter marks from a title.
Selecting the 'Chapter Mark' option.
Selecting the 'Delete All' option.
Procedure to divide one title into two new titles.
Playing title to the point of division and pressing PAUSE.
Selecting the 'Title Dividing' option.
Procedure to delete a specific part (scene) of a title.
Selecting the 'Scene Delete' option.
Playing title to set the start point for deletion.
Selecting the 'Delete' option to remove the scene.
How to protect a title from accidental editing or erasing.
Procedure to erase all titles and contents on a disc.
Procedure to delete all titles from the HDD.
Setting viewing limitations based on MPAA, TV, and Canadian ratings.
Managing downloadable ratings and passwords for V-Chip.
Settings related to recording, including auto chapter and auto finalize.
Setting auto chapter marks and automatic disc finalization.
Settings for clock, auto clock, and manual channel presets.
Settings for analog TV audio and HDMI output.
Explanation of parental lock for DVD videos and rating levels.
Choosing audio settings for external devices during disc playback.
Explanation of the V-chip system for program viewing limitations.
Enabling or disabling the progressive scan system.
Enabling progressive scan for higher definition images.
Enabling or disabling HDMI audio output.
Troubleshooting steps for when the power does not turn on or unit turns on automatically.
Troubleshooting for unit not responding, no picture/sound/menu.
Troubleshooting for improper operation and the repairing process.
Troubleshooting for inability to input DV signals or operate DVC.
Troubleshooting for no HDMI image, setup menu, or channel change.
Troubleshooting for unable to record, timer recording errors, and HDD issues.
Troubleshooting for no sound/subtitle, aspect ratio mismatch, distorted picture.
Troubleshooting for playback not starting, stopping suddenly, or not performing.
Troubleshooting for dubbing execution failures.
Troubleshooting for title editing/deletion and disc protection issues.
Detailed list of error messages and their causes/solutions.
Steps to follow when turning on the unit for the first time.
Steps for basic recording of TV programs.
How to configure timer recording in 30-minute blocks.
Procedure for copying from HDD to DVD or DVD to HDD.
How to copy discs instantly with a single touch.
Details on parts and labor warranty duration and coverage.
| Playback Media | CD-R/CD-RW, DVD-R/-RW, DVD+R/+RW, DVD-Video |
|---|---|
| Video disc playback system | NTSC |
| Playback Media | Audio CD, CD-R/RW, DVD-R/-RW, DVD+R/+RW, DVD |
|---|---|
| Compression format | Dolby Digital, PCM |
| Playback Media | CD-R/RW, DVD+R/+RW, DVD-R/-RW, DVD, Audio CD |
|---|---|
| Picture Compression Format | JPEG |
| Front Connections | Analog Audio Left/Right In, Composite Video (CVBS) In, DV In, S-Video In |
|---|---|
| Rear Connections | Analog Audio Left/Right In, Analog Audio Left/Right Out, HDMI Out, Component Video Out, Composite Video (CVBS) In, Composite Video (CVBS) Out, Digital Coaxial Out, S-Video In, S-Video Out, RF In, RF Out |
| Power supply | 120V, 60Hz |
|---|
| Set dimensions (W x H x D) | 420 x 61.2 x 290 mm |
|---|---|
| Set weight | 3.4 kg |
| Packaging dimensions (W x H x D) | 520 x 147 x 413 mm |