EasyManua.ls Logo

Magnum 262800 - User Manual

Magnum 262800
84 pages
Print Icon
To Next Page IconTo Next Page
Loading...
Operation
X5
, X7
, ProX7
& ProX9
Airless Sprayers
312001P
EN
- For portable spray applications of architectural paints and coatings -
X5 & X7 Models ONLY: Use water-based or min-
eral spirit-type materials only. Do not use materi-
als having flash points lower than 70° F (21° C).
For more information about your material, request
MSDS from distributor or retailer.
Models 262800, 262805, 261815, 261820
See page 2 for model and series information including
dispense rate, recommended hose length, guns, and
maximum working pressure.
IMPORTANT SAFETY INSTRUCTIONS.
Read all warnings and instructions in this
manual. Save these instructions.
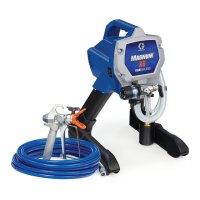
M
AGNUM
X5
Model: 262800
ti11304a
Series D
M
AGNUM
X7
Model: 262805
ti11305a
Series C
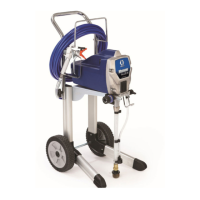
M
AGNUM
ProX7
Model: 261815
ti9369b
Series B
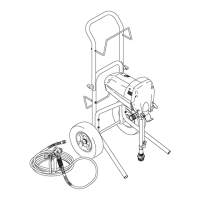
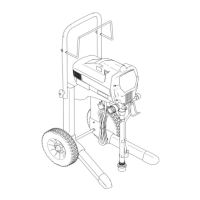
M
AGNUM
ProX9
Model: 261820
Series B
ti16976a
The manual provided with
this sprayer contains
English and Español.
Visit our website;
http://M
AGNUM
.Graco.com

Questions and Answers

  • M
    Michael PowersSep 12, 2025
    What to do if Magnum 262800 only dribbles paint?
    • B
      Bobby LloydSep 12, 2025
      If your Magnum Paint Sprayer pump cycles but the paint only dribbles or spurts when the spray gun is triggered, first, increase the pressure by slowly turning the Pressure Control Knob clockwise. Also, unclog the spray tip.
  • B
    Briana WhiteAug 22, 2025
    What to do if my Magnum 262800 Paint Sprayer pump cycles but does not build up pressure?
    • A
      angelaellisAug 22, 2025
      If your Magnum Paint Sprayer pump cycles but doesn't build up pressure, first, ensure that the pump is primed. Check if the inlet screen is clogged and clean any debris, making sure the suction tube is immersed in the paint. Also, verify the suction tube isn't leaking by tightening the connection and inspecting for cracks. If cracked or damaged, replace the suction tube.
  • R
    Ryan BrownAug 25, 2025
    How to fix Magnum 262800 when pressure is set at maximum but cannot achieve a good spray pattern?
    • S
      Shelly ThomasAug 25, 2025
      If your Magnum Paint Sprayer's pressure is at maximum but the spray pattern is poor, first check that the reversible spray tip is in the SPRAY position. If that's not the issue, the spray tip might be too large or worn, so select a smaller or new spray tip. Also, a clogged spray gun fluid filter or InstaClean fluid filter could be the problem, so clean or replace them. Additionally, make sure the inlet screen is clean and that the material isn't too thick; thin it if necessary. Finally, if you've added an extra section of hose, remove it.
  • S
    Samuel PowellAug 27, 2025
    What to do if my Magnum 262800 Paint Sprayer stops spraying?
    • J
      Jose WolfeAug 27, 2025
      If your Magnum Paint Sprayer suddenly stops spraying, first check the suction tube connection. Tighten it and inspect for any cracks or vacuum leaks. Also, the spray tip might be clogged, so unclog it.
  • P
    Preston PierceAug 29, 2025
    What to do if my Magnum Paint Sprayer motor does not run?
    • G
      Gary ClarkAug 29, 2025
      If your Magnum Paint Sprayer's power switch is on, and it's plugged in, but the motor isn't running, first, check the pressure control knob. Turn it clockwise to increase the pressure setting. If that doesn't work, the electric outlet may not be providing power; try a different outlet or test the outlet with a working device. Also, inspect the sprayer's electric cord and any extension cords for damage, replacing them if necessary. Lastly, if paint or water is frozen or hardened in the pump, thaw the sprayer in a warm area before attempting to use it. If the paint is hardened, you may need to take your sprayer to an authorized service center.
  • J
    Jaime AndersonAug 31, 2025
    Why doesn't my Magnum 262800 build up pressure?
    • D
      Danny GreenAug 31, 2025
      To resolve a Magnum Paint Sprayer pump that cycles but doesn't build up pressure, start by priming the pump. Ensure the inlet screen is clean and the suction tube is fully immersed in the paint. Check the suction tube for any leaks by tightening the connections and inspecting for cracks.
  • J
    Jordan TerryNov 25, 2025
    Why won't my Magnum 262800 pump prime?
    • J
      Jim BradyNov 25, 2025
      If your Magnum Paint Sprayer pump won't prime, first ensure the Prime/Spray Valve is in the PRIME position. Check the inlet screen for clogs and ensure the suction tube is fully immersed in the fluid. Remove the suction tube from the paint and prime the pump with water or solvent-based flushing fluid. If the inlet valve check ball is stuck, remove the suction tube and use a pencil to dislodge the ball. Also, check if the inlet valve check ball or seat is dirty; remove the inlet fitting and clean or replace the ball and seat. For ProX7 and ProX9 models, you can remove and clean the outlet valve assembly. For X5 and X7 models, remove the outlet fitting and clean the outlet check ball. Additionally, ensure the suction tube connection is tight and inspect for cracks or vacuum leaks. Some fluid...
  • T
    Travis MccormickSep 13, 2025
    How to stop Magnum Paint Sprayer from paint running down the wall?
    • D
      Doris MarksSep 13, 2025
      To prevent paint from running down the wall or sagging when using your Magnum Paint Sprayer, move the gun faster. Select a tip with a smaller hole size and a wider fan, and ensure the gun is far enough from the surface.
  • A
    Amanda CalhounSep 10, 2025
    Why is paint leaking down the outside of the pump on my Magnum 262800 Paint Sprayer?
    • C
      Chris PadillaSep 10, 2025
      If paint is leaking down the outside of the pump on your Magnum Paint Sprayer, the pump packings are likely worn and need to be replaced.
  • M
    Mrs. Rebecca ObrienSep 6, 2025
    What causes inadequate coverage when using Magnum Paint Sprayer?
    • A
      amyrobersonSep 6, 2025
      If you're experiencing inadequate coverage with your Magnum Paint Sprayer, it's likely that the coat is going on too thin, so move the gun slower. You might also need a tip with a larger hole size or a narrower fan. Ensure the gun is close enough to the surface.

Summary

Operation

IMPORTANT SAFETY INSTRUCTIONS.

Read all warnings and instructions in this manual.

Specifications

Specifications

Details on model, series, dispense rate, hose length, gun, and working pressure.

Warnings

GROUNDING

Proper grounding reduces risk of electric shock. Use 3-wire extension cords.

FIRE AND EXPLOSION HAZARD

Avoid flammable materials near ignition sources. Ensure proper ventilation and grounding.

SKIN INJECTION HAZARD

Do not aim gun at people or animals. Keep body parts away from discharge.

EQUIPMENT MISUSE HAZARD

Avoid misuse that can cause death or serious injury. Follow safety regulations.

ELECTRIC SHOCK HAZARD

Grounding is essential. Connect only to grounded outlets. Use 3-wire extension cords.

PRESSURIZED ALUMINUM PARTS HAZARD

Use compatible fluids to prevent chemical reaction and equipment rupture.

BURN HAZARD

Equipment surfaces and fluid can be hot. Avoid touching hot fluid or equipment.

MOVING PARTS HAZARD

Keep clear of moving parts. Ensure guards are in place.

TOXIC FLUID OR FUMES HAZARD

Toxic fluids/fumes can cause serious injury or death. Read MSDS.

PERSONAL PROTECTIVE EQUIPMENT

Wear appropriate protective gear like eyewear, hearing protection, and respirators.

Installation

Grounding and Electric Requirements

Essential grounding and electrical setup guidelines for safety.

Thermal Overload

Motor has a thermal overload switch. Allow unit to cool if overheated.

Component Identification

Component Identification

Lists and describes sprayer components with reference letters.

Operation

Trigger Lock

Engage trigger lock when not spraying to prevent accidental triggering.

Pressure Relief Procedure

Follow this procedure before cleaning, checking, servicing, or transporting.

Pressure Control Knob Settings

Explains settings for Hi Spray, Low Spray, Prime/Clean, and Roll.

Setup

Setup

Steps for preparing the sprayer for use.

Prime and Flush Storage Fluid

Procedures for priming and flushing the sprayer before first use or new projects.

Setup

Install Tip and Guard on Gun

Instructions for assembling the spray tip and guard onto the gun.

Spraying Techniques

Tips for achieving good spray patterns and preventing tip wear.

Adjust Spray Pressure

How to adjust the pressure control knob for desired spray output.

Setup

Getting Started

Practice basic spraying techniques on scrap cardboard.

Unclogging Spray Tip

Procedure to clear a clogged spray tip.

Setup

Tip Selection

Guidance on selecting the correct tip hole size and fan width for coatings.

Shutdown and Cleaning

Pail Flushing

Steps for flushing the sprayer after use.

Shutdown and Cleaning

Power Flush

Faster flushing method for water-based coatings.

Shutdown and Cleaning

Cleaning InstaClean Fluid Filter (ProX Sprayers Only)

How to remove and clean the InstaClean fluid filter.

Cleaning Gun

How to clean the gun fluid filter, tip, guard, and exterior.

Storage

Short Term Storage (up to 2 days)

Instructions for storing the sprayer for short periods.

Long Term Storage (more than 2 days)

Procedures for long-term storage, including using Pump Armor.

Storage

Stowing Sprayer

Steps for preparing the sprayer for storage, including draining and securing.

Maintenance and Service

Caring for Sprayer

General advice on keeping the sprayer clean and in good working order.

Pump Packings

How to identify and address worn pump packings.

Troubleshooting

Troubleshooting

Table of common problems, causes, and solutions for the sprayer.

Troubleshooting

Troubleshooting

More problems and solutions, including pump priming issues.

Troubleshooting

Troubleshooting

Further troubleshooting for pressure build-up and output issues.

Troubleshooting

Troubleshooting

Additional troubleshooting for spray pattern and coverage issues.

Troubleshooting

Troubleshooting

Troubleshooting for fan pattern variations, motor issues, and power supply.

Technical Data

Technical Data

Specifications for MAGNUM X5 and X7 sprayers.

Technical Data

Technical Data

Specifications for MAGNUM ProX7 and ProX9 sprayers.

Graco Standard Warranty

Graco Standard Warranty

Graco's limited warranty terms and conditions.

Repair and Parts

Repair and Parts

Overview of parts availability and repair services.

General Repair Information

General Repair Information

Important notices and precautions for performing repairs on the sprayer.

Parts

List of Kits (Series A)

Lists available kits for ProX7/ProX9 Series A.

Parts

List of Kits (Series B, C, D)

Lists available kits for ProX7/ProX9 Series B, C, D.

Parts

X5 Model 262800 (Series A)

Detailed part list and diagrams for X5 Model 262800 (Series A).

Parts

X5 Model 262800 (Series B, C, D)

Detailed part list for X5 Model 262800 (Series B, C, D).

Parts

X7 Model 262805 (Series A)

Detailed part list and diagrams for X7 Model 262805 (Series A).

Parts

X7 Model 262805 (Series B, C)

Detailed part list for X7 Model 262805 (Series B, C).

Parts

ProX7 and ProX9 Models 261815 and 261820 (Series A, B)

Part list for ProX7/ProX9 models (Series A, B).

Parts

ProX7 and ProX9 Models 261815 and 261820 (Series A)

Exploded view and part list for ProX7/ProX9 Series A.

Wiring Diagrams

X5 and X7 Models 262800 and 262805 (Series A)

Wiring diagram for specific X5/X7 models.

Wiring Diagrams

Wiring Diagrams

ProX7 and ProX9 Models 261815 and 261820

Wiring diagram for ProX7/ProX9 models.

Technical Data

Technical Data

Specifications for MAGNUM X5 and X7 models.

Technical Data

Technical Data

Specifications for MAGNUM ProX7 and ProX9 models.

Graco Standard Warranty

Graco Standard Warranty

Graco's limited warranty terms and conditions.

Magnum 262800 Specifications

General IconGeneral
BrandMagnum
Model262800
CategoryPaint Sprayer
LanguageEnglish

Related product manuals