Operating Instructions MA 50
Geba_MA50_Fe_11a.doc 7 851 406/2 11/11
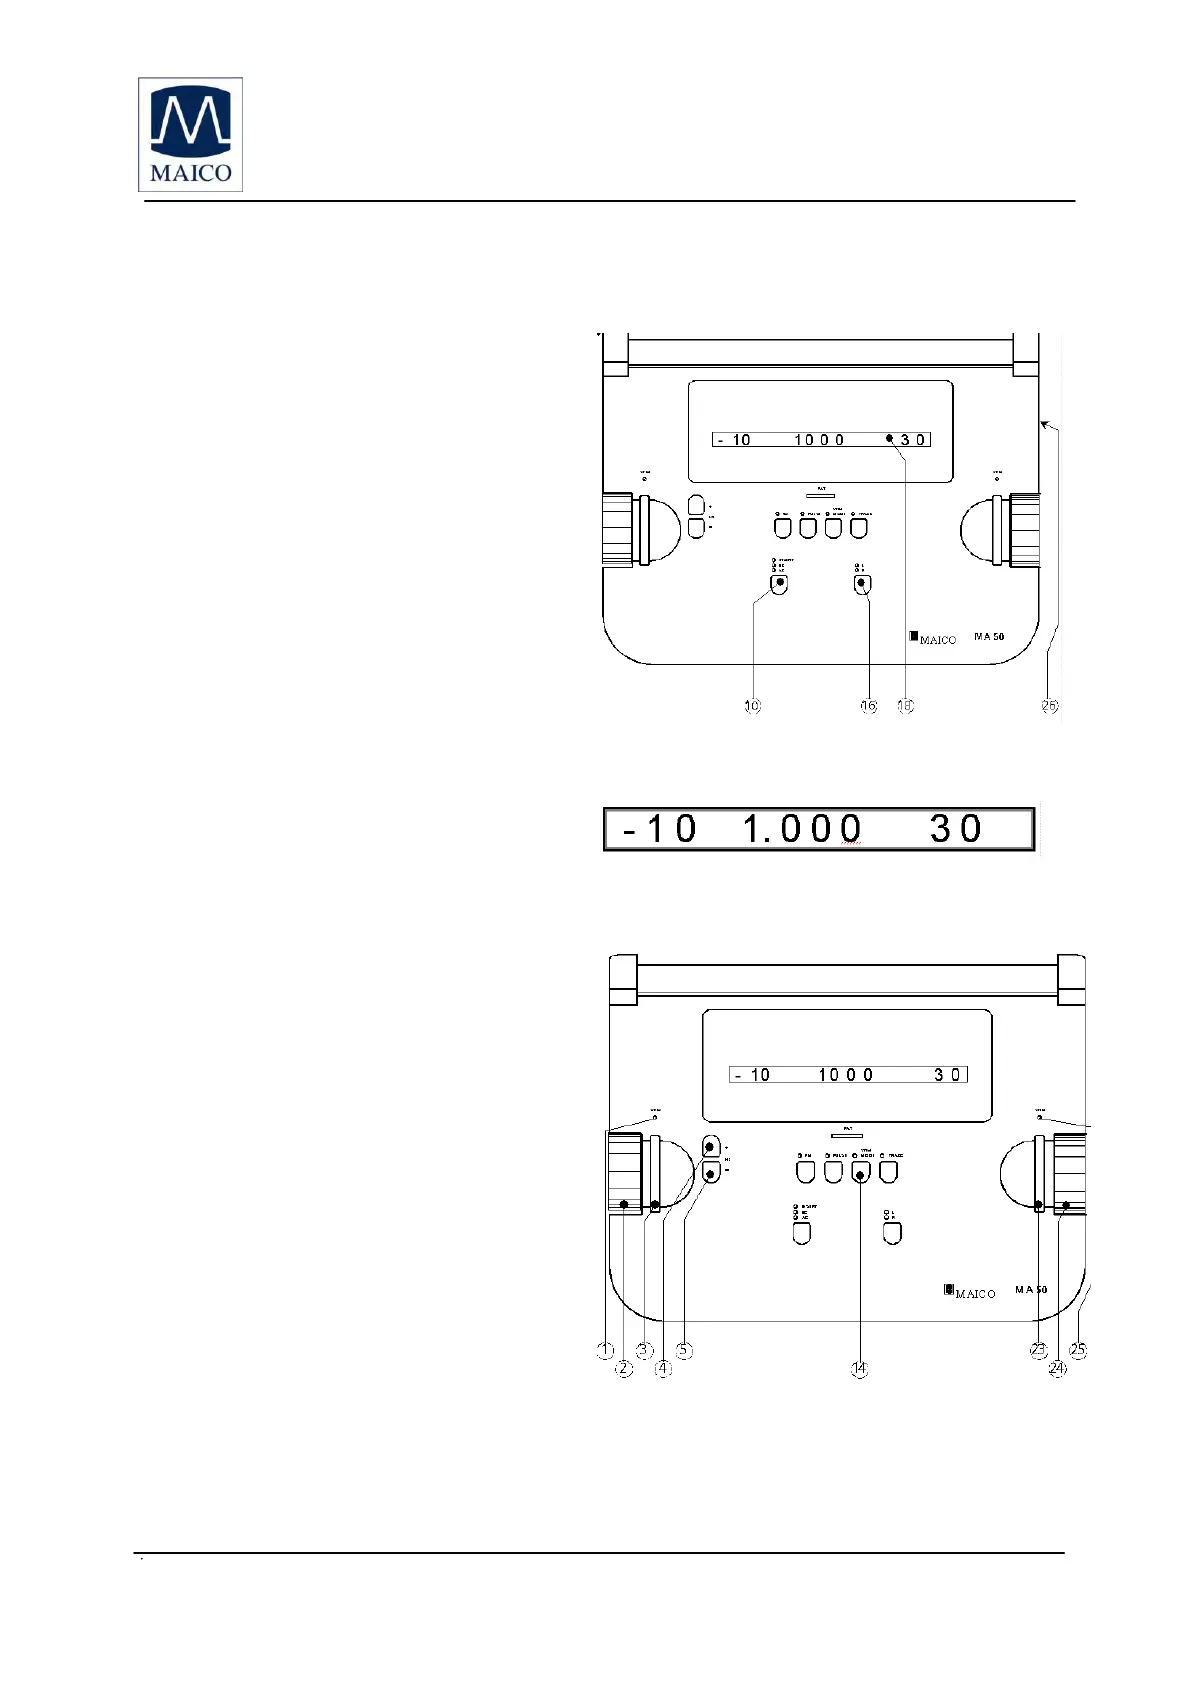
3.3 Getting familiar with the MA 50
Turn on the instrument with the power switch which is located at the right
side of the MA 50. The device
performs its initial test and auto
calibration. If an error is detected
the test is stopped and the code of
the error is shown on the LED-
display . In this case please
contact your local dealer or service.
If the test is passed, the instrument
is setup to air conduction and pure
tone for the right ear and narrow
band masking noise for the left
s above
the receiver and the test channel
selector are lighted. The
frequency is set to 1 kHz and the
level to 30 dB
HL
for the right test
channel and to -10 dB for the left
masking channel. All these settings
are also shown on the display
(see picture 5).
The hearing level can be easily
adjusted with the right knob
and the masking level with the
knob on the left side of the
instrument.
For optimal convenience these level
control knobs are usable from the
top or the side of the instrument.
They are detented in 5 dB steps.
The STIM bars and ↔ are
located beside the level control
knobs , . The STIM LED light
up when you press the STIM bar
↔ to present the test signal. The
STIM LED lights continuous
because the the masking noise is
continuous presented. The
frequency is changed with up
and down buttons. The design
of the MA 50 makes it easy to control level, signal presentation and
frequency with one hand.
Picture 4 MA 50 power switch, display and selection
Buttons for receiver and test channel
Picture 5 MA 50 display with initial settings
Picture 6 MA 50 level and frequency control
 Loading...