This document is a user and installation guide for the Maidaid Halcyon C2035WS pumped waste dishwasher. It provides comprehensive instructions on the safe operation, installation, maintenance, and troubleshooting of the appliance.
Function Description
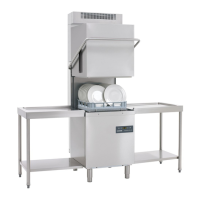
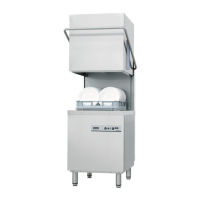
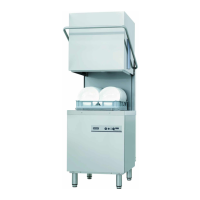
The Maidaid Halcyon C2035WS is a professional heavy-duty dishwasher designed for commercial use. Its primary function is to wash dishes efficiently and hygienically. The "pumped waste" designation indicates that the machine is equipped with a drain pump, allowing for flexible installation where the drain sump may not be lower than the machine's base. The dishwasher offers various wash programmes tailored to different levels of soiling and types of dishes, including standard cycles for lightly, averagely, and heavily soiled items, as well as special programmes for energy saving, heavily encrusted dishes, cutlery, glasses, and sanitisation. It also features an integral water softener (optional) to manage water hardness and ensure optimal washing results.
Usage Features
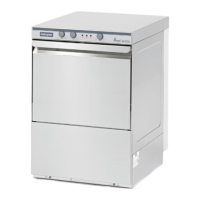
The dishwasher's control panel, as shown in Fig. 1, includes an ON/OFF button (1), SPECIAL PROGRAMME SELECTION button (2), PROGRAMME SELECTION button (3), START button (4), INFORMATION DISPLAY (5), STATUS BAR (LED) (6), and CHECK BAR (LED) (7).
To switch the dishwasher on (Fig. 2):
- Turn on the main power switch and open the external water tap.
- Check for the overflow, if required.
- Press the ON/OFF button (1).
- The CHECK BAR (7) will light up, turning from red to green to confirm the check. A serious fault will cause the LED bar to light red and stop operation, while a minor error will be indicated in orange without stopping the cycle.
- Loading begins automatically when switched on, with a flashing point on the display until the level is reached.
- The STATUS BAR (6) lights up from bottom to top, indicating heating. Once the working temperature is reached, it stays green, signifying optimal wash conditions.
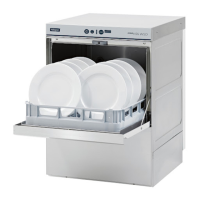
Filling the rack (Fig. 3):
- Use a suitable rack, avoiding overloading or overlapping dishes.
- Wipe dishes before placing them in the dishwasher to remove dry or solid residues.
- Place empty dishes facing downwards.
- Place plates with the inner surface facing upwards in the sloping rack.
- Place cutlery handle-end down in the cutlery basket.
- Avoid placing silver and stainless steel cutlery together to prevent browning or corrosion.
- Wash dishes immediately after use to prevent residue hardening.
- Use only solid, dishwasher-proof dishes.
Cycle selection and start-up (Fig. 4 & 5):
- Press the PROGRAMME SELECTION (3) or SPECIAL PROGRAMME SELECTION (2) button repeatedly to select a suitable wash cycle. The display (5) will show the cycle number.
- To run the programme, press START (4). The STATUS BAR (6) will flash orange, increasing from bottom to top to indicate cycle progression.
- When the cycle finishes, the bar lights up green.
- For rapid drying, remove the rack as soon as the cycle finishes.
- To stop a wash cycle early, press START (4).
- In hood versions, after the first cycle, automatic start ("AS" on display) is enabled for subsequent cycles when the hood is closed.
Standard Programmes (4.5):
- Pr 1: Short wash for lightly soiled dishes.
- Pr 2: Medium wash for averagely soiled dishes.
- Pr 3: Long wash for heavily soiled dishes.
- CLE: Drain and self-cleaning cycle for end-of-day use.
- dr: Drain cycle.
Special Programmes (optional) (4.6):
- ECO: Reduces energy and water consumption with lower temperatures and prolonged mechanical washing.
- Act Ac62: For very dirty, encrusted dishes, includes 2 washes and 2 rinses.
- StEE: For forks, spoons, knives, and other cutlery, uses higher water temperature and lasts longer.
- rEFr: Recommended for a total water change in the washing tub, suitable for consecutive washes of greasy dishes.
- PLAt: Program for dishes.
- GLAS: For washing glasses, uses low rinse temperature and requires long drying time.
- LonG: Continuous wash, can be stopped anytime by pressing Start. Rinse stage starts after a short pause. Cycle ends automatically after 12 minutes.
- SAn: For sanitising dishes, controls wash temperature and time based on A0 value (ends when A0=30, typically 20 minutes at ~70°C).
- Pr 5: Recommended for sparkling glassware, used with a reverse osmosis device.
- Pr 6: Long wash for heavily soiled dishes (8').
- Pr 7: Long wash for heavily soiled dishes (10').
Automatic cycle start-up (4.7) (Fig. 6):
- If not enabled by default, with the appliance on and door open, press and hold START (4) for 5 seconds until "AS" appears on the display.
- To disable, press START (4) again for 5 seconds with the door open.
Emptying the dishwasher (4.9):
- Appliances with no drain pump: Switch off, remove integral filter (Fig. 7A), pull up overflow pipe (Fig. 8B), wait for tub to empty, and clean tub filter (Fig. 8C) if necessary.
- Appliances with drain cycle (optional): If present, remove integral filter (Fig. 7), remove overflow by pulling upwards (Fig. 9), close door, select "dr" cycle, press START (4). The machine runs a drain cycle with self-cleaning and switches off. Clean tub filter (Fig. 8C) if necessary.
Turning the dishwasher off (4.10):
- Press ON/OFF (1). The central segments on the DISPLAY (5) will light up, indicating power.
Resin regeneration (optional) (4.11):
- When "SALt" appears, add salt to the container (Fig. 11). Remove basket, integral filter (Fig. 7), unscrew cap. Pour ~700g of large-grain kitchen salt (fill tank with water first time). Close cap firmly. Rinse area around cap and run a self-cleaning cycle. "SALt" warning will disappear.
- "rEG" on display indicates a regeneration cycle is running; do not switch off the machine during this time.
Displaying information (4.12):
- Hold START (4) for a few seconds to display Boiler temperature, Tub temperature, and number of cycles.
- Hold PROGRAMME SELECTION (3) for a few seconds to display Boiler temperature, Tub temperature, and number of cycles.
List of viewable messages (4.13):
- door: Door open
- b: Rinse temperature
- t: Wash temperature
- rEG: Regeneration cycle or request
- SALt: No salt in the softener
- CY: Number of cycles carried out
- End: End of cycle
- AS: Automatic start enabled
- LonG: Continuous wash
- SEru: Service
End of shift (4.14):
- Drain the machine, disconnect power, close water cock.
- Perform routine maintenance and cleaning.
- Leave door ajar to prevent odours.
Maintenance Features
Before any maintenance, completely drain water, shut off power, and close the water supply cock. Do not use water under pressure. Wash body panelling when cold, using steel-specific products. Drain water from boiler and wash pump if there's a risk of ice.
Cleaning (5.2):
- Regular maintenance is essential. Periodically run a sanitising treatment with suitable non-corrosive commercial products.
Cleaning the filter unit (5.3):
- Perform at end of day or when filters are dirty.
- Remove and clean baskets.
- Empty tub ("Machine draining").
- Remove and thoroughly clean all filters.
- Do not use abrasive products on the tub.
- Restore all removed parts.
Cleaning the arms (5.4) (Fig. 10):
- Easily remove wash and rinse arms to clean nozzles and prevent blockages.
- Unscrew retaining nuts or unclip quick-fit attachments.
- Wash parts under running water, clean nozzles with a toothpick or pointed tool.
- Clean arm rotation pins and wash/rinse water drainage area.
- Restore arms and check free rotation.
Self Diagnostics (Chap 6):
The machine has a self-diagnosis system that registers and warns of malfunctions.
- Er0 1: No rinsing (check nozzles).
- Er02: No drainage (check drain pipe, siphon, filters; remove overflow pipe before draining).
- Er03: Rinsing temperature reset fault (switch off/on, run new cycle).
- Er04: Water filling in tank fault (check pipes, water tap, overflow; switch off/on, fill again).
- Er05: Tank thermometer fault (Probe open) (switch off/on).
- Er06: Tank thermometer fault (Probe short circuited) (switch off/on).
- Er07: Boiler thermometer fault (Probe open) (switch off/on).
- Er08: Boiler thermometer fault (Probe short circuited) (switch off/on).
- Er09: Boiler loading time out (check water tap; switch off/on, run new cycle).
- Er21: Insufficient rinse (check rinse nozzles).
- Er22: Tank temperature reset fault (switch off/on, run new cycle).
- ErSF: Electro-mechanical safety device (boiler/tub safety thermostats or tub safety pressure switch triggered).
- ErSL: Level safety switch (incorrect water level).
- drb: Dirty filter (incorrect water level due to dirty filter or incorrectly fitted overflow).
- If problems persist after resetting, contact an Authorised Service Centre.
Settings (Chap 7):
These settings should only be configured by a qualified technician.
- Access settings: Machine in standby, door open. Press buttons 1 and 2 together for 5 seconds to enter key CH 12 (use 3 and 4 to change parameter, 1 to confirm). Press button 1 repeatedly to scroll through headings, enabling/changing with buttons 3 and 4.
- Language: Language selection.
- b: Boiler Temperature: Settings for programmes (b1-b3 for atmospheric boiler/rinse pump versions).
- t: Tank Temperature: Settings for programmes (t1-t3 for rinse pump versions).
- EH: Thermo - Stop: Enables Thermostop for correct rinse temperature.
- ES: Energy Saving: Enables energy savings when machine is idle.
- dn: Detergent Pump: Manual operation of detergent doser.
- bn: Rinse Aid Pump: Manual operation of rinse aid doser.
- rn: Manual Rinse: Manual operation of rinse pump.
- dt: Dosage Detergent: Detergent dosing time.
- dL: Dosage Rinse Aid: Rinse aid dosing time.
- dH: Water Hardness: Sets supply water hardness (for water softener).
- CC: Set Number Service Cycles: Sets and activates Service alert for external water softener. Cancel by holding all 4 buttons with machine off and door open.
- AA: Autostart Autoenabling: Automatic enabling of automatic starting.
- dr: Manual Drain: Manual operation of the drain pump.
- To exit and memorise changes, press and hold button 1 for a few seconds until on-line dashes appear.
Hardness settings for incorporated water softener (7.1):
- Set dH level in settings menu according to table:
- 0÷20 °fr (0÷11 dGH) = n°1
- 21÷25 °fr (12÷14 dGH) = n°2
- 26÷30 °fr (15÷17 dGH) = n°3
- 31÷35 °fr (17÷20 dGH) = n°4
- 36÷40 °fr (20÷22 dGH) = n°5
- 41÷45 °fr (23÷25 dGH) = n°6
- 46÷50 °fr (26÷28 dGH) = n°7
- 51÷55 °fr (29÷31 dGH) = n°8
- 56÷60 °fr (31÷34 dGH) = n°9
Scrapping (Chap 8):
- The machine does not contain materials requiring special handling.
- The product should not be scrapped with domestic waste; it must be separated and recycled.
- Packaging materials (plastic bags, expanded polystyrene, nails) are hazardous and must be kept away from children and pets.
- Recyclable components include steel (sheet), cardboard (packaging), wooden pallet, plastic parts (PP, PP+FV), and electrical parts (motors, electronic parts, rubber parts).
Environment (Chap 9):
- Proper use improves environmental footprint: wash full baskets, switch off when not in use, keep machine closed in standby, use appropriate wash programmes, supply hot water if gas heated, ensure drains flow into a suitable sewer, and do not exceed recommended detergent dose.