v
2.4 TO
CUT
Raise
Presserfoot 4402 above top of lay by
pressing
down on
Presserfoot Handle
,4'323 and lift ingPresserfoot
Lift .
For Squeeze
Trigger,
pull
Handle 23308 towards
machine Handle 4549.
Enter lay,
and
lower Presserfoot to top of lay by releasing
Presserfoot
Trigger. When making turns
in lay, it is
sometimes
advisable to let Presserfoot ride
freely
on top of
lay
by
pushing
down onPresserfootHandle.
When machine is not in
use, always
lower Presserfoot to Baseplate. The Presserfoot Leg acts as a
safety
guard
for the blade.
2.5 TO
CHANGE FLD(BANDS
(Figures
2
and 3)
a) Disconnect
power.
b)
Figure
2: Push Block
*A"
to
release right
(upper)
FlexiBand
"B".
Remove FlexiBand from Block and then
from Drive
Rrlley
"Cl'
c)
Figure
3: Slip
new FlexiBand "B" over Drive Pulley
"C
"and
between Band Plate
"D"
and Blade
"E."
Push Block
"A"
forward
and slide FlexiBand over
it. Release Block
*A."
d) Remove left
(lower)
FlexiBand, and install new one in
same manner.
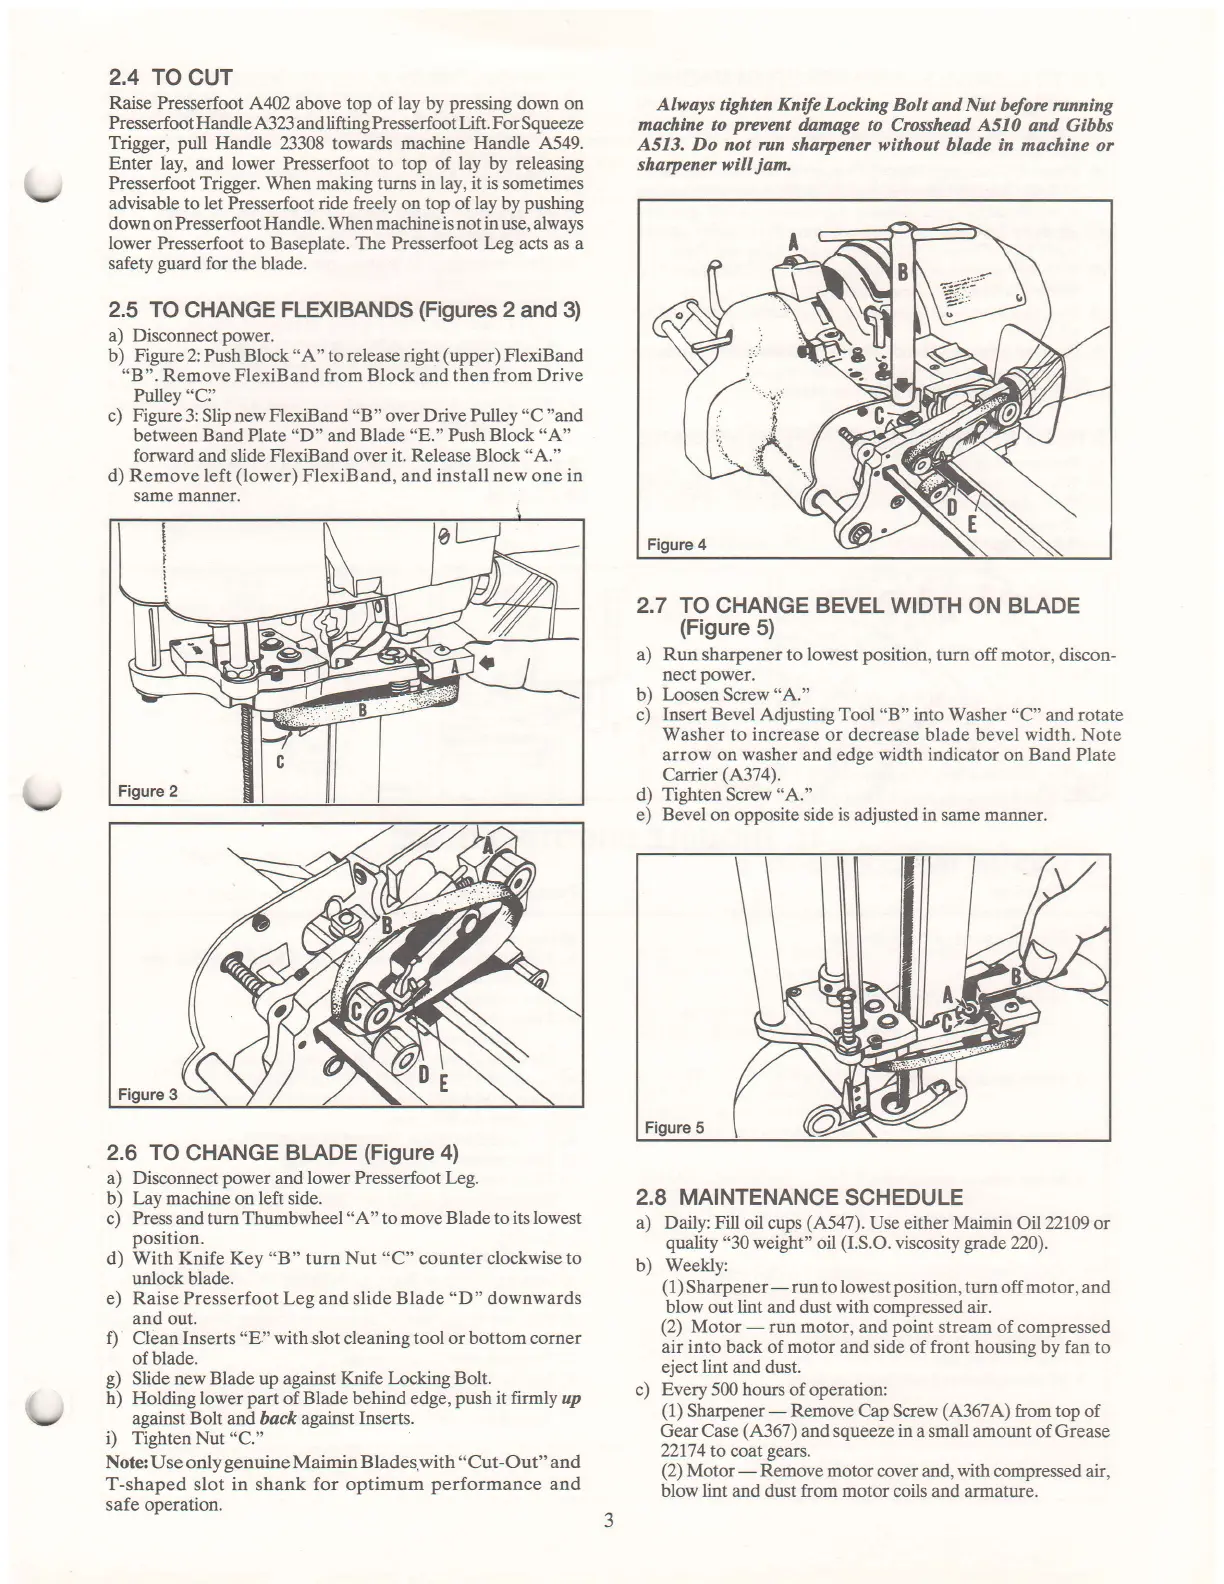
2.6 TO
CHANGE
BLADE
(Figure
4)
a) Disconnect
power
and lower Presserfoot Leg.
b) Lay machine on left side.
c) Press and turn Thumbwheel
"A"
to
move Blade to its lowest
position.
d) With Knife Key
"B"
turn Nut
"C"
counter clockwise to
unlock blade.
e) Raise Presserfoot Leg and slide Blade
"D"
downwards
and out.
f)
Clean Inserts
"E." with.slot
cleaning
tool or bottom corner
ofblade.
g)
Slide new Blade up against Knife Locking Bolt.
h)
Holding lower
part
of
Blade
behind
edge,
push
it firmly up
against Bolt and back against Inserts.
i) Tighten Nut
"C."
Note: IJse only
genuine
Maimin
Blades,with "Cut-Out" and
T-shaped
slot in shank
for
optimum
performance
and
safe operation.
Always tighten Knife
Locking Boh and Nut
beforc nmning
machine to
prevent
damage to
Crosshead
A510
and Gibbs
A513. Do
not
run
sharyrener withoat blade in machine
or
sharTrener wiII
jan
2.7 TO
CHANGE
BEVELWIDTH
ON BLADE
(Figure
5)
a) Run sharpener to lowest
position,
turn offmotor, discon-
nect
power.
b)
Loosen
Screw
"A."
c) Insert Bevel Adjusting Tool
"B"
into Washer "C"
and
rotate
Washer
to
increase
or decrease blade bevel
width.
Note
arrow on washer and
edse
width indicator
on
Band
Plate
Carrier
(4374).
d)
Tighten
Screw
"A."
e) Bevel
on
opposite
side
is
adjusted
in
same
manner.
2.8 MAINTENANCE
SCHEDULE
a) Daily: Fill oil cups
(A547).
Use
either
Maimin
01122109 or
quality
"30 weight"
oil
(I.S.O.
viscosity
grade
220).
b) Weekly:
(1)
Sharpener-run
to
lowestposition,
turn off motor, and
blow out lint and dust with compressed air.
(2)
Motor
-
run motor,
and
point
stream of compressed
air into back of motor
and side of
front housing
by fan to
eject lint and dust.
c) Every500hours of operation:
(1)
Sharpener-
Remove
Cap Screw
(4'367A)
from top of
Gear Case
(A367
)
and squeeze
in
a small amount of Grease
22174
to coat
gears.
(2)
Motor
-
Remove motor
cover and,
with
compressed air,
blow lint and dust from motor
coils and armature.
v
 Loading...