Do you have a question about the Makita BTW104 and is the answer not in the manual?
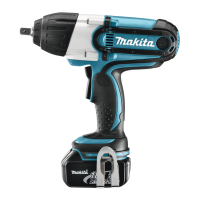
The Makita Cordless Impact Wrench, available in models BTW074 and BTW104, is a robust power tool designed for fastening bolts and nuts. This instruction manual provides comprehensive guidance on its operation, maintenance, and safety, ensuring efficient and secure use.
The Cordless Impact Wrench is equipped with a powerful motor that delivers high fastening torque, making it suitable for various applications. It features a square drive for attaching sockets, and its impact mechanism allows for quick and effective tightening or loosening of fasteners. The tool is powered by a battery cartridge, offering cordless convenience and portability.
A key feature of this impact wrench is its reversing switch action, which allows users to change the direction of rotation between clockwise and counterclockwise. This is essential for both tightening and loosening fasteners. The switch lever can be depressed from the 'A' side for clockwise rotation or from the 'B' side for counterclockwise rotation. When the lever is in the neutral position, the switch trigger is locked, preventing unintentional starting. It is crucial to ensure the tool comes to a complete stop before changing the direction of rotation to prevent damage.
The tool incorporates a switch trigger for controlling operation. Pulling the trigger starts the tool, and the speed increases with greater pressure on the trigger. Releasing the trigger stops the tool. This variable speed control provides flexibility and precision during fastening tasks.
For enhanced visibility in dimly lit work areas, the impact wrench includes a built-in lamp. Pulling the switch trigger activates the lamp, which remains lit as long as the trigger is pulled. It automatically turns off approximately 10 seconds after the trigger is released. Users should avoid looking directly into the light source to prevent eye strain.
An advanced Auto-Stop mechanism is integrated into the tool, allowing users to preset the desired number of impacts for a specific application. Once the preset number of impacts is reached, the tool automatically stops. This feature helps prevent over-tightening and ensures consistent fastening torque. The setting for the number of impacts can be adjusted via a display and an indication button. The display shows the current setting, and the indication button allows for changing the first and second digits of the impact count. The lamp on the display blinks to indicate which digit is being adjusted. After setting, the indicating lamp lights green upon successful completion or red if the operation is incomplete or the auto-stop mechanism is active.
The tool also features a battery protection system (specifically for BL1415NA battery cartridges) that automatically cuts off power to the motor under certain conditions to extend battery life and prevent damage. This system activates if the tool or battery is overloaded, overheated, or if the battery capacity is too low.
Battery Cartridge Installation and Removal: To ensure safe operation, always switch off the tool before installing or removing the battery cartridge. Hold both the tool and the battery cartridge firmly to prevent accidental slipping, which could lead to damage or injury. To remove, slide the cartridge from the tool while pressing the button on the front. For installation, align the tongue of the cartridge with the groove in the housing and push it in until it locks with a click. A red indicator on the button's upper side signifies an unlocked state, so ensure it is fully inserted until the indicator is no longer visible. Forcibly inserting the cartridge is not recommended; if it doesn't slide in easily, it's likely misaligned.
Checking Remaining Battery Capacity: The tool provides a visual indicator for the remaining battery capacity. When the tool is switched on, lamps light up to show the current battery level. These lights typically go out after about 5 seconds when the tool is switched off. If the orange lamp lights up or flickers (for BL1430A and BL1415NA), it indicates low battery capacity, and the tool will stop due to the auto-stop mechanism. At this point, the battery should be charged or replaced with a fully charged one. If a battery that hasn't been used for a long time is switched on and no lamps light up, it also indicates low capacity and requires charging. For BL1430A, a Makita refreshing adapter can be used to refresh the battery.
Socket Installation and Removal: Always use the correct size socket for bolts and nuts to avoid inaccurate fastening torque or damage. For sockets without an O-ring and pin, simply push the socket onto the anvil until it locks into place, and pull it off to remove. For sockets with an O-ring and pin, first move the O-ring out of its groove and remove the pin. Align the socket's hole with the anvil's hole, insert the pin, and then return the O-ring to its original position to secure the pin. Reverse these steps for removal.
Fastening Operation: When fastening, hold the tool firmly and place the socket over the bolt or nut. Turn the tool on and fasten for the appropriate time and number of impacts (if presetting is used). The proper fastening torque can vary based on bolt type, size, and workpiece material. It is recommended to perform a test operation to determine the optimal fastening time and impact count, especially for smaller bolts (M8 or less), to prevent damage to the socket or bolt. Continuous operation until the battery is discharged requires a 15-minute rest period for the tool before using a fresh battery. Factors like battery charge level, socket condition (size, wear), use of universal joints or extension bars, tool holding manner, and operating speed can all affect the fastening torque. Always check the final torque with a torque wrench.
General Maintenance: Before performing any inspection or maintenance, always ensure the tool is switched off and the battery cartridge is removed. Avoid using gasoline, benzine, thinner, alcohol, or similar substances, as they can cause discoloration, deformation, or cracks. Keep handles dry, clean, and free from oil and grease for a secure grip.
Replacing Carbon Brushes: Carbon brushes are consumable parts that need replacement when they wear down to the limit mark. To replace them, first remove the rear cover by unscrewing two screws. Raise the arm part of the spring and place it in the recessed part of the housing using a slotted bit screwdriver. Use pliers to remove the carbon brush caps, take out the worn brushes, insert new ones, and replace the caps in reverse. Ensure the lead wire is placed on the opposite side of the arm and that the carbon brush caps fit securely into the brush holders. Both carbon brushes should be replaced simultaneously with identical carbon brushes. After replacement, reinstall the rear cover and tighten the screws securely.
Battery Life Maintenance: To maximize battery life, charge the battery cartridge before it is completely discharged. Stop tool operation and charge the battery when you notice reduced power. Avoid recharging a fully charged battery, as overcharging shortens its service life. Charge the battery cartridge at room temperature (10°C - 40°C or 50°F - 104°F). Allow a hot battery cartridge to cool down before charging. If the battery cartridge is not used for a long period, charge it once every six months.
Safety and Reliability: For product safety and reliability, all repairs, maintenance, or adjustments should be performed by Makita Authorized Service Centers, using only genuine Makita replacement parts.
Optional Accessories: Makita offers various optional accessories and attachments, such as protectors (white, blue, red), battery protectors for specific battery models (BL1430A, BL1415NA), different battery cartridges (BL1430A, BL1415NA), Makita genuine chargers, and an automatic refreshing adapter for BL1430A. Always use accessories specified by Makita for your tool to avoid the risk of injury. Some accessories may be included as standard depending on the region.
| Brand | Makita |
|---|---|
| Model | BTW104 |
| Category | Impact Driver |
| Language | English |