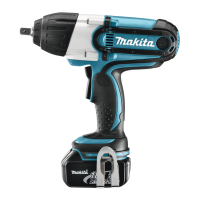
This document provides an instruction manual for the Makita BTW450 Cordless Impact Wrench, a power tool designed for fastening bolts and nuts. It includes important safety warnings, functional descriptions, and maintenance guidelines to ensure safe and effective operation.
Before using the BTW450, it is crucial to read and understand all safety warnings and instructions. Failure to comply can lead to electric shock, fire, or serious injury. These warnings apply to both mains-operated (corded) and battery-operated (cordless) power tools.
Work Area Safety:
- Keep your work area clean and well-lit to prevent accidents.
- Avoid operating the tool in explosive atmospheres where flammable liquids, gases, or dust are present, as sparks can ignite them.
- Keep children and bystanders at a safe distance to avoid distractions that could cause loss of control.
Electrical Safety:
- Ensure power tool plugs match the outlet and never modify the plug. Do not use adapter plugs with earthed (grounded) power tools.
- Avoid body contact with earthed or grounded surfaces like pipes, radiators, ranges, and refrigerators to reduce the risk of electric shock.
- Do not expose power tools to rain or wet conditions.
- When operating outdoors, use an extension cord suitable for outdoor use.
- If operating in a damp location is unavoidable, use a ground fault circuit interrupter (GFCI) protected supply.
Personal Safety:
- Stay alert, watch what you are doing, and use common sense. Do not operate the tool when tired, under the influence of drugs, alcohol, or medication.
- Always wear personal protective equipment, including eye protection, dust mask, non-skid safety shoes, hard hat, or hearing protection.
- Prevent unintentional starting by ensuring the switch is in the off-position before connecting to a power source, battery pack, or when picking up/carrying the tool.
- Remove any adjusting key or wrench before turning the power tool on.
- Do not overreach; maintain proper footing and balance at all times.
- Dress properly: avoid loose clothing, jewelry, and long hair that can get caught in moving parts.
- If dust extraction and collection facilities are provided, ensure they are connected and properly used to reduce dust-related hazards.
Power Tool Use and Care:
- Do not force the power tool; use the correct tool for your application.
- Do not use the power tool if the switch does not turn it on and off.
- Disconnect the plug or battery pack before making adjustments, changing accessories, or storing the tool.
- Store idle power tools out of reach of children and untrained users.
- Maintain power tools by checking for misalignment, binding, breakage of parts, or any other condition that may affect operation.
- Keep cutting tools sharp and clean.
- Use the power tool, accessories, and tool bits according to these instructions, considering working conditions and the work to be performed.
Cordless Impact Wrench Specific Safety Warnings
- Hold the power tool by insulated gripping surfaces when performing operations where the fastener may contact hidden wiring.
- Wear ear protectors.
- Carefully check the socket for wear, cracks, or damage before installation.
- Hold the tool firmly and ensure a firm footing.
- Be sure no one is below when using the tool in high locations.
- Check the fastening torque with a torque wrench, as it may vary depending on the bolt type and size.
Battery Cartridge Safety Instructions
- Read all instructions and cautionary markings on the battery charger, battery, and product using the battery before use.
- Do not disassemble the battery cartridge.
- If operating time becomes excessively shorter, stop operation immediately to prevent overheating, burns, or explosion.
- If electrolyte gets into your eyes, rinse with clear water and seek medical attention immediately to prevent loss of eyesight.
- Do not short the battery cartridge by touching terminals with conductive material, storing it with other metal objects, or exposing it to water/rain.
- Do not store the tool and battery cartridge in locations where the temperature may exceed 50°C (122°F).
- Do not incinerate the battery cartridge, even if severely damaged or worn out, as it can explode in a fire.
- Be careful not to drop or strike the battery.
- Do not use a dropped or struck battery.
Tips for Maintaining Maximum Battery Life:
- Charge the battery cartridge before it is completely discharged.
- Stop tool operation and charge the battery when you notice less tool power.
- Never recharge a fully charged battery cartridge, as overcharging shortens its service life.
- Charge the battery cartridge at room temperature (10°C - 40°C / 50°F - 104°F). Allow a hot battery cartridge to cool before charging.
Functional Description
Installing or Removing Battery Cartridge:
- Always ensure the tool is switched off and the battery cartridge is removed before making adjustments.
- To remove, slide the button on the front of the cartridge and withdraw it from the tool.
- To insert, align the tongue on the battery cartridge with the groove in the housing and slide it in until it locks with a click. The red part on the upper side of the button should not be visible when fully inserted. Do not force the cartridge if it doesn't slide in easily.
Switch Action:
- Before inserting the battery cartridge, ensure the switch trigger actuates properly and returns to the "OFF" position.
- The switch is reversible, allowing for clockwise or counterclockwise rotation. Pull the lower part (A) of the switch trigger for clockwise rotation or the upper part (B) for counterclockwise rotation. Release the trigger to stop.
- Change the direction of rotation only when the tool has come to a complete stop to prevent damage.
Lighting Up the Front Lamp:
- Push the upper position of the lamp switch to turn on the light and the lower position to turn it off.
- Do not look directly into the light source.
- Use a dry cloth to wipe dirt off the lamp lens, being careful not to scratch it.
- The light is equipped with an anti-excessive discharge circuit. If the lamp does not light up, the battery power may be low and require charging.
- Keep the lamp switch in the "off" position when not needed.
Installing or Removing Socket:
- For sockets without O-ring and pin: Push the socket onto the anvil until it locks into place. To remove, pull it off.
- For sockets with O-ring and pin: Move the O-ring out of its groove and remove the pin from the socket. Fit the socket onto the anvil, aligning the holes. Insert the pin through the holes in the socket and anvil, then return the O-ring to its original position to retain the pin. To remove, reverse the installation steps.
- Alternatively, align the hole in the side of the socket with the detent pin on the anvil and push it onto the anvil until it locks into place. Tap lightly if needed. To remove, pull it off.
Hook:
- The hook can be installed on either side of the tool for temporary hanging. Insert it into a groove in the tool housing and secure it with a screw. To remove, loosen the screw and take it out. Ensure it is screwed firmly after installation.
Operation
- Always insert the battery cartridge fully until it locks in place. If the red part on the button is visible, it is not fully locked and may fall out, causing injury.
- Hold the tool firmly and place the socket over the bolt or nut. Turn the tool on and fasten for the proper fastening time.
- The proper fastening torque varies based on the bolt type, size, and workpiece material. Always perform a test operation to determine the correct torque before starting your job.
- Hold the tool pointed straight at the bolt or nut.
- Excessive fastening torque can damage the bolt/nut or socket.
- If the tool is operated continuously until the battery cartridge is discharged, allow it to rest for 15 minutes before using a fresh battery cartridge.
- After fastening, always check the torque with a torque wrench.
Factors Affecting Fastening Torque:
- Battery Cartridge Discharge: A nearly discharged battery reduces voltage and fastening torque.
- Socket: Using an incorrect size socket or a worn socket reduces fastening torque.
- Bolt: Even with the same torque coefficient and bolt class, proper fastening torque differs by bolt diameter. It also varies with bolt length.
- Universal Joint or Extension Bar: Using these accessories somewhat reduces fastening force; compensate by fastening for a longer period.
- Holding Manner and Material: The way the tool is held and the material of the driving position affect the torque.
- Low Speed Operation: Operating the tool at low speed reduces fastening torque.
Maintenance
- Always ensure the tool is switched off and the battery cartridge is removed before performing inspection or maintenance.
- Replacing Carbon Brushes: Regularly check and replace carbon brushes when they wear down to the limit mark. Keep them clean and free to slip in their holders. Replace both carbon brushes at the same time with identical ones. Use a screwdriver to remove the brush holder caps, take out worn brushes, insert new ones, and secure the caps.
- For product safety and reliability, all repairs, maintenance, or adjustments should be performed by Makita Authorized Service Centers using genuine Makita replacement parts.
Accessories
The following accessories or attachments are recommended for use with your Makita tool:
- Sockets
- Extension bar
- Universal joint
- Bit adapter
- Makita genuine battery and charger
Using other accessories or attachments may pose a risk of injury. Only use accessories for their stated purpose. For assistance or more details, contact your local Makita Service Center.