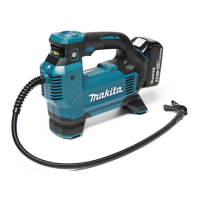
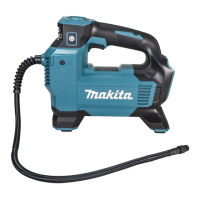
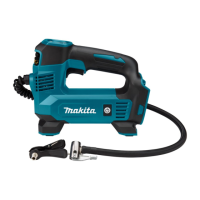
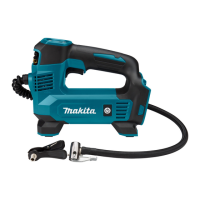
The Makita Cordless Inflator DMP181 is a versatile and portable tool designed for inflating various objects such as tires, sport balls, and small floating tubes. This battery-operated device offers convenience and ease of use, making it suitable for both household and outdoor applications.
Function Description
The core function of the DMP181 is to inflate objects to a desired pressure. It operates by drawing air and delivering it through a hose equipped with different adapters to suit various valve types. The tool features a pressure gauge that displays the current pressure value of the object being inflated, as well as a target pressure value set by the user. This allows for precise inflation and prevents over-inflation, which could damage the object or the tool itself.
The inflator is powered by a Makita 18V battery cartridge, providing cordless operation for maximum portability. It incorporates a tool/battery protection system that safeguards against overload, overheat, and overdischarge, ensuring the longevity of both the tool and the battery. An auto power-off function further enhances safety by automatically shutting down the main power switch if the switch trigger is not pulled for a certain period after the tool is turned on.
For visibility in low-light conditions, the tool is equipped with a front lamp that illuminates when the main power switch is turned on. An air release button allows users to quickly deflate an object if it has been over-inflated.
Usage Features
The DMP181 offers several user-friendly features that enhance its operational convenience:
- Battery Installation and Removal: Battery cartridges are easily installed by aligning the tongue with the groove in the housing and sliding it into place until it locks. Removal is achieved by sliding a button on the front of the cartridge while sliding it out of the tool. A red indicator confirms if the battery is not fully locked.
- Remaining Battery Capacity Indication: The tool includes indicator lamps on the battery cartridge that, when a check button is pressed, light up to show the remaining battery capacity. This helps users monitor battery life and plan charging accordingly.
- Main Power Switch: A simple main power switch turns the tool on and off. Users are advised to always turn off the main power switch when not in use or when carrying the tool to prevent unintentional startup.
- Switch Trigger Operation: The tool is activated by pulling a switch trigger and stops when the trigger is released. It is crucial to ensure the switch trigger actuates properly and returns to the "OFF" position before installing the battery cartridge.
- Pressure Gauge and Mode Selection: The pressure gauge displays essential information, including the target pressure value, pressure value unit (PSI, BAR, or KPA), and the selected inflation mode. Users can easily switch between these units by pressing the [M] button. The target pressure value can be adjusted using the [+] and [-] buttons, allowing for precise pressure settings between 35 kPa (5 PSI) and 1,100 kPa (160 PSI).
- Inflation Modes: The tool offers three distinct inflation modes:
- Ball Mode: Specifically designed for inflating sport balls using a sport ball needle. It's important to select this mode for proper inflation of balls.
- Low Speed Mode: Recommended for inflating objects using an English valve adapter.
- High Speed Mode: Suitable for inflating other objects at a faster rate.
Users can cycle through these modes by pressing and holding the [M] button for 3 seconds.
- Adapter Storage: The inflator includes an adapter holder for convenient storage of the sport ball needle, Presta valve adapter, and tapered adapter. The sport ball needle can be inserted into the Presta valve adapter before attaching them to the holder.
- Hose Storage: The hose can be neatly attached to the hose holder on the tool, ensuring compact storage and preventing entanglement.
- Inflation Procedures:
- Schrader Valve Adapter: For tires with Schrader valves, the air chuck is directly attached to the valve stem. After setting the desired pressure and turning on the tool, the switch trigger is pulled until the tool stops, indicating the specified pressure has been reached.
- Presta Valve Adapter: For Presta valves, the locking nut on the valve stem is loosened, the Presta valve adapter is attached to the valve stem, and then the air chuck is attached to the Presta valve adapter. The inflation process is similar to Schrader valves, followed by tightening the locking nut after removing the adapters.
- Sport Ball Needle: For sport balls, the sport ball needle is attached to the air chuck. Users must select the "Ball" mode on the pressure gauge before inflating.
- Tapered Adapter: For floating tubes, the tapered adapter is attached to the air chuck and then inserted into the hole on the floating tube. Users are cautioned not to over-inflate and to avoid relying solely on the pressure gauge for floating tubes, especially when pressure is below 35 kPa (5 PSI).
- English Valve Adapter: For objects using an English valve adapter, the adapter is inserted into the air chuck and then attached to the valve stem while opening the adapter. The low speed mode should be selected. It's important to note that the pressure gauge may not display an accurate value with this adapter due to valve characteristics; users should inflate by checking the tire's status.
Maintenance Features
Proper maintenance is crucial for ensuring the safety, reliability, and longevity of the Makita Cordless Inflator DMP181.
- Pre-Maintenance Safety: Always ensure the tool is switched off and the battery cartridge is removed before performing any inspection or maintenance tasks. This prevents accidental startup and potential injury.
- Cleaning: The tool should be kept clean and free from dirt and debris. For the front lamp lens, a dry cloth should be used to wipe off dirt, taking care not to scratch the lens, which could impair illumination.
- Avoidance of Harsh Chemicals: Never use gasoline, benzine, thinner, alcohol, or similar substances for cleaning, as these can cause discoloration, deformation, or cracks on the tool's surfaces.
- Regular Checks: Periodically check for misalignment or binding of moving parts, breakage of parts, or any other condition that might affect the tool's operation. If any damage is found, the tool should be repaired by qualified personnel.
- Battery Care:
- Charge the battery cartridge before it is completely discharged. Stop operation and charge the battery when a decrease in tool power is noticed.
- Avoid overcharging, as this shortens battery service life.
- Charge the battery cartridge at room temperature (10 °C - 40 °C). Allow hot battery cartridges to cool down before charging.
- Remove the battery cartridge from the tool or charger when not in use for extended periods.
- Charge the battery cartridge if it will not be used for more than six months.
- Store the battery cartridge in a safe place, away from other metal objects that could cause a short circuit.
- Do not store or use the tool and battery cartridge in extreme temperatures (below -20 °C or above 50 °C).
- Do not incinerate, nail, cut, crush, throw, drop, or hit the battery cartridge.
- Keep the battery away from children.
- Ensure that chips, dust, or soil do not get stuck into the terminals, holes, and grooves of the battery cartridge, as this can lead to poor performance or breakdown.
- Professional Servicing: For repairs, maintenance, or adjustments, it is recommended to use Makita Authorized or Factory Service Centers. They will use identical replacement parts to ensure the safety and integrity of the power tool. Damaged battery packs should only be serviced by the manufacturer or authorized service providers.
- Continuous Operation: After using the tool continuously for 10 minutes, it is advised to stop using it for 5 minutes to allow for cooling down. Exceeding the continuous operating time can damage the tool.