EasyManua.ls Logo

Makita DUR187L - User Manual

Makita DUR187L
20 pages
Print Icon
To Next Page IconTo Next Page
Loading...
INSTRUCTION MANUAL
Cordless Grass Trimmer
DUR187U
DUR187L
DUR188U
DUR188L
ENGLISH: Original instructions
Read before use.

Other manuals for Makita DUR187L

Questions and Answers

  • T
    Tyler HebertJul 25, 2025
    What to do if Makita DUR187L Trimmer has abnormal vibration?
    • T
      Tiffany NielsenJul 25, 2025
      If your Makita Trimmer is vibrating abnormally, stop the machine immediately! This could be because: * One end of the nylon cord has broken. Tap the nylon cutting head against the ground while it is rotating to cause the cord to feed. * The drive system is not working correctly. Ask your local authorized service center for repair.
  • J
    James NunezJul 30, 2025
    What to do if my Makita DUR187L cutting tool and motor cannot stop?
    • J
      Jesse HooverJul 30, 2025
      If the cutting tool and motor of your Makita Trimmer won't stop, it indicates an electric or electronic malfunction. Immediately remove the battery and ask your local authorized service center for repair.
  • R
    rhonda27Aug 4, 2025
    What to do if my Makita DUR187L Trimmer motor does not run?
    • C
      Chloe ClarkAug 4, 2025
      If the motor of your Makita Trimmer doesn't run, there could be several reasons: * The battery cartridge might not be installed. Ensure the battery cartridge is correctly installed. * There might be a battery problem, such as undervoltage. Try recharging the battery. If recharging doesn't work, replace the battery. * The drive system may not be working correctly. In this case, ask your local authorized service center for repair.
  • L
    Leslie WoodardAug 10, 2025
    Why does my Makita DUR187L Trimmer not reach maximum RPM?
    • J
      Justin SchaeferAug 10, 2025
      Your Makita Trimmer might not reach maximum RPM due to a few reasons: * The battery might be installed improperly. Ensure you install the battery cartridge as described in this manual. * The battery power could be dropping. Try recharging the battery, and if that doesn't help, replace it. * The drive system may not be functioning correctly. Contact your local authorized service center for repair.
  • S
    Sonya HaynesAug 14, 2025
    What to do if my Makita DUR187L cutting tool does not rotate?
    • D
      Dawn KleinAug 14, 2025
      If the cutting tool of your Makita Trimmer doesn't rotate, stop the machine immediately. This could be due to: * A foreign object, like a branch, jammed between the guard and the nylon cutting head. Remove the foreign object. * The drive system not working correctly. In this case, ask your local authorized service center for repair.
  • S
    smithkatherineAug 19, 2025
    Why does my Makita DUR187L motor stop running after a little use?
    • E
      Eric SingletonSep 12, 2025
      If your Makita Trimmer motor stops running after a short period, it could be due to: * Low battery charge. Recharge the battery, and if it's still not effective, replace the battery. * Overheating. Stop using the tool and allow it to cool down.

Summary

SPECIFICATIONS

Symbols Explained

SAFETY WARNINGS

IMPORTANT SAFETY INSTRUCTIONS

Essential safety guidelines for operating the grass trimmer.

Intended use of the tool

Specifies the proper applications and limitations for the grass trimmer.

Personal protective equipment

Details the required safety gear for operating the grass trimmer.

Electrical and battery safety

Safety precautions related to the electrical components and battery usage.

Method of operation

Maintenance Instructions

Tips for maintaining maximum battery life

PARTS DESCRIPTION

FUNCTIONAL DESCRIPTION

Installing or removing battery cartridge

Instructions on how to insert and remove the battery from the tool.

Tool; battery protection system

Explanation of the automatic power cut-off system for tool and battery protection.

Power switch action

How to operate the main power button and switch trigger for starting and stopping.

Speed adjusting

How to change and control the tool's speed settings using the main power button.

ASSEMBLY

Installing the handle

Guide for attaching and securing the handle to the trimmer shaft.

Mounting the attachment pipe

Steps to connect the attachment pipe to the power unit.

Installing the guard

Instructions for fitting the protective guard for safety.

Installing the wire guard

How to attach the wire guard to control cutting range.

Installing nylon cutting head

Procedure for fitting the nylon cutting head accessory.

Installing plastic blade

Procedure for fitting the plastic blade accessory.

Adjusting handle;hanger position

How to adjust handle and hanger for comfortable operation.

OPERATION

Correct handling of tool

Guidelines for safe and effective handling of the grass trimmer during use.

Hex wrench storage

Proper method for storing the hex wrench to prevent loss or damage.

Attachment of shoulder harness

Instructions on how to connect and use the shoulder harness.

MAINTENANCE

Replacing the nylon cord

Step-by-step guide for replacing the nylon cutting line.

Detachment of shoulder harness

How to quickly release the tool from the shoulder harness.

Replacing the plastic blade

Instructions for replacing a worn or broken plastic blade.

TROUBLESHOOTING

OPTIONAL ACCESSORIES

Overview

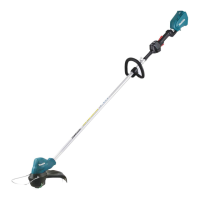
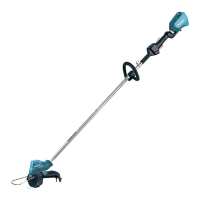
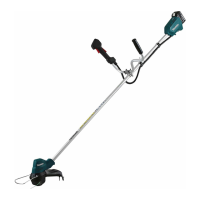
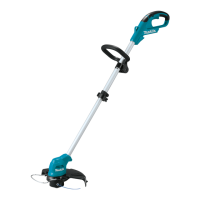
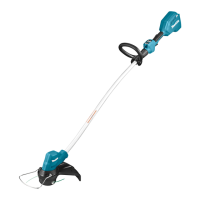
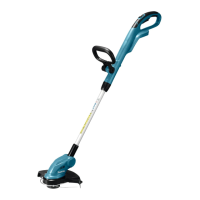
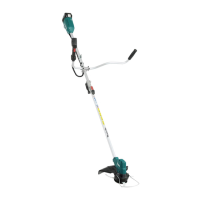
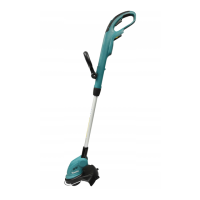
This document provides an instruction manual for the Makita Cordless Grass Trimmer, models DUR187U, DUR187L, DUR188U, and DUR188L. It covers safety warnings, functional descriptions, assembly, operation, and maintenance.

Function Description

The Makita Cordless Grass Trimmer is designed for cutting grass and light weeds. It operates on a D.C. 18V battery and features a motor that drives either a nylon cutting head or a plastic blade. The tool is equipped with a tool/battery protection system that automatically cuts off power to the motor under certain conditions to extend tool and battery life. These conditions include overload, overheating (of the tool or battery), and overdischarge (low battery capacity). The trimmer also includes a reverse rotation function, primarily for removing entangled weeds or debris from the cutting head.

Usage Features

The trimmer offers several user-friendly features:

  • Battery Installation/Removal: Battery cartridges are easily installed by aligning the tongue with the housing groove and pushing until it clicks, and removed by sliding a button on the front of the cartridge. Users are cautioned to ensure the cartridge is fully locked and not to force it.
  • Power Switch Action: The tool is turned on by pressing and holding the main power button for a few seconds, and turned off by pressing and holding it again. A lock-off lever is provided to prevent accidental pulling of the switch trigger. To start the tool, the handle must be grasped (releasing the lock-off lever) and the switch trigger pulled.
  • Speed Adjustment: The tool speed can be adjusted by tapping the main power button, cycling through different speed levels.
  • Reverse Button for Debris Removal: A dedicated reverse button allows for temporary reverse rotation of the cutting head. This feature is specifically for removing entangled weeds or debris and operates for a short period before automatically stopping.
  • Handle/Hanger Adjustment: The handle and hanger positions can be adjusted to achieve a comfortable working position, enhancing user comfort and control. This involves loosening hex socket head bolts, repositioning, and then tightening the bolts.
  • Shoulder Harness: The tool comes with a shoulder harness for comfortable operation and to prevent fatigue. It is crucial to adjust the harness according to user size and ensure the tool is securely held.
  • Guard Installation: A guard must always be installed to prevent personal injury. The guard's projections align with grooves in the motor housing and are secured with hex socket head bolts.
  • Wire Guard: A wire guard can be installed to control the cutting range and reduce the risk of damaging objects in front of the cutting head. It is inserted into holes in the protector after being slightly expanded.
  • Cutting Tools: The trimmer supports both nylon cutting heads and plastic blades. The nylon cutting head features a bump & feed mechanism to feed out the nylon cord by tapping it against the ground while rotating.

Maintenance Features

Regular maintenance is crucial for the tool's safety and longevity:

  • Pre-Maintenance Safety: Before any inspection or maintenance, the tool must be switched off, and the battery cartridge removed to prevent accidental start-up and serious personal injury.
  • Cleaning: The tool should be kept clean, and ventilation openings clear of debris. Handles should be kept dry, clean, and free from oil and grease.
  • Cutting Tool Inspection: The cutting tool, protective devices, and shoulder strap must be checked regularly for wear or damage. If the nylon cutting head or plastic blade impacts a hard object, the tool should be stopped immediately, inspected for damage, and replaced if necessary.
  • Nylon Cord Replacement: The manual provides detailed instructions for replacing the nylon cord, including preparing a specific length of new cord and winding it correctly onto the spool.
  • Plastic Blade Replacement: Instructions are given for replacing the plastic blade, emphasizing proper alignment with the protector's arrow.
  • Battery Cartridge Care: To maintain maximum battery life, the cartridge should be charged before it is completely discharged, not overcharged, charged at room temperature, and charged if not used for a long period (over six months).
  • Hex Wrench Storage: The hex wrench should be stored in its designated slot on the tool to prevent loss and avoid injury or damage.
  • Troubleshooting: A troubleshooting guide is provided to help users identify and remedy common issues such as the motor not running, the motor stopping after short use, failure to reach maximum RPM, the cutting tool not rotating, abnormal vibration, or the cutting tool and motor not stopping. For issues not covered or if repairs are needed, users are advised to contact a Makita Authorized Service Center.
  • Genuine Parts: Users are strongly advised to use only genuine Makita batteries, chargers, and replacement parts to ensure product safety, reliability, and to avoid voiding the warranty. The use of non-genuine parts or metal blades is explicitly warned against due to potential risks of fire, personal injury, and damage.

Makita DUR187L Specifications

General IconGeneral
FlowerguardYes
Product colorBlack, Blue, Silver
Rotational speed6000 RPM
Vibration emission2.5 m/s²
Sound pressure level74 dB
Cutting diameter (max)300 mm
Sound pressure level uncertainty6 dB
Battery charger includedNo
Power sourceBattery
Battery voltage18 V
Weight and Dimensions IconWeight and Dimensions
Depth232 mm
Width258 mm
Length1805 mm
Weight3600 g

Related product manuals