P 12/ 17
Repair
[3] ASSEMBLY/ DISASSEMBLY
[3]-4. Crank section
[3]-5. Armature
DISASSEMBLING
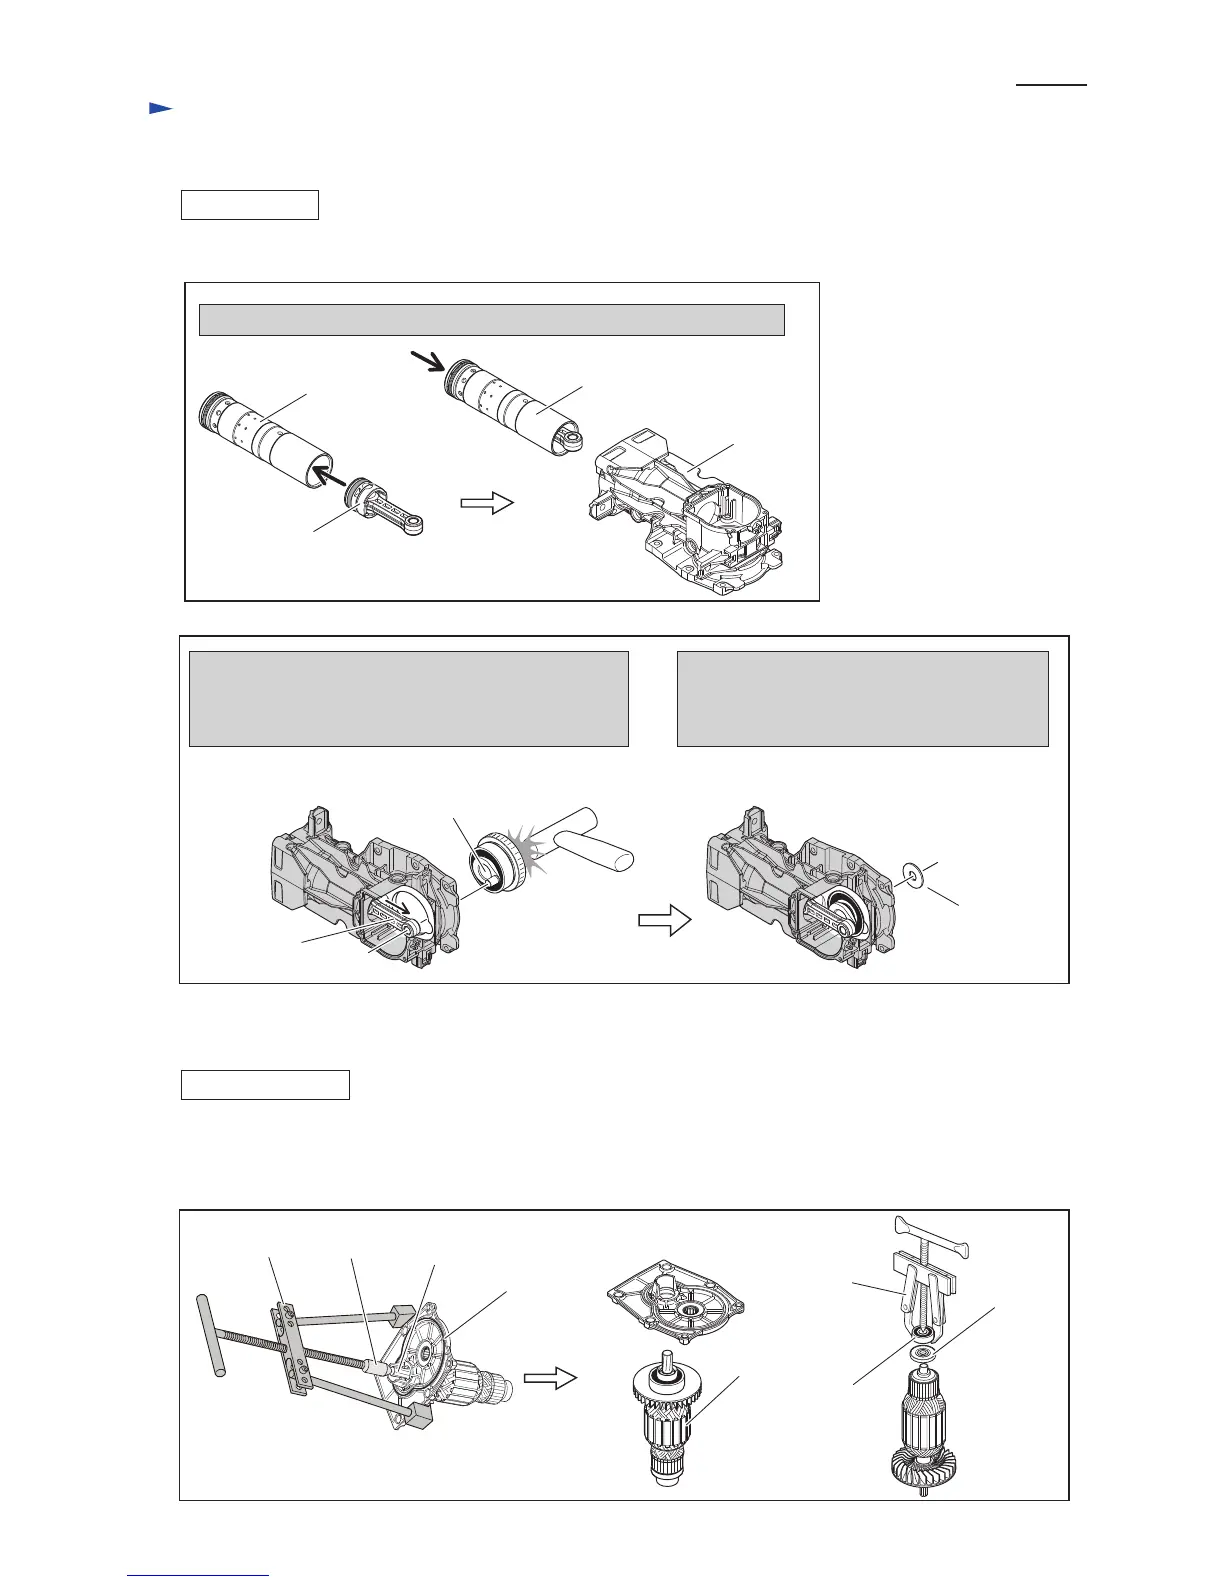
Cylinder 40
Cylinder 40
Crank
Housing
Crank shaft with
Helical gear 57
Move Connecting rod of piston to dead center point on
Handle assembling side.
And then, aligning Piston pin to the hole of
Connecting rod, tap Helical gear 57 with Plastic hammer.
Piston
Insert Piston into Cylinder 40. And assemble the Cylinder to Crank housing.
Crank shaft is assembled to Crank housing that
is connected with Connecting rod of Piston.
Do not forget to assemble Flat washer 12 to
Crank shaft.
Connecting
rod of Piston
Flat washer 12
ASSEMBLING
(2) Assemble Crank shaft section to Crank housing as illustrated in Figs. 26 and 27.
(3) By taking the disassembling step in reverse, assemble the components.
Fig. 26
Fig. 27
Fig. 28
(1) Separate Motor housing from Crank section. (Fig. 19 and 20)
(2) Separate Gear housing complete from Crank section. (Fig. 21)
(3) Armature can be disassembled as illustrated in Fig. 28.
1R045 1R346
Armature
Armature
Insulation
washer
Ball bearing
6000DDW
Gear housing
complete
1R269
 Loading...