Do you have a question about the Makita HP2050 and is the answer not in the manual?
Details on noise levels and the recommendation to wear ear protection.
Vibration emission values for impact drilling into concrete and drilling into metal.
Guidelines for maintaining a safe work environment, including lighting and preventing distractions.
Precautions regarding electrical connections, grounding, and wet conditions.
Measures for operator safety, including alertness, PPE, and preventing accidental starts.
Wear ear protectors when impact drilling to prevent hearing loss.
Use auxiliary handle, hold firmly with both hands, and keep hands away from moving parts.
Ensure firm footing, avoid hot surfaces, and handle materials safely.
Details on how to operate the switch trigger for starting, stopping, and continuous operation.
Instructions for changing the direction of rotation using the reversing switch lever.
How to preselect and change between two speed ranges using the speed change knob.
Information on how to operate the lamp for illumination.
How to select between hammering and rotation-only action using the lever.
Steps for attaching and positioning the auxiliary handle for safe operation.
Procedure for inserting and removing drill bits using the chuck key or sleeve.
How to use the depth gauge for drilling uniform hole depths.
Guidance on safe and effective hammer drilling, including handling twisting forces.
How to use the optional blow-out bulb to clean dust from holes.
Advice on drilling in wood and metal, including lubricant use and preventing bit slippage.
Recommendations for cleaning vent holes and professional servicing for repairs.
List of recommended accessories for use with the tool, with a caution on using others.
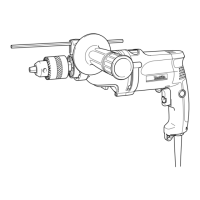
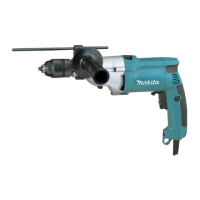
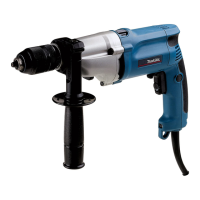
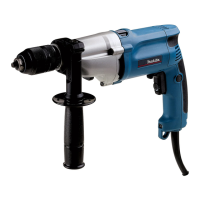
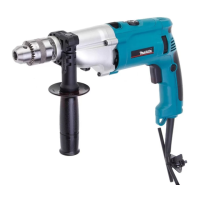
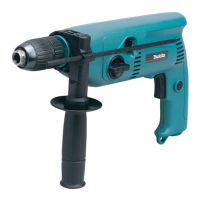
The Makita 2-Speed Hammer Drill, models HP2050, HP2050F, HP2051, and HP2051F, is a versatile power tool designed for both impact drilling in brick, concrete, and stone, as well as drilling without impact in wood, metal, ceramic, and plastic. This tool is double-insulated, ensuring safety and allowing it to be used from sockets without an earth wire.
The drill features a switch trigger for operation. Pulling the switch trigger starts the tool, and increasing pressure on the trigger increases the tool's speed. Releasing the trigger stops the tool. For continuous operation, the switch trigger can be pulled and then locked into place using the lock button. To stop the tool from the locked position, the trigger must be pulled fully and then released. A speed control screw is provided to limit the maximum tool speed, allowing for variable speed control. Turning the screw clockwise increases the speed, while turning it counterclockwise decreases it.
A reversing switch is integrated to change the direction of rotation. Moving the reversing switch lever to the "A" position enables clockwise rotation, while moving it to the "B" position enables counterclockwise rotation. It is crucial to always check the direction of rotation before operation and to use the reversing switch only after the tool has come to a complete stop to prevent damage.
The tool offers two preselectable speed ranges, controlled by a speed change knob. The "I" position on the knob is for low speed, and the "II" position is for high speed. To change the speed, the knob should be turned so that the arrow on the tool body points towards the desired position. If the knob is difficult to turn, slightly turning the chuck in either direction may help. It is important to change the speed only after the tool has completely stopped to avoid damage. Operating the tool with the speed change knob positioned halfway between "I" and "II" can also cause damage.
For models HP2050F and HP2051F, a lamp is included to illuminate the work area. The lamp turns on when the trigger is pulled and turns off when the trigger is released. Users should avoid looking directly into the light source.
The drill also features an action mode change lever. For rotation with hammering, the lever should be slid to the right (hammer symbol). For rotation only, the lever should be slid to the left (drill symbol). It is important to slide the lever completely to the desired mode position, as operating the tool with the lever halfway between modes can cause damage.
For hammer drilling, especially in concrete, granite, or tile, the action mode change lever should be set to the "rotation with hammering" symbol. A tungsten-carbide tipped bit is recommended for these materials. The bit should be positioned at the desired location, and the switch trigger pulled with light pressure for best results. Forcing the tool or applying excessive pressure is not recommended, as it can damage the bit, decrease performance, and shorten the tool's service life. If the hole becomes clogged, the tool should be run at an idle, and the bit partially removed from the hole. Repeating this process several times will help clear the hole and allow normal drilling to resume.
When drilling in wood, metal, or plastic, the action mode change lever should be set to the "rotation only" symbol. For wood drilling, wood drills with a guide screw are recommended as they pull the bit into the workpiece, making drilling easier. For metal drilling, an indentation should be made with a center-punch and hammer at the drilling point to prevent the bit from slipping. A cutting lubricant should be used for most metals, with the exception of iron and brass, which should be drilled dry.
The tool comes with a side grip (auxiliary handle) which must always be used for operating safety. The side grip is installed by fitting its teeth between the protrusions on the tool barrel and then tightening it clockwise. It can be swung 360 degrees to be secured at any position. A depth gauge is also provided for drilling holes of uniform depth. It is inserted into a hole in the side grip after loosening the grip, adjusted to the desired depth, and then the side grip is tightened. The depth gauge cannot be used if it strikes against the tool body.
For models HP2050 and HP2050F, bits are installed by placing them in the chuck as far as they will go, tightening the chuck by hand, and then using the chuck key in each of the three holes to tighten clockwise evenly. To remove a bit, the chuck key is turned counterclockwise in one hole, and the chuck is loosened by hand. The chuck key should always be returned to its original position after use. For models HP2051 and HP2051F, bits are installed by holding the ring and turning the sleeve counterclockwise to open the chuck jaws, inserting the bit, and then holding the ring firmly while turning the sleeve clockwise to tighten the chuck. To remove the bit, the ring is held, and the sleeve is turned counterclockwise.
When operating the tool, a firm footing should always be maintained, and hands should be kept away from rotating parts. The tool should be held firmly with both hands, especially during impact drilling, to counter the sudden twisting force that can occur when the bit breaks through a hole or encounters reinforcing rods.
Before performing any inspection or maintenance, it is essential to ensure that the tool is switched off and unplugged. Solvents such as gasoline, benzine, thinner, or alcohol should never be used for cleaning, as they can cause discoloration, deformation, or cracks.
The tool's air vents should be kept clean and regularly cleaned, or whenever they become obstructed, to maintain proper airflow and prevent overheating.
For models with a lamp, a dry cloth should be used to wipe dirt off the lens. Care should be taken not to scratch the lens, as this can reduce illumination.
To maintain the product's safety and reliability, any repairs, carbon brush inspection and replacement, or other maintenance should be performed by Makita Authorized Service Centers, using only genuine Makita replacement parts.
An optional blow-out bulb can be used to clean dust out of drilled holes after operation.
| Chuck type | Key |
|---|---|
| Adjustable speed | Yes |
| Number of gears | 2 |
| Screw diameter (max) | 13 mm |
| Idle speed (1st gear) | 1200 RPM |
| Idle speed (2nd gear) | 2900 RPM |
| Drilling diameter in wood (max) | 40 mm |
| Drilling diameter in concrete (max) | 20 mm |
| Input power | 720 W |
| Cable length | 2.5 m |
| Power source | AC |
| Depth | 360 mm |
|---|---|
| Width | 70 mm |
| Height | 220 mm |
| Weight | 2540 g |