8 ENGLISH
ASSEMBLY
CAUTION: Always be sure that the tool is
switched off and the battery cartridge is removed
before carrying out any work on the tool.
Installing or removing driver bit/
socket bit
Optional accessory
Useonlydriverbit/socketbitthathasinsertingportion
showninthegure.Donotuseanyotherdriverbit/
socket bit.
For tool with shallow driver bit hole
A=12mm
B=9mm
Useonlythesetypeofdriver
bit. Follow the procedure
1. (Note) Bit-piece is not
necessary.
For tool with deep driver bit hole
A=17mm
B=14mm
Toinstallthesetypesofdriver
bits, follow the procedure 1.
A=12mm
B=9mm
Toinstallthesetypesofdriver
bits, follow the procedure 2.
(Note) Bit-piece is necessary
for installing the bit.
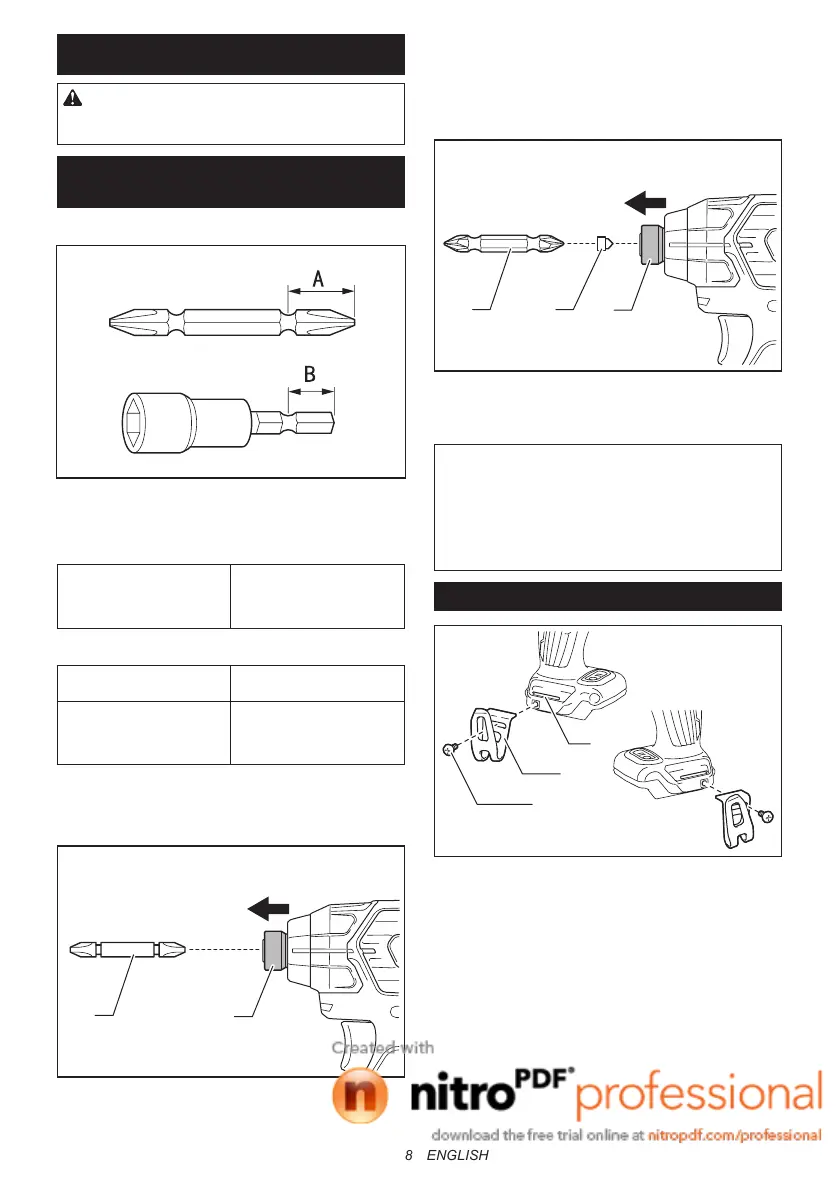
1. Toinstallthedriverbit,pullthesleeveinthedirec-
tion of the arrow and insert the driver bit into the
sleeve as far as it will go.
Thenreleasethesleevetosecurethedriverbit.
1
2
►1. Driver bit 2. Sleeve
2. Toinstallthedriverbit,pullthesleeveinthedirec-
tion of the arrow and insert the bit-piece and driver
bitintothesleeveasfarasitwillgo.Thebit-piece
should be inserted into the sleeve with its pointed
endfacingin.Thenreleasethesleevetosecure
the driver bit.
1
3
2
►1. Driver bit 2. Bit-piece 3. Sleeve
Toremovethedriverbit,pullthesleeveinthedirection
of the arrow and pull the driver bit out.
NOTE: If the driver bit is not inserted deep enough
into the sleeve, the sleeve will not return to its original
position and the driver bit will not be secured. In this
case, try re-inserting the bit according to the instruc-
tions above.
NOTE:Afterinsertingthedriverbit,makesurethatit
isrmlysecured.Ifitcomesout,donotuseit.
Installing hook
3
2
1
►1. Groove 2. Hook 3. Screw
Thehookisconvenientfortemporarilyhangingthetool.
Thiscanbeinstalledoneithersideofthetool.Toinstall
the hook, insert it into a groove in the tool housing on
eithersideandthensecureitwithascrew.Toremove,
loosen the screw and then take it out.
 Loading...