Note:
As this boss of Housing L is easy to be
deformed, tighten M4x65 Pan head
screw carefully.
Fig. 8
Fig. 9
Fig. 10
[3] DISASSEMBLY/ASSEMBLY
[3] -2. DC motor (cont.)
ASSEMBLING
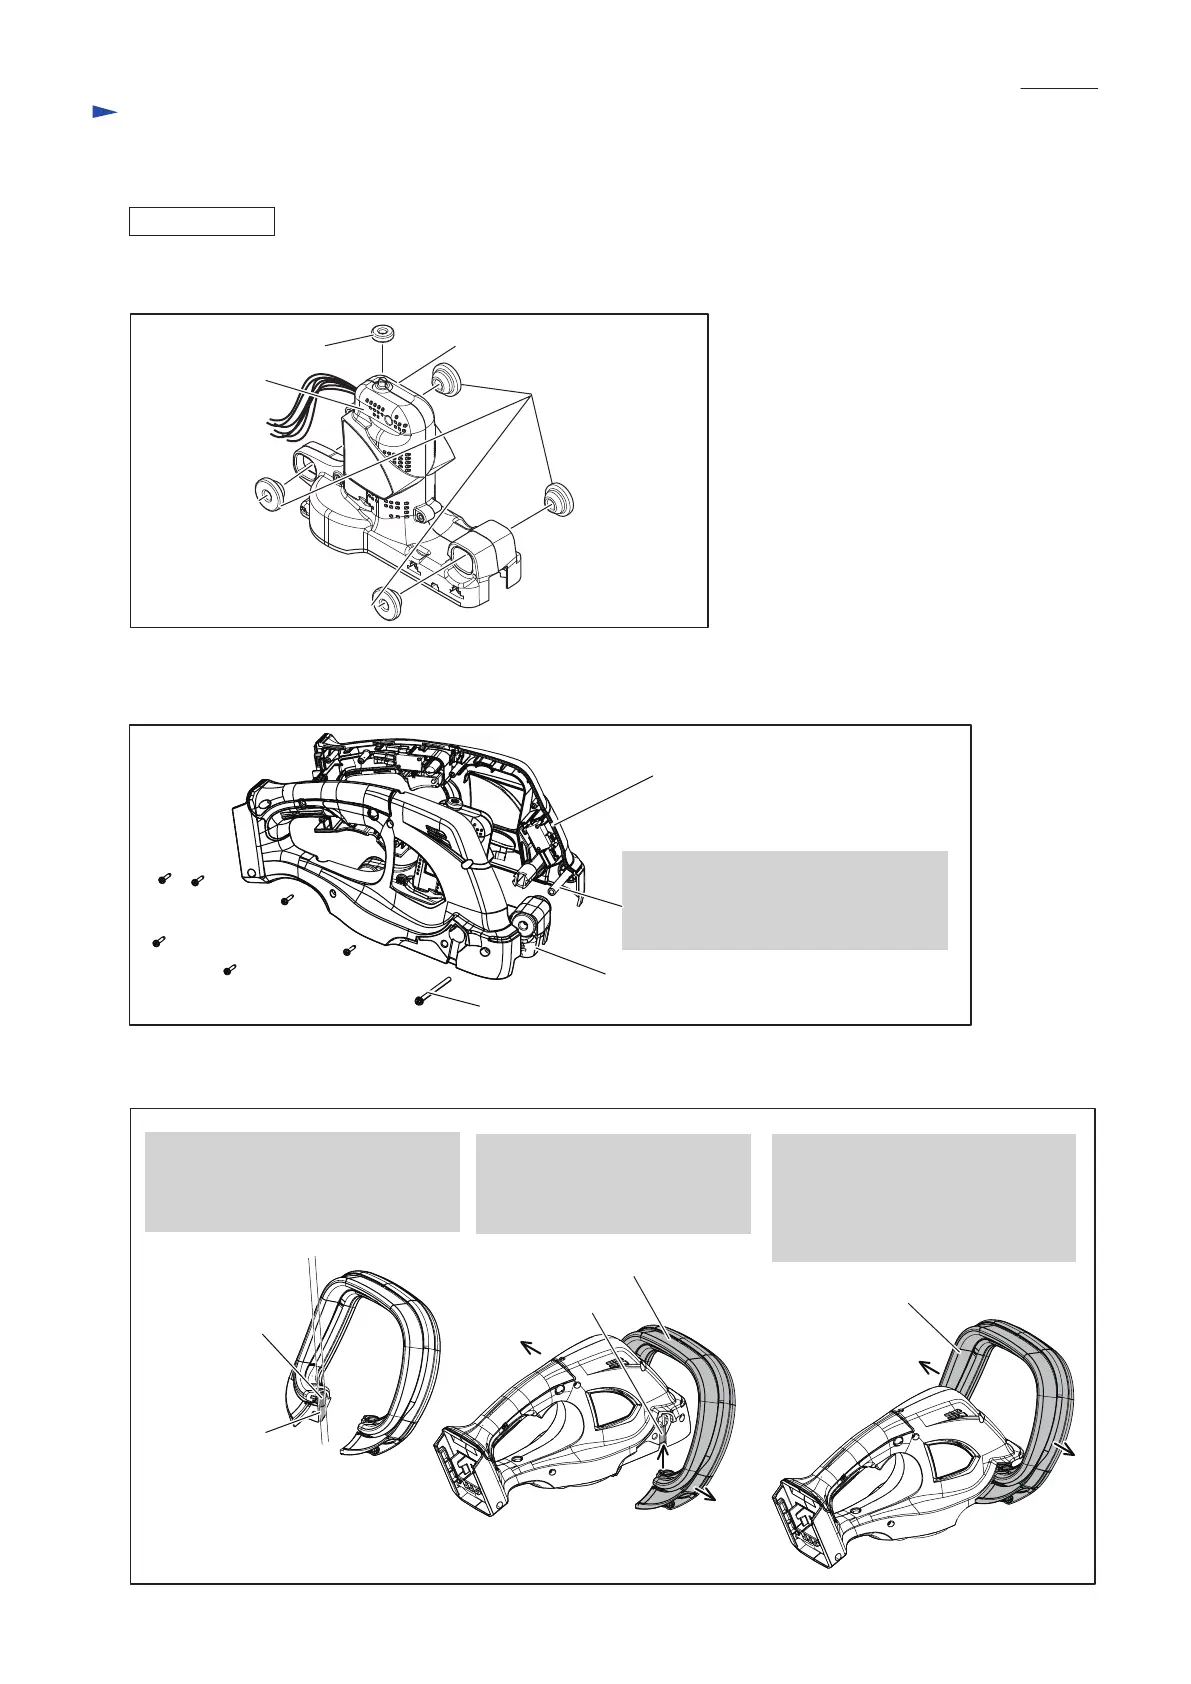
(2) Fix Motor housing R and Motor housing L with Rubber rings as drawn in Fig. 8.
Motor housing L
Rubber ring 8 (4 pcs.)
Rubber ring 6
Motor housing R
(3) Setting Motor housing section to Housing L, set Housing R in place with six 3x16 Tapping screws
and one M4x65 Pan head screw as drawn in Fig. 9.
(4) Assemble Front grip section as drawn in Fig. 10.
Motor housing section
Housing L
Joint of
Switch lever B
1. Align the joints of Switch lever B
and Front grip in line for smooth
moving in the grooves on Housing
set.
2. Pulling Front grip section
to both side, fit the Joints of
Switch lever B and Front grip
to the grooves on Housing set.
3. Pulling Front grip section to both
side, fit Front grip section to the
holes on Housing set.
And tighten two M5x25 Pan head
screw on both side of Housing set.
Joint of
Front grip
groove
Front grip section
Front grip section
M4x65 Pan head screw
Repair
P 6/ 13
3x16 Tapping screw
(6 pcs.)

 Loading...