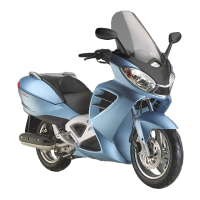
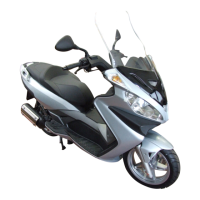
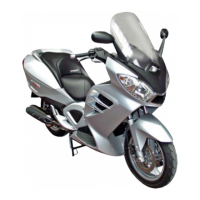
Do you have a question about the Malaguti SPIDER MAX GT 500 and is the answer not in the manual?
Visual checks, identification data, and initial tightening for new motorcycles.
Procedures for checking coolant, engine oil, transmission oil, and brake fluid levels.
Handlebar, shock absorber, headlight adjustments, tyre pressure, and general cleaning.
Instructions for receiving and inspecting the new motorcycle.
Guidance on visually inspecting plastic components, markings, and damage.
Details on engine, transmission, fuel, ignition, brakes, frame, suspension, battery, and tyres.
Description of throttle, brake lever, stop switch, and light switch on the right side.
Description of rear brake, passing lights, horn button, and indicator switch on the left side.
Explains ignition, steering lock, compartment opening, and key operations.
Procedures for locking and unlocking the steering with the key.
Guidelines for checking and adjusting tyre pressure with cold tyres.
Procedures for accessing and refilling the fuel tank with unleaded petrol.
Description of access, lighting, and 12V plug within the helmet compartment.
Information on opening the luggage compartment with the ignition key and fuse locations.
Instructions for checking brake fluid levels and replacement intervals.
A table listing lubricants and their recommended types for various components.
How to check for smooth movement and friction in the steering.
Procedures for checking handlebar screw tightness and adjusting handlebar position.
How to adjust spring pre-load for different load conditions.
Verification of proper tightening for shock absorber mounting screws.
Instructions for fitting the number plate onto its bracket.
Steps for removing and reinstalling the rear view mirrors.
Procedure for releasing screws to remove the central fairing section.
Steps to release screws and remove the windscreen.
Procedure for disconnecting the dashboard connector and extracting the unit.
Steps to release screws and extract the dashboard panel.
Procedure for removing the key switch ring nut and fusebox cover.
Steps to release screws and remove the upper handlebar cover.
What can be reached after removing the front handlebar cover.
Steps to release screws and remove the driver seat.
Identification of electronic components accessible after driver seat removal.
Steps to remove the passenger seat, grab handle, and movable support.
How to adjust the driver seat cushion travel.
Procedure to release screws and remove the grab handle.
Steps to release screws and remove the rear fairing.
How to disconnect cables and remove the helmet compartment.
Steps to release screws for removing the front mudguard.
Note on removing the lower mudguard after front wheel and mudguard removal.
Procedure to release screw and extract the odometer sprocket.
Steps to release screws and remove the front brake calipers.
How to separate brake discs from the front wheel by removing screws.
Steps for reassembling the front wheel, including spindle and spacers.
Procedures for emptying the hydraulic system and ensuring no leaks.
Steps to remove front calipers, including pump unit and clamp.
Replacing front calipers, including coupling, gaskets, and tube connections.
Steps to release screws and extract the rear caliper unit.
Replacing rear calipers, including coupling, gaskets, and fluid draining.
Checking rear disc condition and replacing if worn, noting rotation direction.
Steps to remove retaining rings, spindles, clips, and pads from the rear caliper.
Steps to access and remove the braking distributor after removing the central fairing.
Diagrams showing the routing of brake fluid lines and anchorage points.
Bleeding the integral system, starting with the rear caliper, then front right.
Procedure for bleeding the front left caliper using the right brake lever.
Instructions for removing fork legs, including related component removal steps.
Warnings and notes regarding the hydraulic oil and disassembly of stanchion groups.
How to check and refill the oil level inside the front fork legs.
Steps for draining, refilling, and checking fork oil levels and quantity.
Procedures for removing the entire front fork assembly, including preparatory steps.
Steps to remove fairing, leg protector, drain coolant, and detach radiator lines.
How to cut clips and disconnect the electrical fan wiring.
Steps to release screws and remove the right radiator.
Steps to remove the left radiator, including the electrical fan.
Procedures for disconnecting tubes and releasing screws to remove the expansion reservoir.
Steps for removing thermal expansion valves from the radiator and engine.
Steps to bleed air from the left side of the cooling circuit.
Steps to bleed air from the right side of the cooling circuit.
Steps to release screws and separate the upper subframe from side subframes.
Procedures for removing side subframes and their screws.
Steps to release screws and separate the central aluminium frame parts.
Steps to release screws, nuts, and remove the rear arm.
Procedure to remove the plate supporting the shock absorber.
Steps to remove brake caliper, exhaust, shock absorber, and rear arm to extract the wheel.
Draining coolant, disconnecting wiring, cables, and manifold before engine removal.
Lubricating spacers and shaft, aligning, fitting, and torquing the engine shaft.
Steps to remove the engine mount by releasing nuts and bushings.
Placing and fitting the engine mount, shaft, bushings, and nuts with correct torque.
Steps for removing anti-vibration connecting rods after engine mount removal.
General advice on replacing burnt-out bulbs with identical specifications.
How to access the parking light bulb by removing the central fairing.
Procedure to access front indicator bulbs by removing side covers.
Steps to access rear indicator and tail light bulbs by removing covers.
How to access front headlight bulbs by removing the front fairing.
How to access tail lights by removing compartments and fairings.
Steps to disconnect clamps, release screw, and remove the horn.
Procedure for disconnecting connectors, releasing screws, and removing the Immobilizer ECU.
Steps for removing the key switch, including precautions and replacement notes.
Procedure to release screws and remove the side stand switch.
Steps to remove fairing, leg protector, disconnect wiring, and remove the fan.
Explanation of fuse functions, locations, and replacement precautions.
How to access, remove, clean, gap, and reinstall the spark plug.
Steps to remove the rear fairing and disconnect the coil.
Steps to remove rear fairing and disconnect connectors to remove the voltage rectifier.
Procedure to remove driver seat, anti-vibration element, and ECU.
| Brand | Malaguti |
|---|---|
| Model | SPIDER MAX GT 500 |
| Category | Motorcycle |
| Language | English |