6
Operating Instructions
• Having positioned the ELK under the patient
and connected it to the 4-Way Hand Control
and Airo compressor, position a sturdy chair, if
possible, next to the patient for them to hold to
provide additional stability. When in the seated
position, the patient should place their arm on
the chair seat to provide further stabilization.
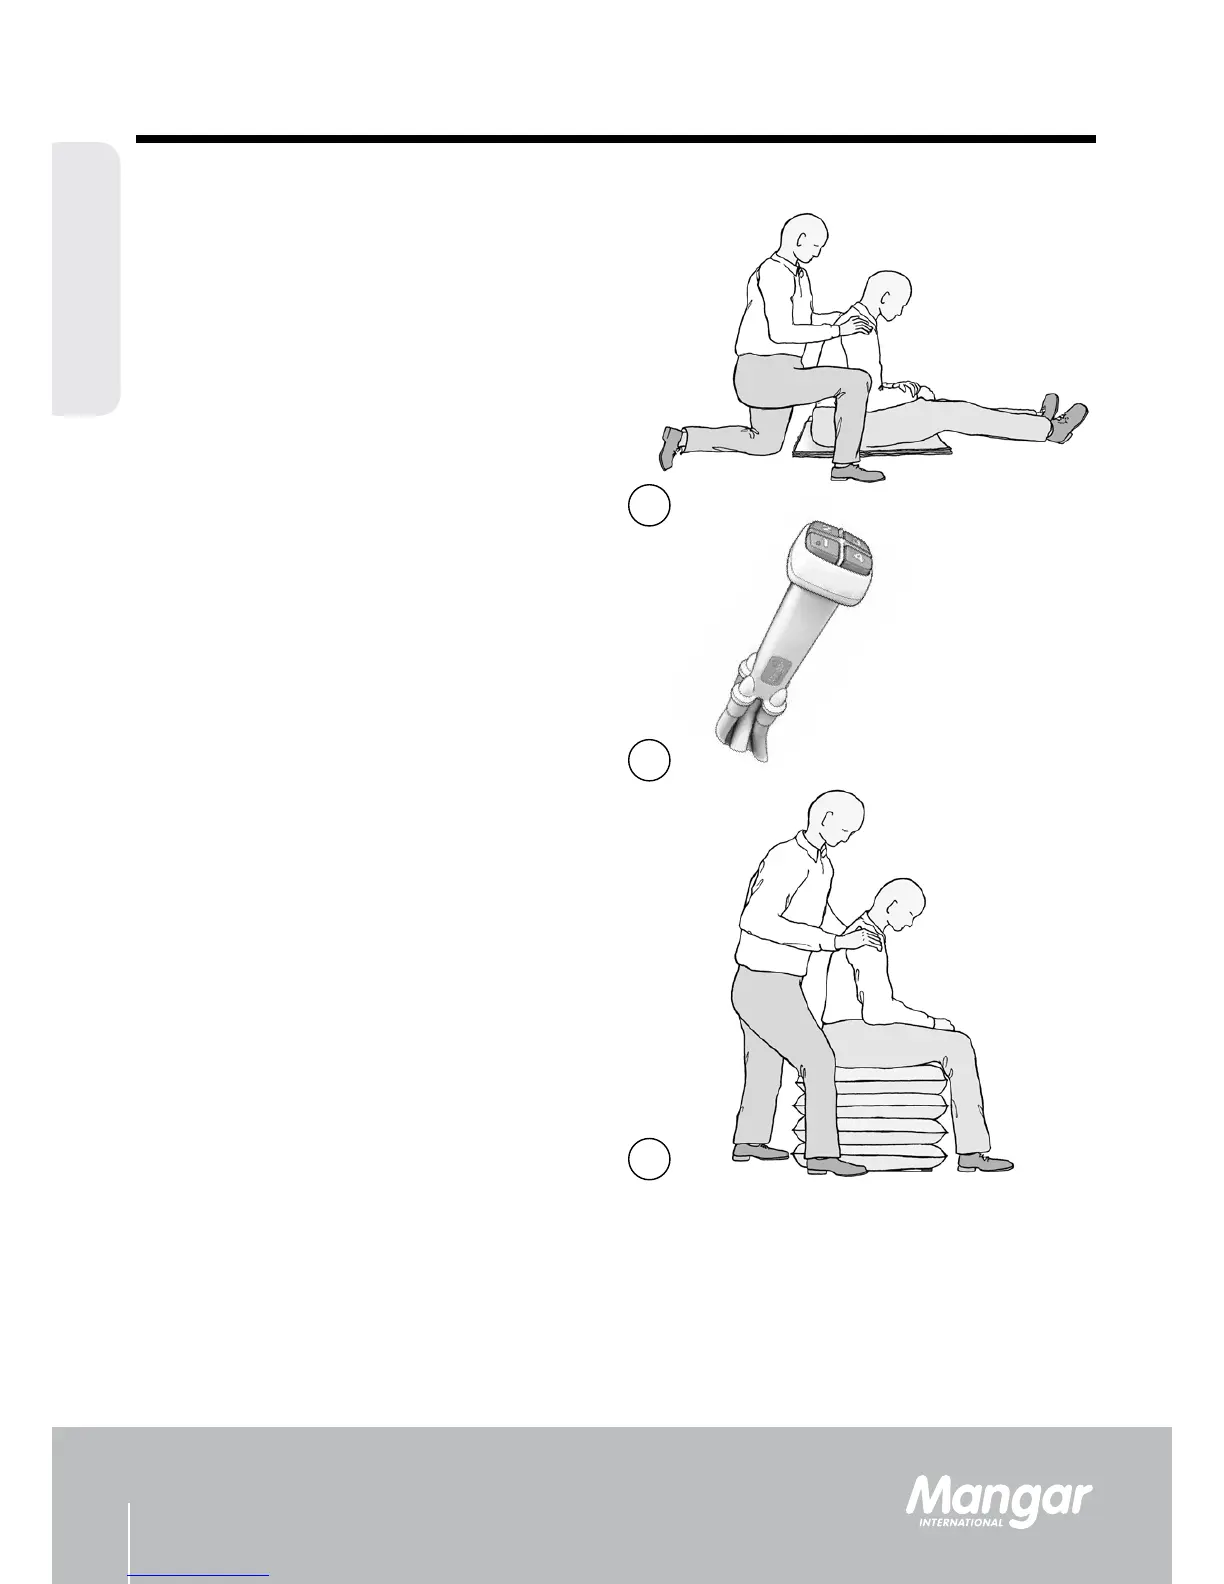
• Kneeling beside the patient, place them
in a seated position on the ELK (g.10). If
necessary, place a transfer belt (with looped
handles) around the patient’s chest and adjust
to t). Use the handles on this belt to provide
additional support and stability while elevating.
• Explain to the patient what to expect when the
ELK elevates.
• Press the number 1 button on the 4-Way Hand
Control (g.11). Steady the patient as the
ELK lifts. Stop ination when the rst (bottom)
compartment becomes hard. The compressor
will automatically stop as each compartment
becomes fully inated.
• Continue to operate buttons 2, 3 and 4, in
sequence, in exactly the same manner. Support
the patient at all times. Always inate the ELK
sections from the BOTTOM UP BEGINNING
WITH THE NO. 1 BUTTON.
• When all four compartments are inated, the
patient may be helped to stand or to transfer
(g. 12).
• To deate the ELK, rst disconnect the air
hose from the Airo and then press each of the
buttons on the hand control in turn to reduce
the pressure in each chamber. Once pressure
has been reduced, disconnect each of the air
hoses from the ELK.
WARNING: While in use, never allow a chamber to become partially deated while any chambers
above it are inated. Chambers must always be fully inated from the bottom up, in sequence, in
order to maintain stability.
English
• After use, roll the ELK up with the 4-Way Hand Control and re-secure the ap around the ends of the
stability bar (see g. 1).
10
11
12