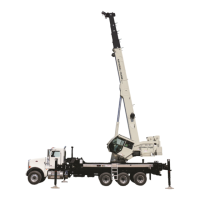
INSTALLATION 1400H OPERATOR AND SERVICE MANUAL
7-20 Published 10-30-2014 Control # 040-09
6. Loosely assemble flex plate and two anchor ears as
shown. Locate flex plate anchor ears to torsion box and
RSOD anchor plate as specified and tack in place. If
proper ground clearance cannot be obtained, see
location drawing for further instructions. Cut flex plate to
length specified. Use holes in RSOD mounting sub-
assembly as a template to mark and drill three holes in
flex plate. Remove flex plate and weld (E70) ears to
torsion box and anchor plate as specified. Install flex
plate with six 5/8 in diameter Grade 8 bolts, washers and
nuts. Tighten to proper torque. Repeat flex plate
installation procedure on other side. Raise and locate
the RSOD frame to the RSOD mounting sub-assembly
and weld (E70).
7. Cut and install the spacer tubes so they fit snugly
between the truck frame flanges. If the truck frame
tapers at the crane mounting location, the crane will
have to be relocated to an area of straight frame or the
truck frame will have to be reinforced to eliminate the
height taper. Special spacers will be required to prevent
crushing of this reinforcement. If the crane is being
mounted on a truck with a double channel frame, the
gap between inner and outer channel must be shimmed
to prevent the channel from collapsing.
8. Set the crane frame on the truck frame and sub-base.
Make sure the plate spacer is installed between the
crane frame and truck frame. Install the 1-1/8 in Grade 8
mounting bolts to bolt the crane frame to the mounting
anchors through the tubes in the subbase. Tighten
mounting bolts to the proper torque.
9. Assemble the mounting studs and plates as shown in
the parts pages. It is very important that the spacer plate
assembly that goes between the crane frame and top of
truck frame rail be positioned tight against the side of the
truck frame rail. Note that this spacer plate assembly
should be bolted to truck frame only after mounting
studs have been torqued. Be sure to maintain a
constant clearance between the truck frame and the
outer stud, top to bottom. Run bottom nut onto the stud
threads until one thread sticks out of the nut. Install the
studs onto the crane frame as shown. Install 1st nut on
the top and tighten. Install the 2nd nut on top and tighten
the two nuts until they are locked. Torque bottom nut to
1280 +/- lb-ft To keep the stud from turning use a wrench
to hold the top nut.
Note: Do not use a cutting torch to shorten the
mounting studs. If studs must be shortened, they
must be cut off with a saw. Do not allow the nuts to
bottom out on the stud. Make allowances for threads
during torquing. After mounting studs have been
torqued and it has been verified that spacer plate
assemblies are still tight against side of truck frame rail,
drill four 3/4 in diameter holes at each spacer plate
assembly using the small holes in the plates as pilot
holes. Install 3/4 in diameter Grade 8 bolts, washer and
nuts and tighten to proper torque.
10. Find a location for and install hydraulic oil reservoir and
oil cooler. See location drawing for location details.
Mounting brackets may be bolted to the truck frame.
Before placing reservoir in service, remove cleanout
cover and inspect to ensure proper installation of
diffuser. Connect 1/2 in winch drain line to coupling in
back side of reservoir and 3 in suction line from pump
before filling with oil.
11. Route and install fittings and return hoses from crane
frame to reservoir filter.
12. Route and install fittings and pressure hoses from crane
frame to pump.
13. Install the main frame outriggers as instructed in the
Service and Maintenance section of this manual.
14. Install operator platforms according to the platform
group parts pages.
15. Important: Before attempting to assemble the boom
and lift cylinder to the frame, see “Hose Routing”
page in “Controls & Hydraulics” Section and “Pin
Bearing Inspection and Installation” and “Anti-Two-
Block System Installation” pages in this section.
Before connecting hoses, boom must be opposite
(180°) the rotation stop to minimize hose twist.
Pin lift cylinder barrel in position in the turret. Pin
boom pivot to turret. (It will be necessary to use an
overhead hoist for lifting boom and lift cylinder.) Connect
the hoses to the lift cylinder. Support outer end of boom
securely and use the overhead hoist to position the lift
cylinder with the control valve to pin the cylinder to the
boom ears. Torque pin keeper capscrews to proper
torque. Install snap ring to end of boom pivot pin. Grease
the three pin joints with gun grease and operate the
boom and lift cylinder through several complete cycles
before placing machine in operation.
16. Route the telescope hoses as shown in the parts pages.
Connect the telescope cylinder connections at the back
of the boom.
SEE LOCATION DRAWING FOR WELD CALLOUTS
AND OTHER INFORMATION

 Loading...


