5
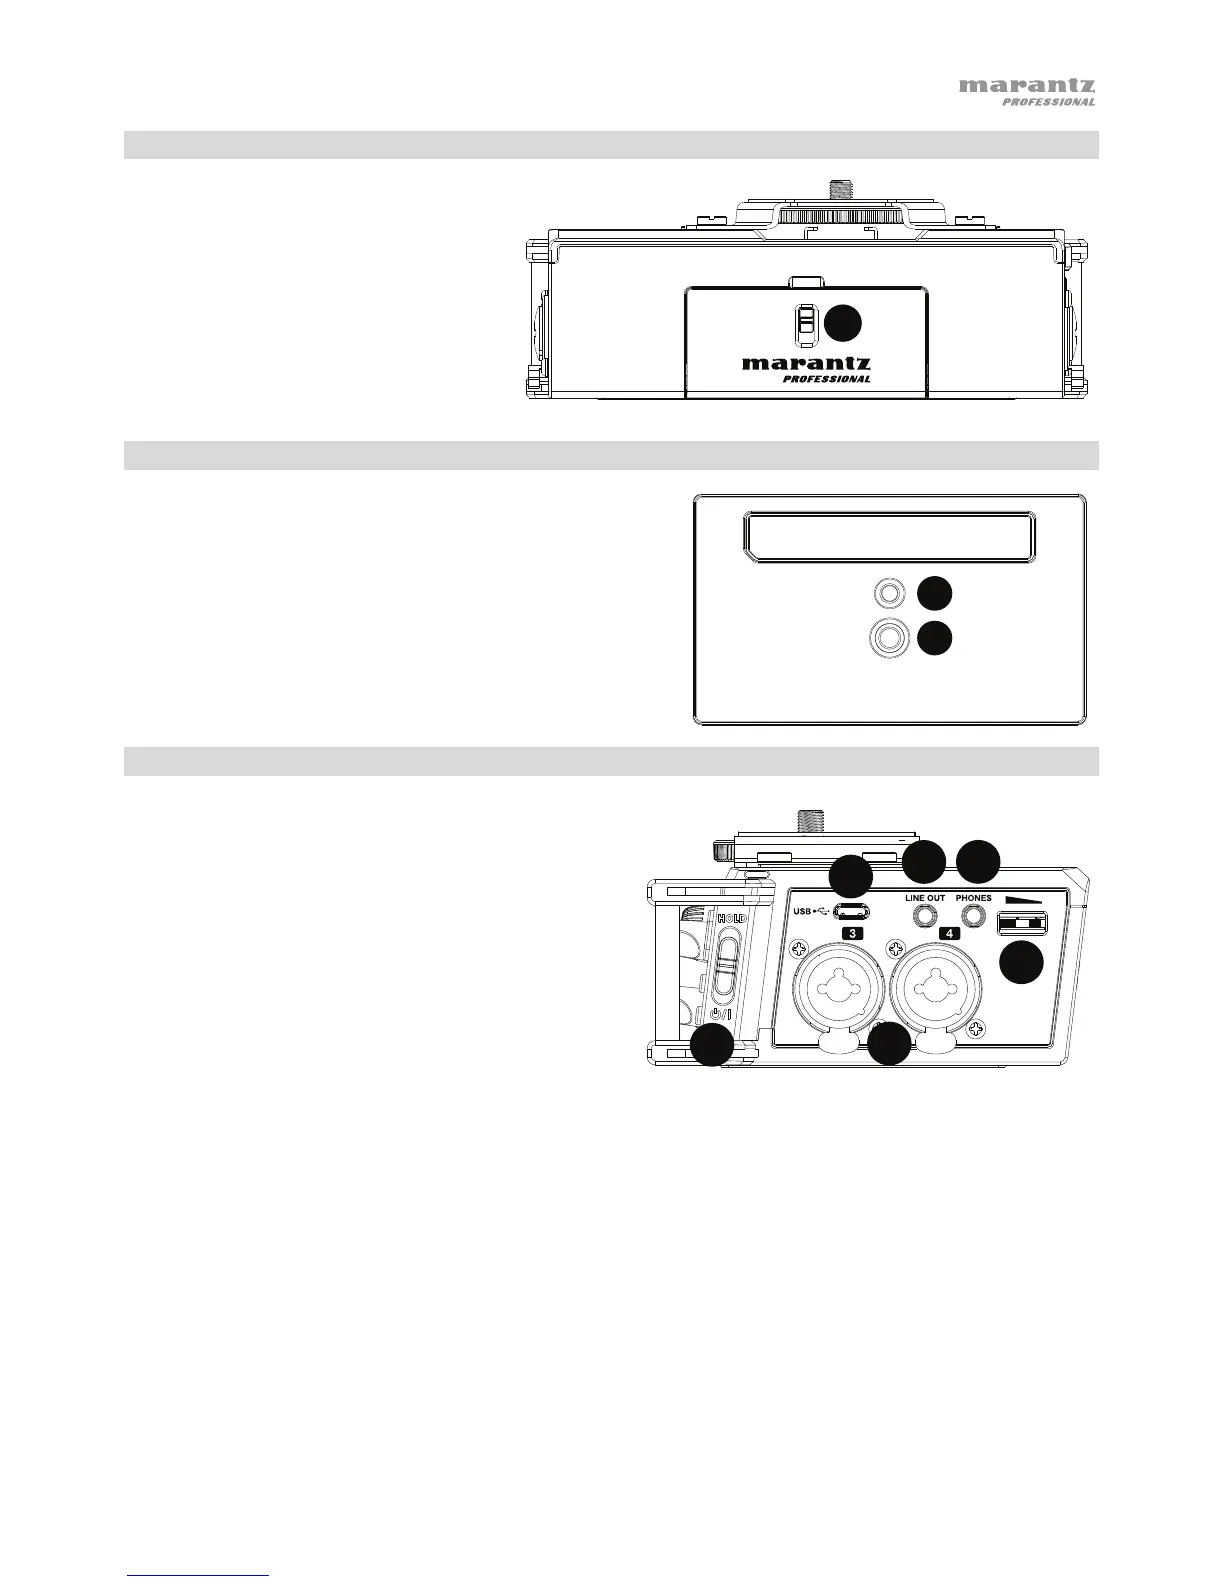
Rear Panel
1. Battery Compartment: Insert 4
AA batteries into this
compartment to power the unit.
Note: If recording with 4 or more
channels using 48V phantom
power, a USB power adapter or a
computer’s USB bus power must
be used in order to provide the
necessary power (1A) to all
channels.
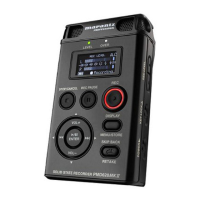
Bottom Panel
1. Tripod Locking Hole: Attach your tripod here for a
secure connection.
2. 1/4” Threaded Insert: Connect your mounting
adapter from a tripod here.
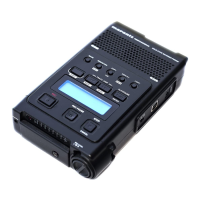
Right Side Panel
1. Power On/Off/Hold Switch: Slide this switch
down to power PMD-706 on or off. Slide this
switch up to activate or deactivate the Hold
feature. When Hold is activated, all of PMD-706's
buttons will be disabled to prevent accidental
changes.
2. XLR+1/4” TRS Inputs: Connect a microphone or
line-level device to these XLR+1/4” (6.35 mm)
inputs.
3. Micro USB Port: Connect this port to a
computer with the included USB cable. This
connection will power PMD-706. You can also
use this connection to transfer files between PMD-706 and your computer. You can also connect this
port to a USB power adapter (sold separately) to power PMD-706 from a standard power outlet.
Note: If recording with 4 or more channels using 48V phantom power, a USB power adapter or a
computer’s USB bus power must be used in order to provide the necessary power (1A) to all channels.
4. Line Out: Connect this 1/8” (3.5 mm) output to a mixer, another recorder, or powered speakers. Go to
Menu > Output Control
to adjust the volume output.
5. Headphone Output: Connect this 1/8” (3.5 mm) output to headphones for monitoring the incoming
audio signal or audio playback.
6. Headphone Volume Control: Adjust the headphone output volume using this control.
Note: Before connecting any device (condenser or dynamic microphones, line-level devices, etc.) to
any XLR, 1/4” input, or external inputs, ensure phantom power is turned off. Connecting or
disconnecting devices to or from these inputs while phantom power is on can damage the device or
PMD-706.