2
INSTALLATION
Mounting the Projector
Available options for mounting the CP-670 are a wall, unit, and
table mount. Preferably, the instrument should be mounted at
the same height as the patient’s eyes. If this is not possible, tilt the
instrument slightly so that the projected image on the screen is at
the same height as the patient’s eyes.
Positioning the Projector
M
easure the distance from patient to screen (refracting distance)
and mount the Chart Projector within the following projection
distance guidelines:
R
efracting Distance Projection Distance
10 feet 10-13 feet
13 feet 13-17 feet
16.4 feet 16-21 feet
20 feet 19-25 feet
To obtain a longer refracting distance in smaller rooms, a mirror
or system of mirrors should be used (Figure 2). A high quality
front surface mirror is recommended to obtain optimal results.
Positioning the Screen (Figure 3)
Hang or hold a small mirror on the screen and tilt or turn the
screen until the projected spot of light is properly directed
towards the patient.
Correct Letter Size and Focus
1. Project the 20/200 N on the screen.
2. As a reference for proper measurements, have someone hold
the distance scale (Figure 4) on the screen and focus the
20/200 N to measure evenly with the respective distance line.
(The scale of 10 to 20 feet refers to the distance from patient to
screen.)
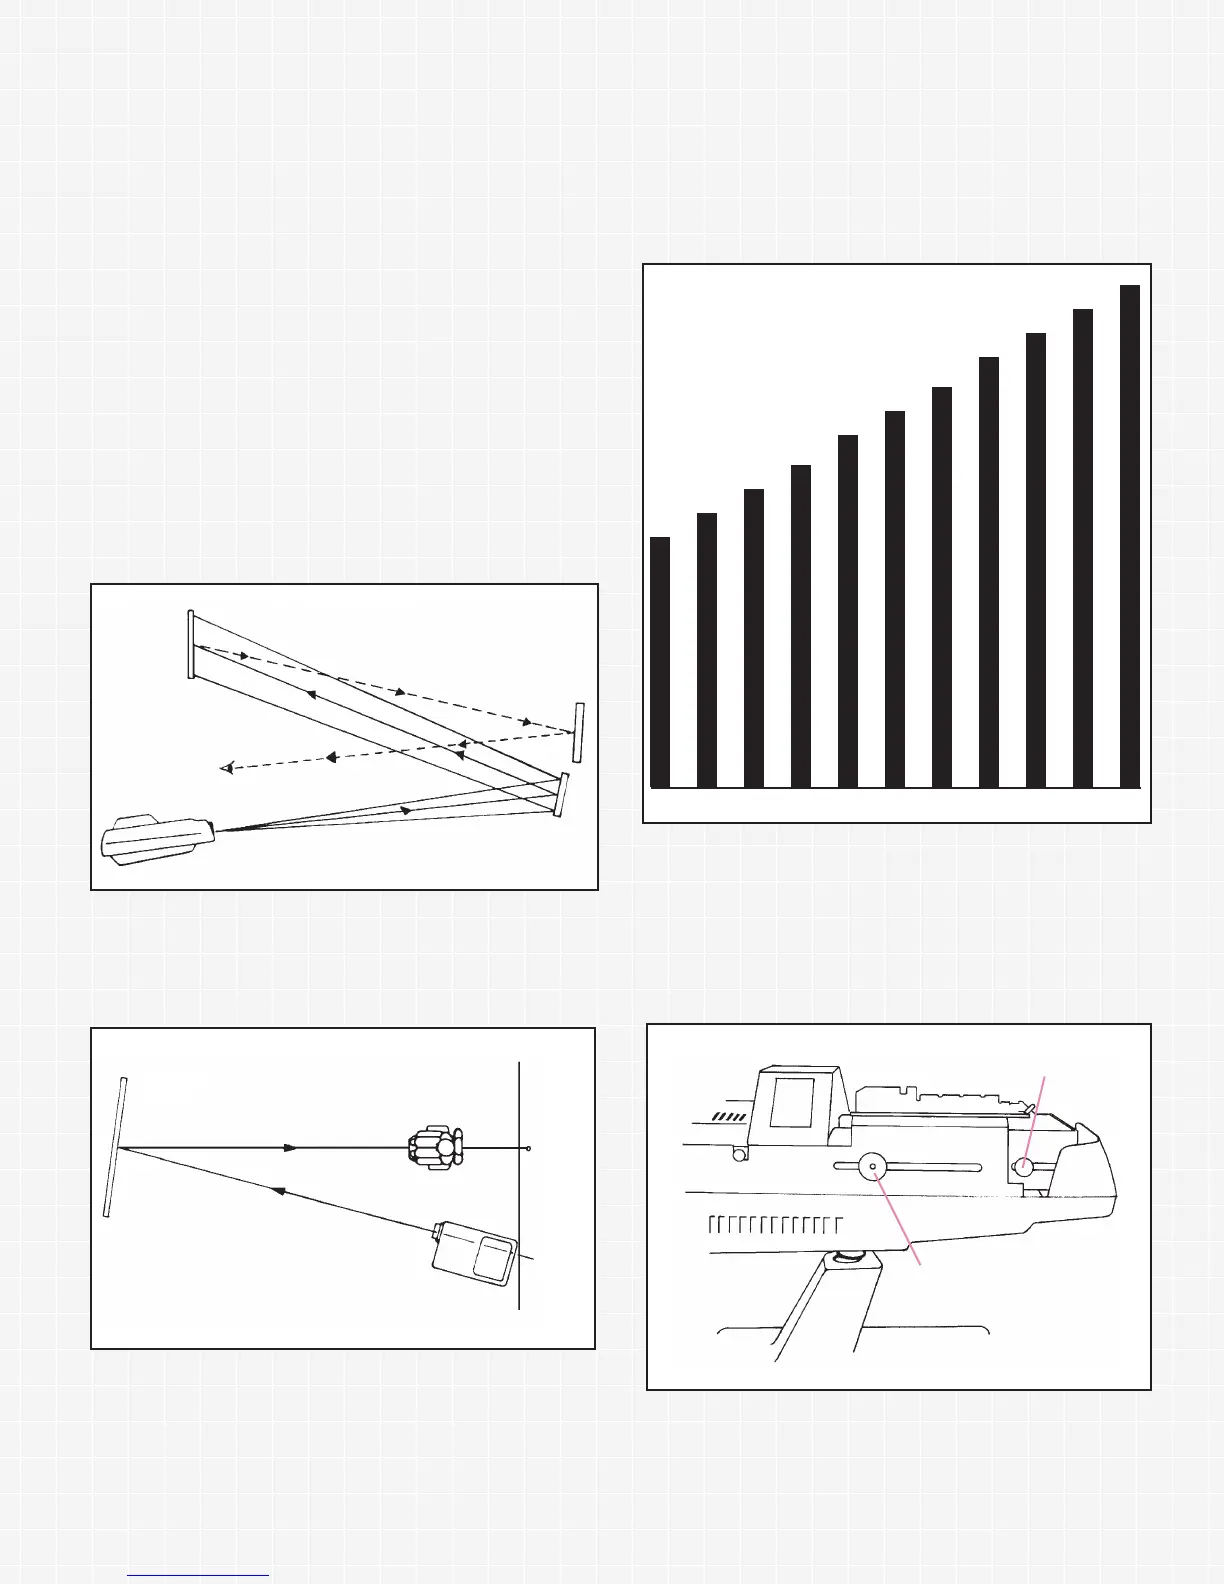
3. To adjust for proper letter size and focus, remove the top cover
by turning the top cover screw
1
/2 turn counterclockwise (refer
to figure 5). For image focusing, loosen the focusing knob and
slide the focusing tube forward or backward to obtain proper
focus. The rear adjustment knob controls letter size. Loosen
and slide the knob forward or backward for proper letter size.
When adjustments are completed, tighten both knobs and
replace the top cover.
Screen
Patient
Spot of
light
on wall
Projector
Figure 3
Focusing Knob
Letter Size Control Knob
Mirror
Mirror
Screen
Projector
Patient’s eye
Figure 2
1100’’ 1111’’ 1122’’ 1133’’ 1144’’ 1155’’ 1166’’ 1177’’ 1188’’ 1199’’ 2200’’
Figure 4
Figure 5
 Loading...