26
4
left analog dc
out
right analog dc
out
50 – 60HZ
90 – 110VAC
~
~
~
105 – 125VAC
180 – 220VAC
210 – 240VAC
230 – 250VAC
~
~
~
operating voltage:
WARNING:
BEFORE ATTEMPTING TO OPERATE
THIS DEVICE, REFER TO OWNER'S MANUAL FOR
PROPER OPERATING INSTRUCTIONS AND SAFETY
PRECAUTIONS. HAZARDOUS VOLTAGE AVAILABLE
INSIDE; DISCONECT AC ~ MAINS CABLE BEFORE
REMOVING COVER.
digital dc
out
1 3 12
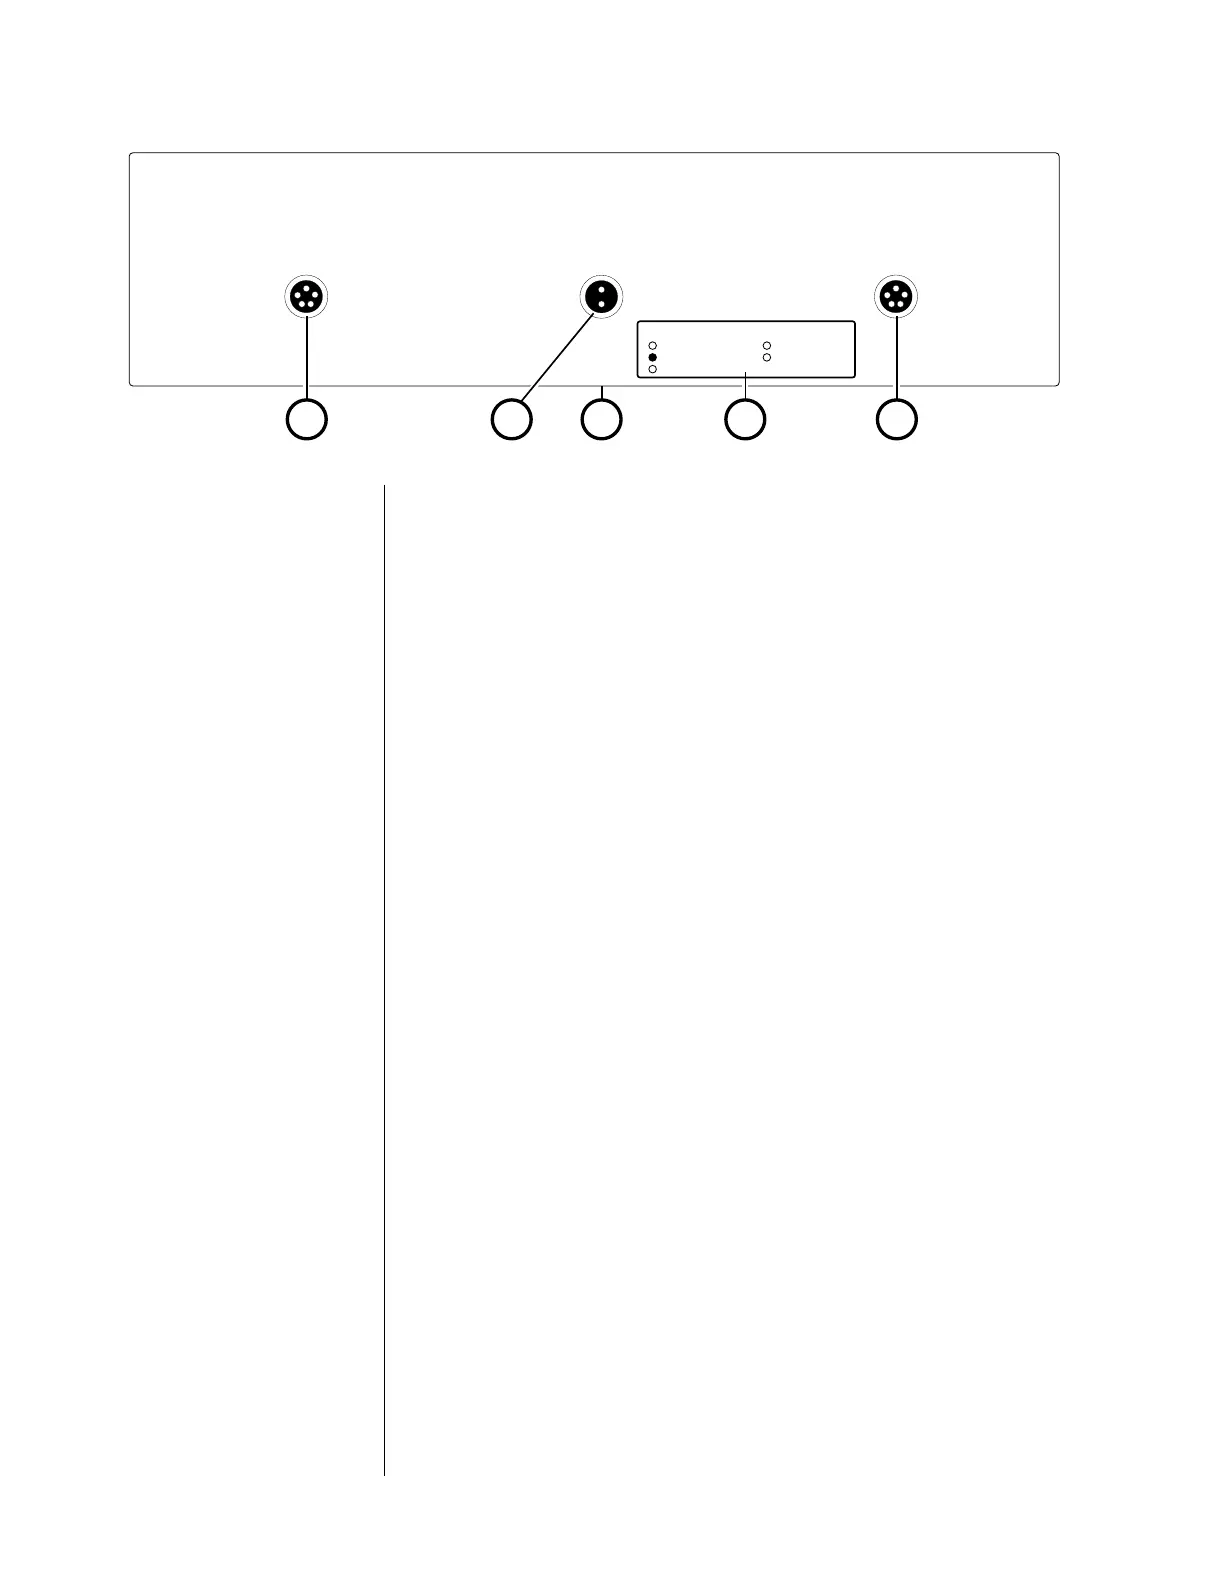
Rear panel, PLS-330
1 right analog dc out, left analog dc out
These outputs, one for each channel, provide DC power to the
Nº30.6 (via the supplied cables equipped with five-pin connec-
tors).
Connect the left channel’s analog dc in on the rear panel of the
Nº30.6 to the left analog dc out on the rear panel of the PLS-
330; likewise, connect the right channel’s analog dc in on the
rear panel of the Nº30.6 to the right analog dc out on the rear
panel of the PLS-330.
2 digital dc out
This output provides DC power to the Nº30.6 (via the supplied
cable equipped with two-pin connectors).
Connect digital dc in on the rear panel of the Nº30.6 to the digi-
tal dc out
on the rear panel of the PLS-330.
3 AC power connector (on bottom)
This input accepts AC power from the AC mains (via the supplied
AC cable). Connect the female end of this cable to the PLS-330.
Connect the male end of this cable to wall outlet or to an “un-
switched” convenience outlet like those found on many audio
components.