5
Pre-Installation
1. Read Checks Before Commencing Installation and ensure compliance.
2. Locate a suitably ventilated, flat and vertical surface close to the hot water tank to fix
the Solar iBoost+, observing all clearances shown on page 6. Positioning should be
convenient for running a cable from a fused spur to the Solar iBoost+ and on to the
immersion heater(s).
Connection
3. Hard wire the Solar iBoost+ in accordance with the selected wiring diagram on pages
7-9 following IEE Regulations or local regulations. Replace the terminal cover but do
not power up.
4. Connect the Measurement Clamp into the Sender and fit the batteries in the Sender.
Keep the Sender at 1-2m from the main unit. Do NOT press the button on the Sender.
5. Switch on the power supply to the Solar iBoost+ and a short start up procedure runs
until Water Heating Off is displayed.
6. Programme Time and Timed Boosts if desired, see page 15.
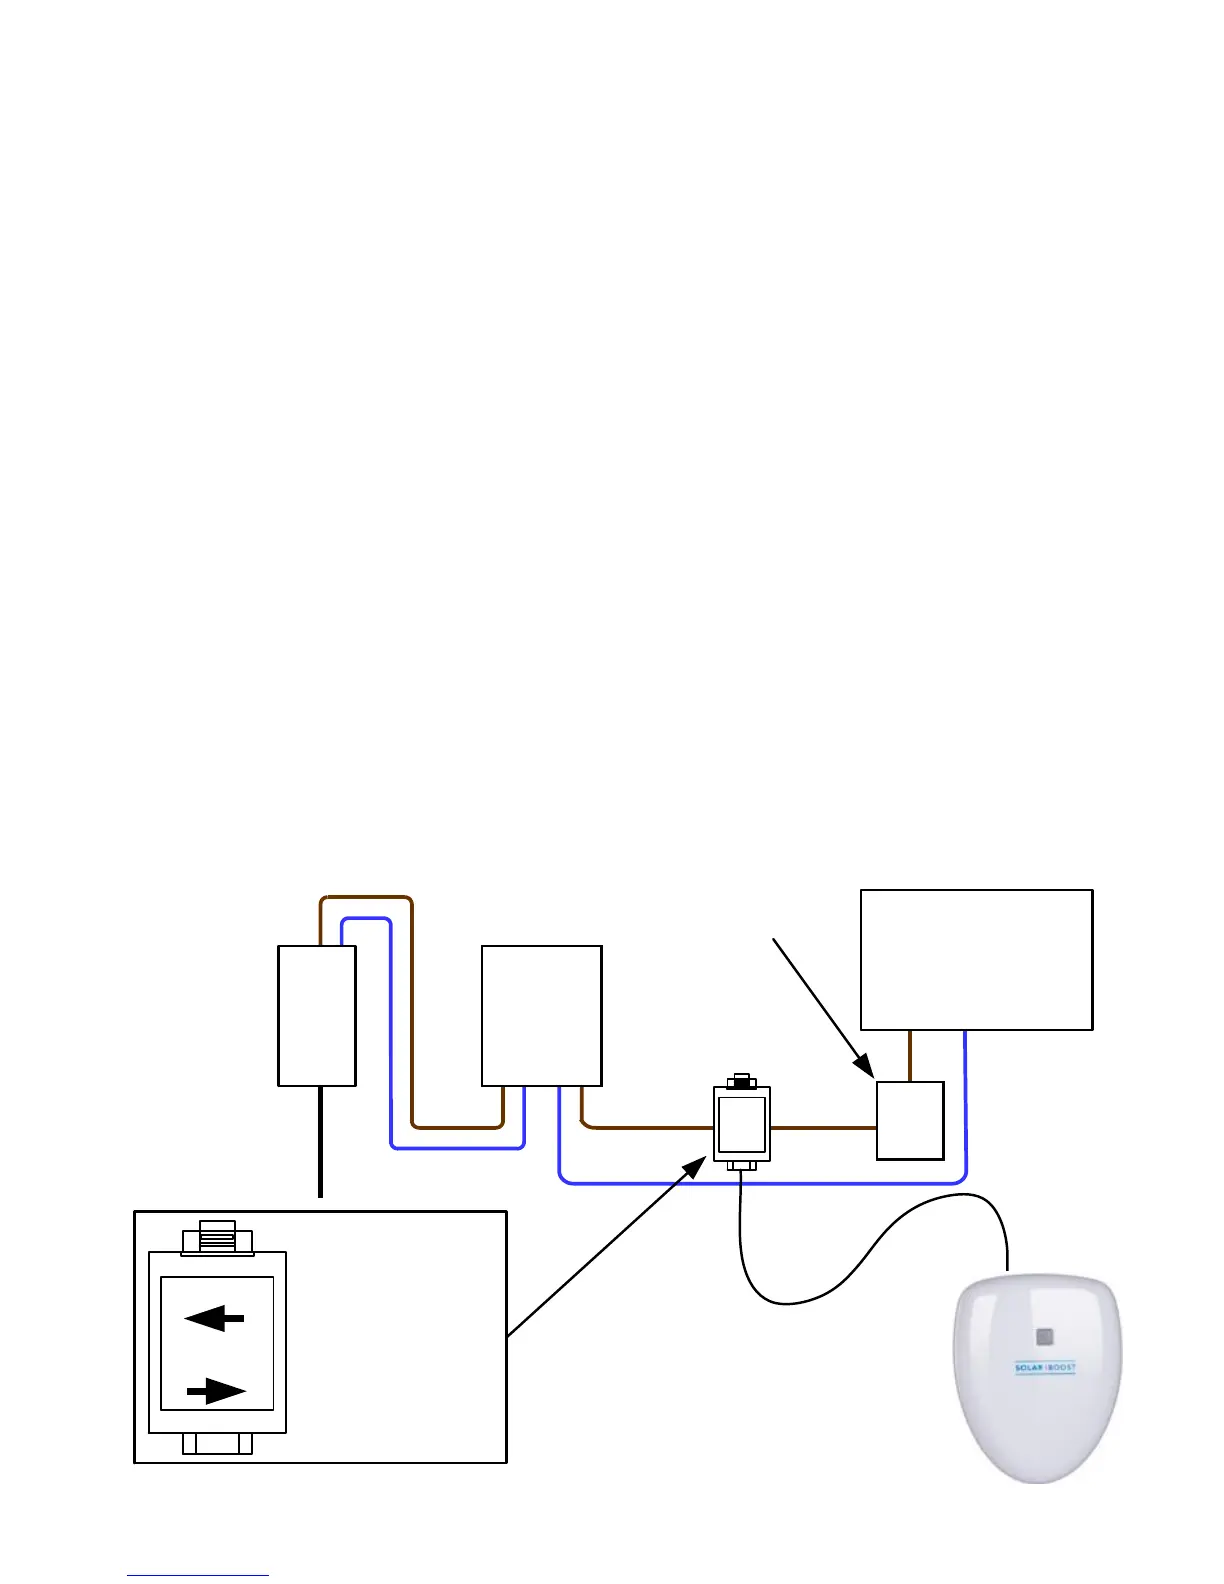
Locate the Sender
7. At the utility meter (NOT the Generation meter) place the Measurement Clamp over the
household main incoming live cable and latch into place. Note that the Clamp
must be installed on the utility meter side of any connector (or Henley) blocks.
IMPORTANT: the orientation of the clamp must be observed to ensure only
excess current is detected and used for water heating.
Commissioning
8. To commission, perform the tests shown in section 5.