Page 27
Step 4: Reduce splintering by taping the
cut area prior to making the cut.
Step 5: Plug the saw into a power source.
Step 6: Carefully follow all instructions for
applicable miter, bevel or compound cuts.
Step 7: After finishing the cut, release
trigger and wait until the blade comes to a
complete stop before returning the saw
arm to the raised position.
Step 8: Remove the work piece and
repeat.
When cutting a long work piece or do
repeated cutting, use extension table and
length stop.
CUTTING CROWN MOLDING
This miter saw is ideal for cutting crown
molding. To fit properly, it must be
compound-mitered with extreme accuracy.
WARNING Failure to unplug the saw
could result in accidental start up,
which may cause serious injury.
WARNING To avoid serious personal
injury, always tighten the bevel-lock
lever or miter-lock lever securely before
making a cut. Failure to do so could
cause serious injury.
WARNING Always use the work
piece clamp, and place tape on the area
being clamped to avoid marks on the
work piece.
CUTTING USA CROWN
MOLDING
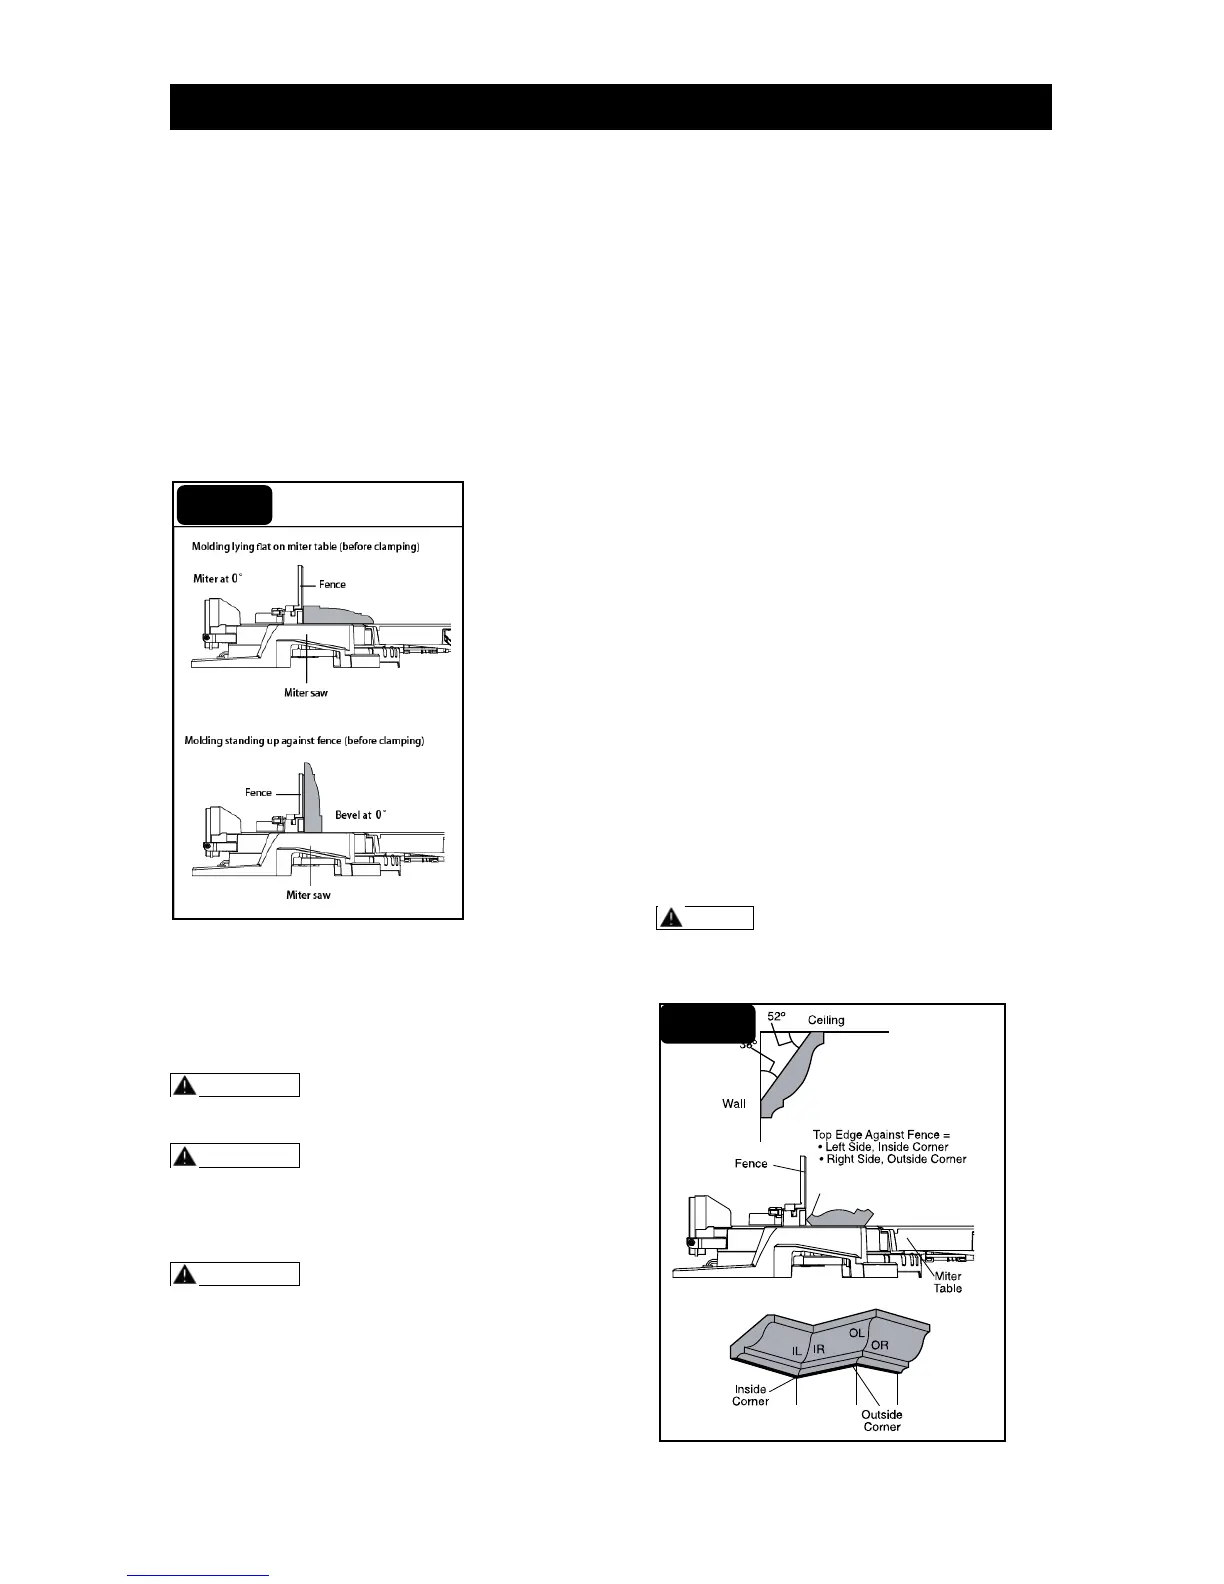
USA Crown molding has a high top rear
spring angle (the section that fits flat
against the ceiling) of 52° and a bottom
rear spring angle (the section that fits flat
against the wall) of 38°.
Step 1: Unplug the saw.
Step 2: Set the bevel angle at 33.9°, miter
angle at 31.6° either left or right,
depending on the desired cut for the
application. Tighten the miter lock knob
and the bevel lock lever.
Step 3: Place tape on the area being
clamped to avoid marks on the work piece,
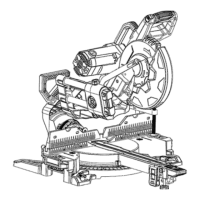
then position work piece with its back flat
on the saw table. Always place top edge of
the molding against fence. Clamp work
piece in place using the work piece clamp.
Step 4: Reduce splintering by taping the
cut area prior to making the cut.
Step 5: Plug the saw into a power source.
Step 6: Carefully follow all instructions for
applicable miter, bevel or compound cuts.
Step 7: After finishing the cut, release
trigger and wait until the blade comes to a
complete stop before returning the saw
arm to the raised position.
Step 8: Remove the work piece and
repeat. When cutting a long work piece or
repeated cutting, use extension table and
length stop.
NOTE: Miter and bevel setting for
standard crown molding cuts. The pre-
condition: crown molding is milled
consistently. Wall corner is exact 90°.