19
material you will be using. In general, use greater torque for larger screws,
but if the torque is too high, the screws may be damaged or broken.
For delicate operations, such as removing a partially stripped screw, use
a low torque setting. For operations such as drilling into hardwood, use a
higher torque setting.
NOTE: when adjusting the torque clutch make sure that the speed switch is
either completely in the LO or HI position.
CAUTION: do not change the torque setting when the tool is running.
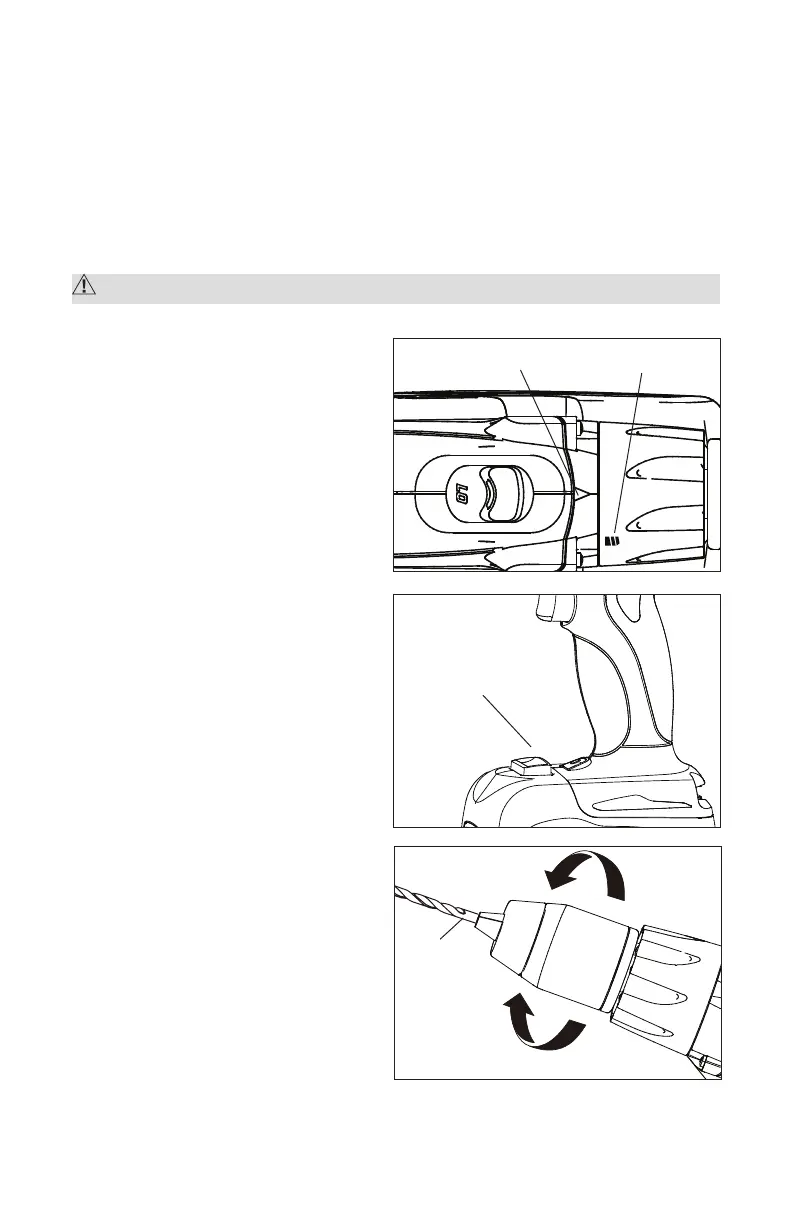
DRILL MODE (Fig. 10)
1. Select drill mode for drilling and
other heavy-duty applications.
2. To select drill mode, rotate the
torque adjustment ring until
the icon aligns with the torque
indicator and clicks into position.
LED WORKLIGHT (Fig. 11)
The LED worklight, located on
the front of the Drill/Driver, will
illuminate when the trigger switch
is depressed. This provides
additional light on the surface
of the workpiece for operation
in lower-light areas. The LED
worklight will turn off when the
trigger switch is released.
INSTALLING BITS (Fig.12)
1. Lock the trigger switch by placing
the direction of rotation selector in
the OFF (center) position.
2. Open or close the chuck jaws
to a point where the opening is
slightly larger than the bit size
you intend to use.
3. Insert a drill bit.
NOTE: Rotate the chuck body in the
direction of the arrow marked GRIP
Fig. 10
Fig. 11
Torque indicator
LED worklight
Drill icon
Fig. 12a
Keyless
chuck
OPEN
(Release)
GRIP
(Tighten)