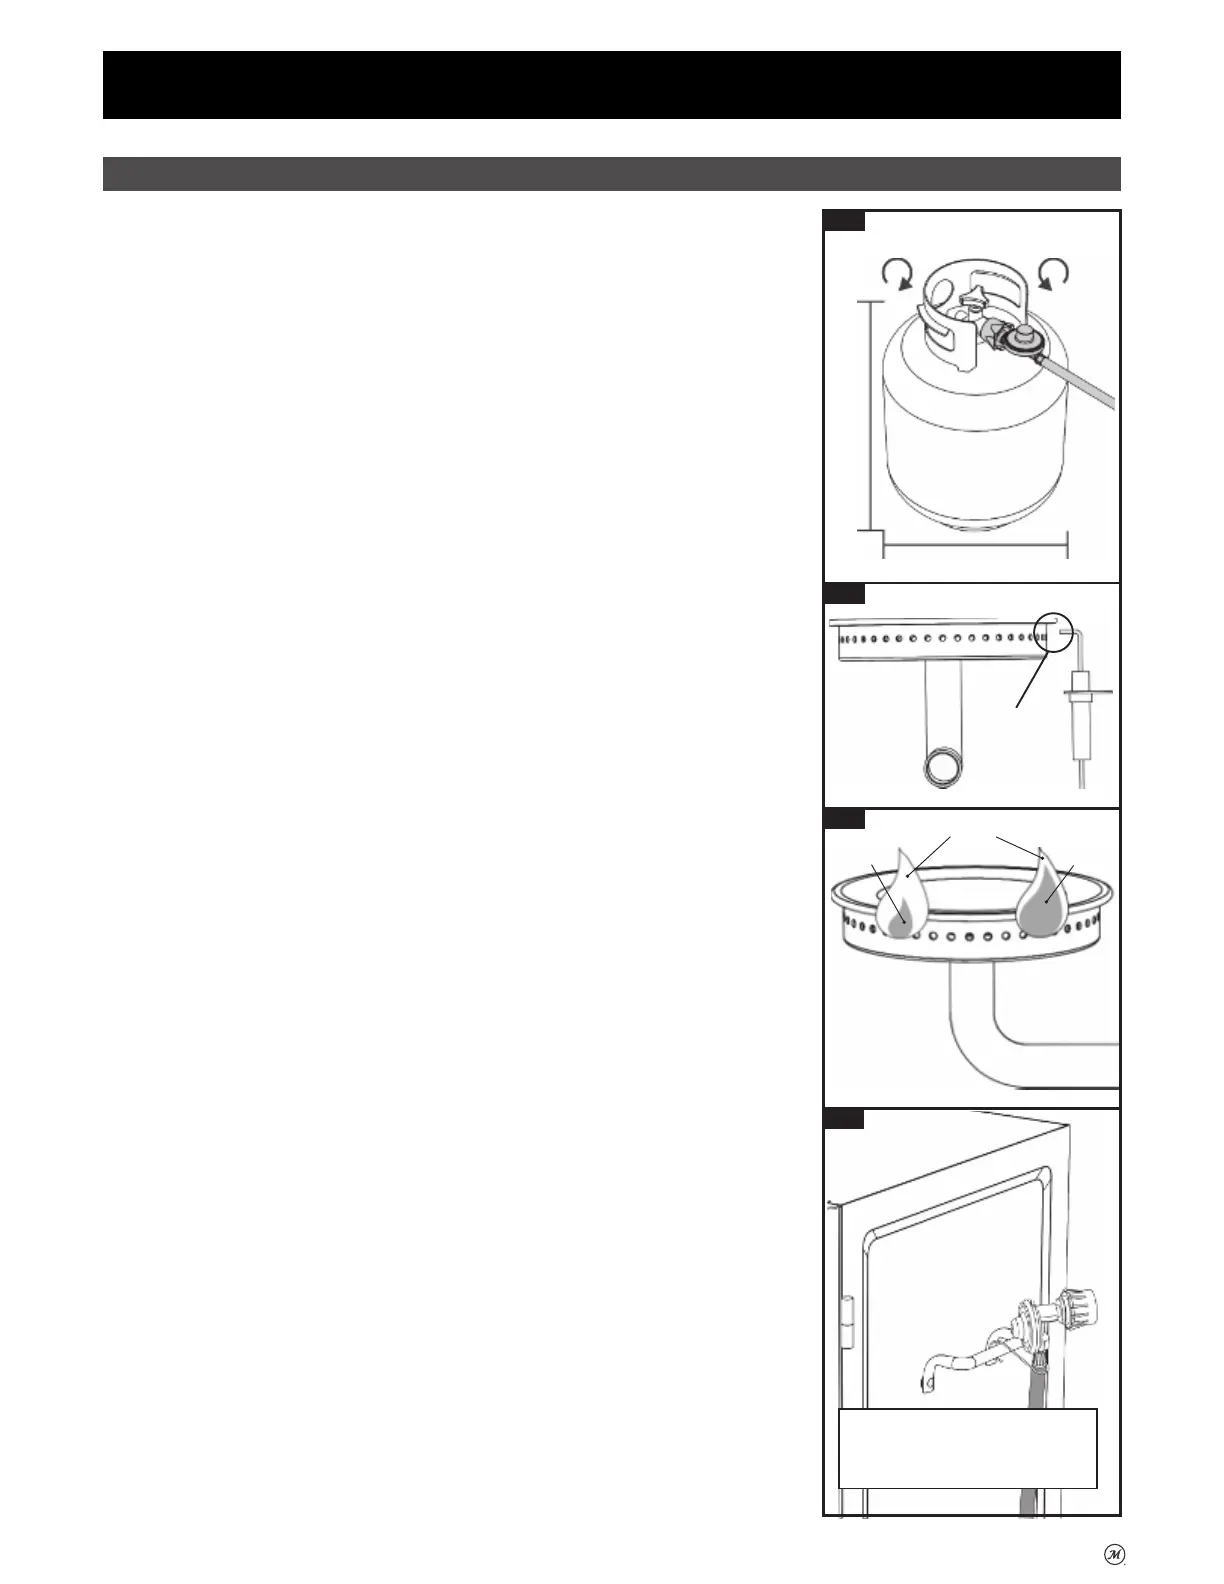
38
Clockwise
Counter
Clockwise
Approx. 31 cm
Approx. 45 cm
Operating Instructions - Propane
Fig. 1
• Inspect hose before each use. If there are signs of abrasion, wear, cuts
or leaks, the hose must be replaced. DO NOT USE.
• Inspect burner before each use. Check burner and burner venturi tube
for insects and insect nests. A clogged tube can lead to a fi re beneath
the smoker.
• Check to ensure the valve orifi ce is centred inside the venturi tube.
Failure to properly assemble the valve orifi ce to the venture tube can
result in a gas leak or potential fi re at connection. See assembly steps
for proper assembly method.
• Check to ensure the igniter pin is properly spaced and aligned to the
burner. Igniter pin should be approximately 6.35 mm from the burner
and aligned to the top of a burner port (Fig. 2). Confi rm spacing is
correct by pressing the igniter button and ensuring spark occurs
between igniter pin and burner.
• Connect regulator and hose to LP gas cylinder (Fig. 1).
1. Make sure LP gas cylinder valve is closed. Turn valve clockwise
until it stops.
2. Make sure burner control knob on smoker is in the OFF position.
3. Remove protective cap from LP gas cylinder and coupling nut if
applicable.
4. Centre and insert regulator nipple into valve outlet on LP gas
cylinder (Fig. 1). Turn regulator coupling nut clockwise until it
stops. DO NOT OVER TIGHTEN.
• Perform a leak test (refer to Leak Testing in this manual). If you smell,
hear or see gas escaping, immediately get away from LP gas cylinder
and call the fi re department. Fire may cause death or serious injury.
• Before starting the lighting procedure make sure the smoker door(s) is
(are) open.
• When lighting burner, remove all parts inside or on smoker to prevent
explosion from gas build up.
• To use, turn LP gas cylinder valve ON, push burner control knob in and
turn counterclockwise 1/4 turn to HIGH setting. Push ignitor button to
light.
• If ignition does not take place within fi ve seconds, turn burner control
knob to OFF position and wait fi ve minutes and repeat lighting
procedures. If ignition still does not occur, see Match-Lighting
Instructions.
• Always ensure that smoker door(s) is (are) open before igniting. Gas
can accumulate in smoker.
• If fl ame goes out during cooking, turn burner control knob OFF, turn LP
gas cylinder valve OFF, wait 5 minutes, then open door(s) and wait 5
additional minutes before repeating ignition instructions above.
• Burner control knob adjusts burner fl ame. Turn knob counterclockwise
to decrease fl ame. Turn knob clockwise SLOWLY to increase fl ame.
Push burner control knob in and turn clockwise to shut fl ame off.
IGNITION INSTRUCTIONS
Fig. 2
6.35 mm Gap
Fig. 3
Yellow
Blue Blue
CorrectIncorrect
Fig. 4
REGULATOR NOT
INCLUDED