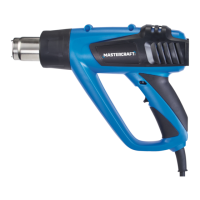
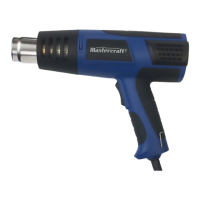
3 Position trigger switch
The heat gun has a 3-position trigger switch that
acts as both an ON/OFF switch and a temperature
selector switch (Fig. 1).
To turn the heat gun ON at the lower temperature
(250° C or 482° F), squeeze the upper part of
the switch (1). To turn the heat gun OFF from the
lower temperature setting, squeeze the lower part
of the switch (2) half way until it clicks into the
OFF position and the heat gun turns OFF.
To turn the heat gun ON at the higher temperature
(450°C or 842°F), squeeze the lower part of the
switch (2). To turn the heat gun OFF from the
higher temperature setting, squeeze the upper
part of the switch (1) half way until it clicks into
the OFF position and the heat gun turns OFF.
NOTES:
a) When the switch is set to the lower tempera-
ture setting, the motor speed will be slower and
there will be a reduced ow of hot air through
the nozzle. The temperature of the air will also be
reduced to 250° C (482° F).
b) When the switch is set to the higher tempera-
ture setting, the motor speed will be higher and
there will be an increased ow of hot air through
the nozzle. The temperature of the air will also be
increased to 450°C (842°F).
NOTE: When the heat gun is rst turned ON,
smoke may appear due to the burning of manu-
facturing oils on the element. The smoke will
disappear within ve minutes of operation.
16
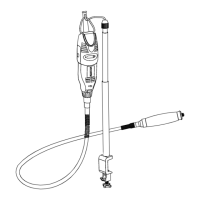
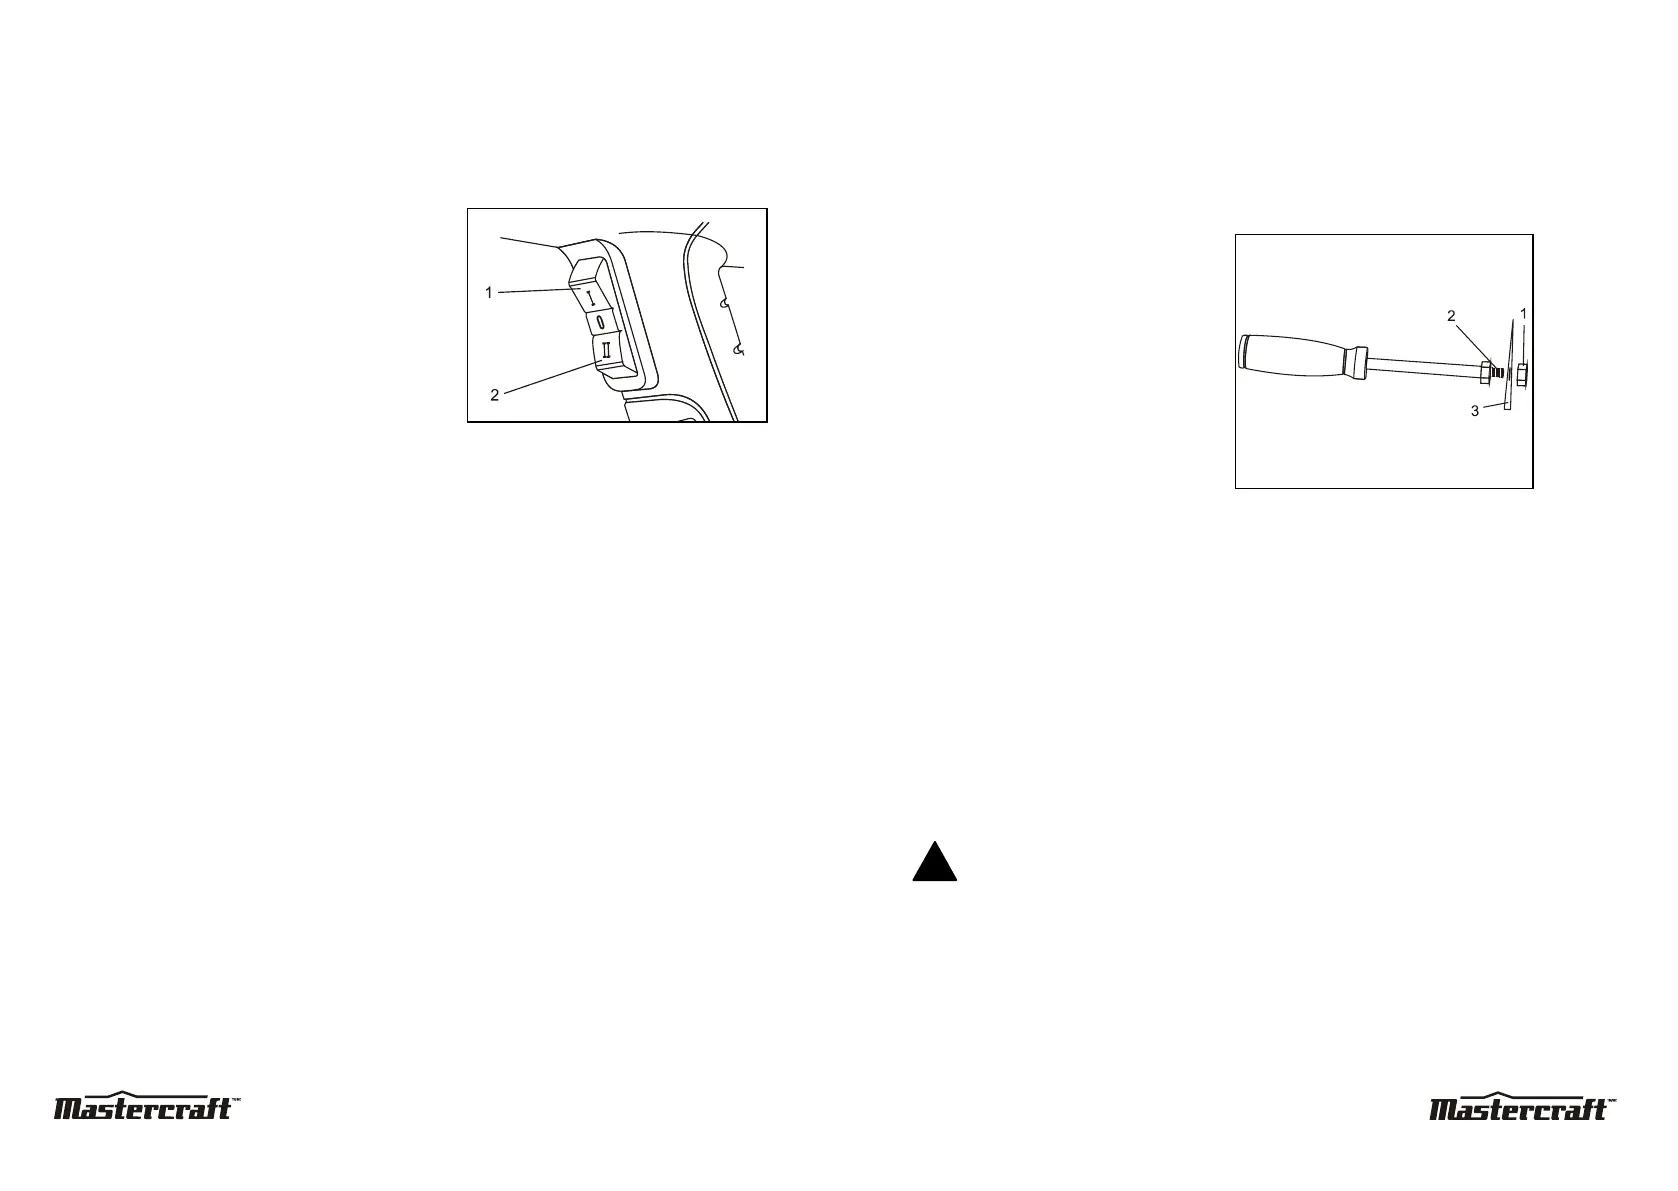
Assemble interchangeable
scraper blades to the handle
The scraper handle can be assembled with the
isosceles, convex or concave scraper proles.
1. Remove the outer nut (1) from the scraper
handle (2) (Fig. 2).
2. Place the appropriate scraper prole (3)
onto the threaded portion of the scraper
handle.
NOTE: Match the “D” shape of the prole to
the threaded handle.
3. Thread the outer nut back onto the handle
and tighten it with two 12 mm wrenches.
NOTE: Do not over tighten the nuts or you
will strip the threads.
Install appropriate deector to the heat gun
nozzle
The heat gun comes with four nozzles that will
create an air ow shape best suited for each
heating application:
• Wide jet – use for heating a wide area at
one time
• Air wrap – use for limiting the spread of the
air stream
• Coned reducer – use for concentrating the
air ow onto a small area
• Curved head shield – use for shielding
sensitive areas from the direct heat.
DANGER: Never attempt to
change or attach a deector to the heat gun
immediately after it has been turned ON. The
nozzle will be extremely hot. Always wear
gloves when changing or attaching a deector.
OPERATING INSTRUCTIONS
17
OPERATING INSTRUCTIONS
HEAT GUN 054-1252-6
HEAT GUN 054-1252-6
g. 2
g.1
 Loading...