REMOVING THE CHUCK – cont’d
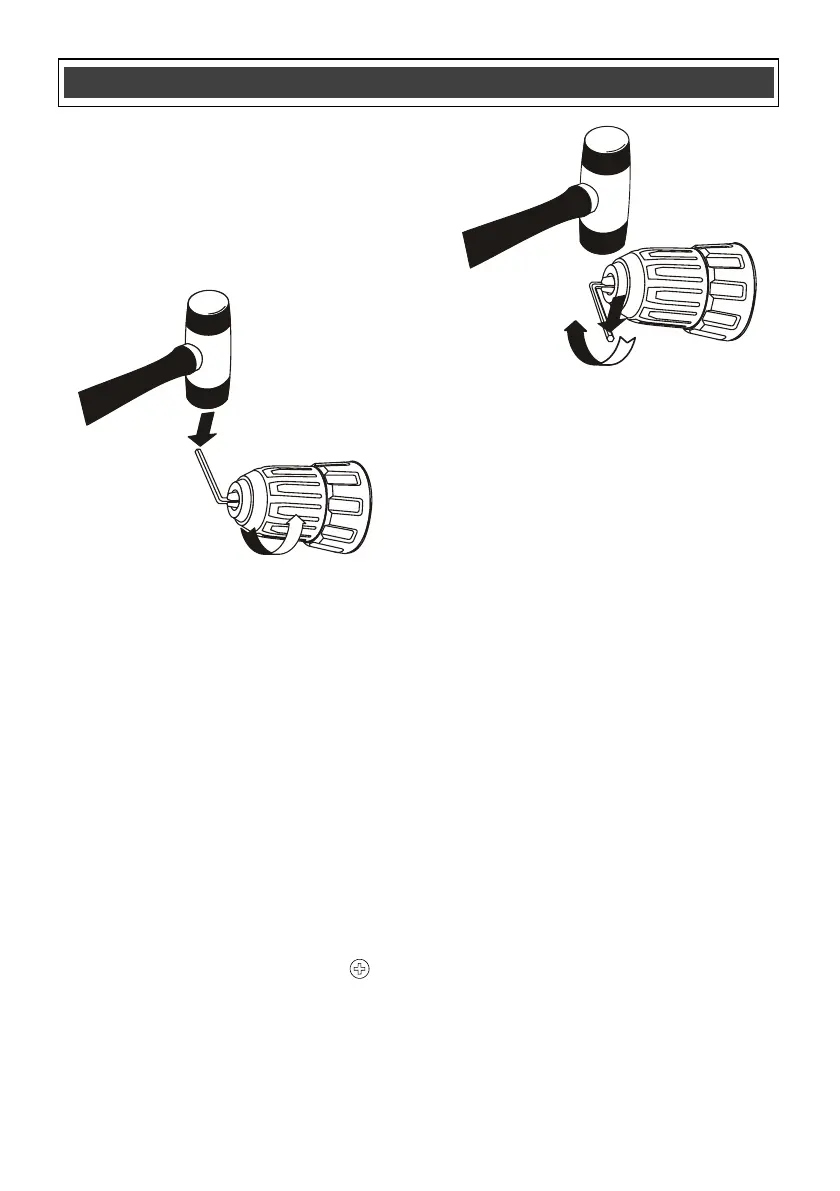
7. Insert the hex key into the chuck and
tighten jaws of chuck securely (Fig. 16).
Tap the hex key sharply with a mallet in a
COUNTER-CLOCKWISE direction. This
will loosen the chuck on the spindle. The
chuck can now be unscrewed and removed
from the spindle by hand.
RETIGHTENING A LOOSE CHUCK
After installing a chuck that has previously been
removed, the chuck may become loose on the
spindle and develop a wobble. Also, the chuck
screw may become loose, causing the chuck
jaws to bind and prevent them from closing. To
tighten the chuck, follow these steps:
1. Insert the hex key into the chuck and
tighten the chuck securely.
2. Tap the hex key sharply with a mallet in a
CLOCKWISE direction (Fig. 17). This will
tighten the chuck on the spindle.
3. Open the chuck jaws and remove the hex
key.
4. Tighten the chuck screw using a #2
screwdriver.
NOTE: Turn the screw COUNTER-
CLOCKWISE to tighten it. This screw has a
left-handed thread.
 Loading...