model no. 058-9805-6 | contact us 1-800-689-9928
10 11
headline bars
continuation tabs
notes
warnings
model no. 058-9852-2 | contact us 1-800-689-9928
SETUP
OPERATING INSTRUCTIONS
SETUP OF THE INFLATOR
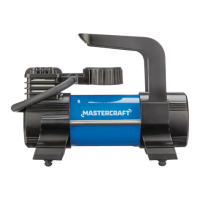
1. Place the inflator (A) evenly on flat surface.
2.Connecttherecoilairhose(I)totheinflatorbypullingbackthequickconnectcoupler(K)andinsertingit
ontothefittingattheendoftherubberhose(E).Pushfirmlyandreleasethequickconnectcoupler—you
willhearaclickwhenthequickconnectcouplerisattachedontothefittingsecurelyandinplace.
3.Insertthepowercordplug(H)intothenearest120-volt,grounded,electricaloutlet.
4. Turn on the On/Off power switch (F) and inspect the air connections for leaks.
5. Turn off the On/Off power switch and unplug the inflator, then repair any leaks found.
IMPORTANT: This inflator operates only on AC 120 Volt. Do not attempt to operate this inflator with any
other source or voltage. Do not rewire or reconfigure the inflator from its original design or personal injury
and/or bodily harm may occur.
SETUP OF INFLATOR AREA
1.Designateaworkareathatiscleanandwell-lighted.Theworkareamustnotallowaccessbychildrenor
pets to prevent injury.
2. Locate the inflator on a flat, level surface to prevent damage to the unit. Keep at least 12" (30 cm) of
space around the unit to allow air circulation.
3. Route the power cord from the inflator to the grounded wall outlet, along a safe path without creating a
tripping hazard or exposing the power cord to possible damage.
OPERATING INSTRUCTIONS
IMPORTANT: Before operation, follow all the instructions in the SETUP section.
IMPORTANT: Inflation time may vary depending on size of tire, climate, temperature and voltage level of
vehicle/internal battery.
TO INFLATE ITEM:
1. Plug the inflator power cord (G) into a grounded 120 Volt outlet.
2.Connectthelock-ontirechuck(J)tothetireairvalve.Unlockthetirechuckbypullingthechucktabup.
Lock the tire chuck once it is fixed to the tire valve. Make sure that the tire chuck is attached to the tire
valve stem tightly and securely.
3. Turn on the On/Off switch (F) of the inflator (A). Monitor the PSI on the pressure gauge (C) to fill your item
to the desire pressure.
4. Turn the inflator off once the desired air pressure in the tire has been reached.
5. Remove the tire chuck (J) from the tire valve stem.
6. Unplug the inflator after use.
IMPORTANT:Wheninflatingbiketires,sportsequipmentsandairmattresses,usethePrestavalveadaptor
(N), sports ball needle (M), or mattress nozzle (L) as needed. Insert it to the central hole of the tire chuck (J)
before inflation.
IMPORTANT:Thisinflatorfeaturesapressuregauge(C)withglow-in-the-darkdisplayforeasyreadingof
tire pressure during the inflation process.
USE OF 5 HIGH FLOW ACEESSORIES
IMPORTANT: The high air accelerator kit is a great device for inflating or deflating air mattresses, small
boats, inflatable toys and a variety of other items which use a large volume of low pressure air.
IMPORTANT: The attachments are not to be used with automobile tires, bicycle tires, sports balls, or any
other high pressure inflatables.
IMPORTANT: The high flow air accelerator kit comes with three nozzles of varying sizes, an air accelerator
body and an enlargement collar to prevent the air from leaking out of the inflatable when it is being filled.
WARNING!
•Readtheentireimportantsafetyinformationattheabovesectionof“SAFETYGUIDELINES”beforesetuporuseofthisproduct.
•Topreventseriousinjuryfromaccidentaloperation,turnthepowerswitch“Off”andunplugtheinflatorfromitselectricaloutlet
before assembling or making any adjustments to the inflator.
•Beforeoperating,makesuretheinflatorissetupinawell-ventilatedarea,onaflat,level,solidsurfacewellawayfromany
flammable objects, such as drapes. Never operate without proper ventilation, or near possible ignition sources.
WARNING!
•Donotover-inflatetheitembeinginflated.Monitorairpressure(PSI)atalltimesduringtheinflationprocessbyobserving
the pressure gauge on the inflator.
•Topreventseriousinjuryfrominflatorfailure,doNOTusedamagedequipment.Ifabnormalnoiseorvibrationoccurs,have
the problem corrected before further use.
•Topreventseriousinjuryfromaccidentaloperation,turnthepowerswitch“OFF”andunplugtheinflatorfromitselectrical
outlet before performing any inspection, maintenance, or cleaning procedures.
•Ifthepowercordofthisinflatorisdamaged,itmustbereplacedonlybyaqualifiedtechnician.
 Loading...