ASSEMBLY INSTRUCTIONS
7
1
2 3
4
5
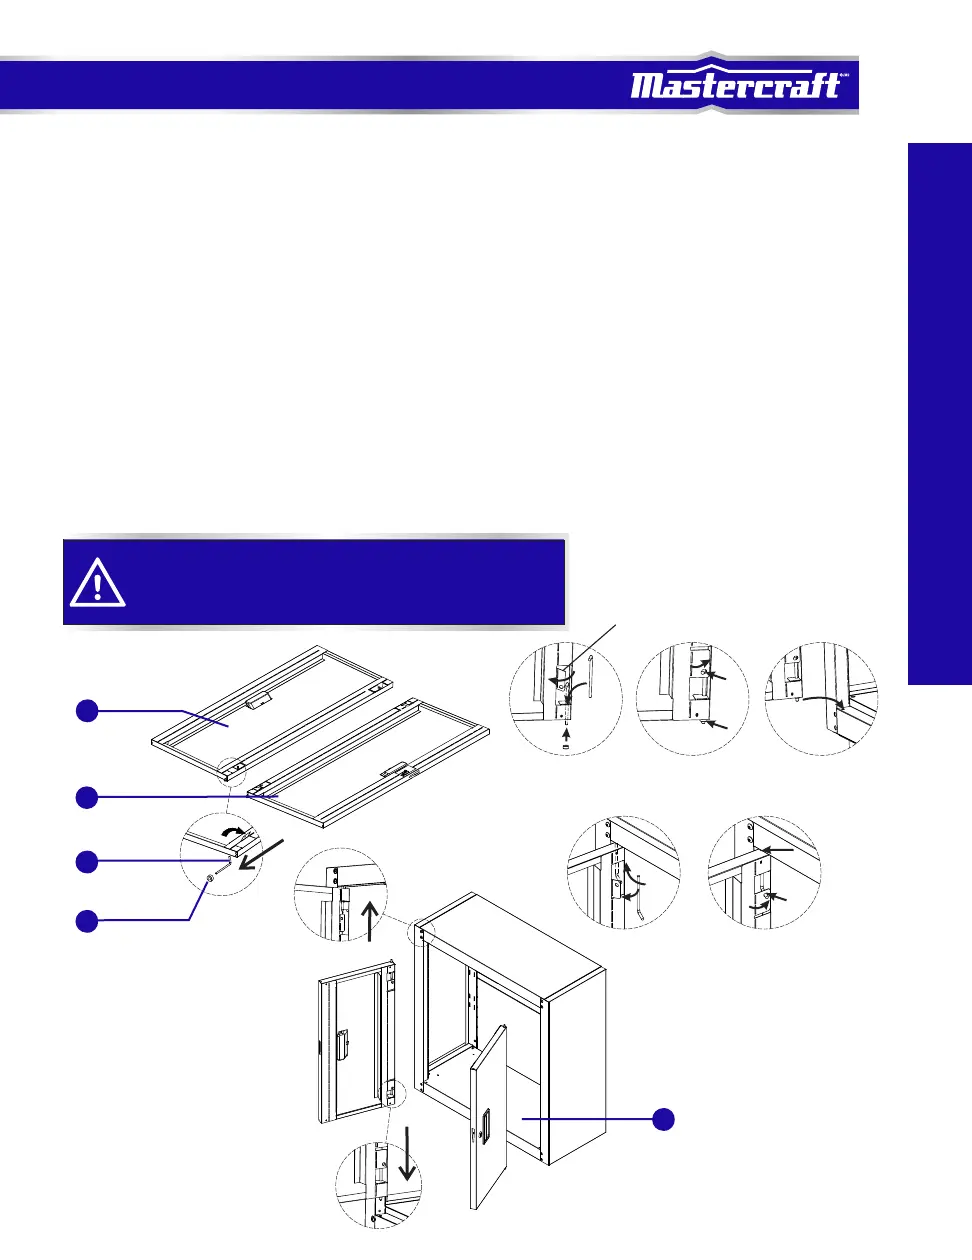
Close the doors to see if the doors can touch the magnets (17) completely. If not, adjust the cabinet’s
top and side panels to make sure the shape of the cabinet is square and flush. Until the doors can
catch the magnets (17) completely, tighten the top and back panels’ screws.
10
16
15
14
Lay down the left door (16) on its face with a soft mat underneath. Pull the bottom locking tab at the
right bottom corner of the door outwards. Insert a pin (15) through the hole at the door’s bottom
corner and put a rubber ring (14) into the pin’s vertical end.
When push the locking tab back to its place, make sure the end of the
pin's horizontal part inserted into the hole of the locking tab to make
the pin well locked.
STEP 5 ATTACH THE DOORS
•
•
view from door bottom
view from door top
Push back the bottom locking tab to its place. Insert the horizontal end of the pin (15) into the hole at
the locking tab at the same time.
•
Take up the left door (16) and insert the pin (15) into the hole at the left bottom corner of the bottom
panel (8).
•
Pull the upper locking tab at the right top corner of the door outwards. Insert a pin (15) through the
hole at door’s right top corner into the hole at the left top corner of the cabinet
•
Push back the upper locking tab to its place. Insert the horizontal end of the pin (15) into the hole at
the locking tab at the same time.
•
Repeat the same procedure to install the right door (10).
•
8
locking tab
 Loading...